This Coin Cell Can Move That Train!

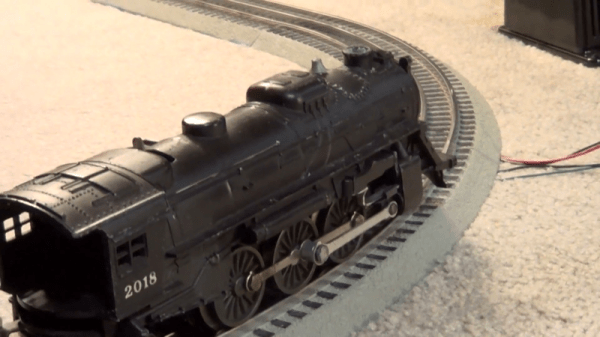
[Mike Rigsby] has moved a train with a coin cell. A CR2477 cell to be exact, which is to say one of the slightly more chunky examples, and the train in question isn’t the full size variety but a model railroad surrounding a Christmas tree, but nevertheless, the train moved.

A coin cell on its own will not move a model locomotive designed to run on twelve volts. So [Mark] used a boost converter to turn three volts into twelve. The coin cell has a high internal resistance, though, so first the coin cell was discharged into a couple of supercapacitors which would feed the boost converter. As his supercaps were charging, he meticulously logged the voltage over time, and found that the first one took 18 hours to charge while the second required 51 hours.

This is important and useful data for entrants to our Coin Cell Challenge, several of whom are also going for a supercap approach to provide a one-off power boost. We suspect though that he might have drawn a little more from the cell, had he selected a dedicated supercap charger circuit.

Continue reading “This Coin Cell Can Move That Train!”

Tiniest Control Board Fits Inside An N-Gauge Model Train

[kodera2t] discovered the VL53L0X Time of Flight sensor and thought it would make a great way to control the operation of a model train without touching it. He explains it in his own words in the demo video.

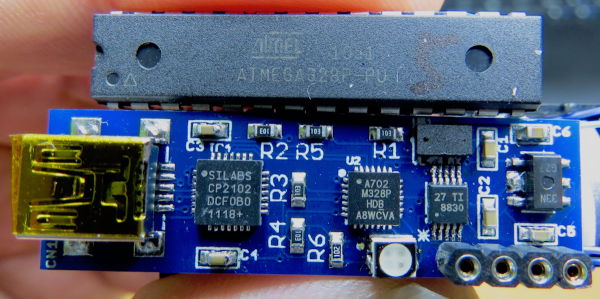
The sensor was small enough for an N-gauge train, which translates to 1:148 scale or about 9mm from rail to rail. His idea was to build a tiny control board that could fit inside the locomotive: 10mm by 40mm. His board consists of the ToF sensor, an ATMega328P-MMH, USB-serial, and a Texas Instruments DRV8830 motor driver. he powers the board via the 6V running through the track.

Right now [kodera2t]’s using the ToF as sort of a gestural controller to get the train to start rolling, but one could imagine the sensor could be incorporated into more advanced programming, like having the train speed up on straightaways and slow down on a curve, based on the height of the bridge over it.

We’ve published a bunch of [kodera2t]’s tiny circuit board projects here on Hackaday, including the smallest basic computer, his minimal frequency counter, and his VFD amplifier.

Continue reading “Tiniest Control Board Fits Inside An N-Gauge Model Train”

Controlling A Railroad With An Mbed

rr

The word hacking got its start with model railway clubs, and the state of the art belies the current advancements in computer control and very, very small microcontrollers. [Jim] put together a great tutorial for driving model locomotives with a microcontroller, in this case an ARM-powered mbed.

Low-end model locomotives are controlled with DC, so an H-bridge and a PWM out on the mbed makes sense to drive these trains. [Jim] wired up a Pololu H-bridge driver, connected it to his mbed, and everything ran great.

Rail switches are another matter entirely. These allow trains to move from one track to another, but having them go to the left or right requires powering a fairly high current solenoid with 15 to 24 volts. For this, [Jim] used a MOSFET power control board to switch the rails and came up with a pretty neat demo that shows a small locomotive going back and forth over a single rail switch.

There is another class of model locomotive – ones with Digital Command Control. This setup is just a small decoder chip that fits inside an engine and tells the locomotive to turn on a lamp or run a motor digitally, allowing the conductor to control multiple trains on the same track.

[Jim] goes through the basics of DCC using the mbed, allowing two trains to switch positions in a rail yard using computer control. It’s really cool stuff that leaves us wanting a little more room in the basement to start building a huge computer controlled model railway.

Continue reading “Controlling A Railroad With An Mbed”

Preserving Locomotives With 3D Laser Scanning And 3D Printing

[Chris Thorpe] is a model railroading aficionado, and from his earliest memories he was infatuated with the narrow gauge locomotives that plied their odd steel tracks in northern Wales. Of course [Chris] went on to create model railroads, but kit manufacturers such as Airfix and Hornby didn’t take much interest in the small strange trains of the Ffestiniog railway.

The days where manufacturing plastic models meant paying tens of thousands of dollars in tooling for injection molds are slowly coming to an end thanks to 3D printing, so [Chris] thought it would be a great idea to create his own models of these small locomotives with 3D laser scanners and high quality 3D printers.

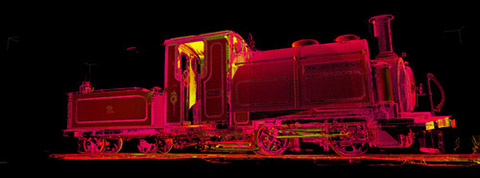
[Chris] started a kickstarter to fund a 3D laser scanning expedition to the workshop where the four oldest locomotives of the Ffestiniog railway were being reconditioned for their 150th anniversary. The 3D printed models he’s able to produce with his data have amazing quality; with a bit of paint and a few bits of brass, these models would fit right in to any model railway.

Even better than providing scale narrow gauge engines to model railway enthusiasts around the world is the fact that [Chris] has demonstrated the feasibility of using modern technology to recreate both famous and underappreciated technological relics in plastic for future generations. There’s a lot that can be done with a laser scanner in a railway or air museum or [Jay Leno]’s garage, so we’d love to see more 3D printed models of engineering achievements make their way onto Kickstarter.

Router Controlling Choo-choos Over The CAN Bus

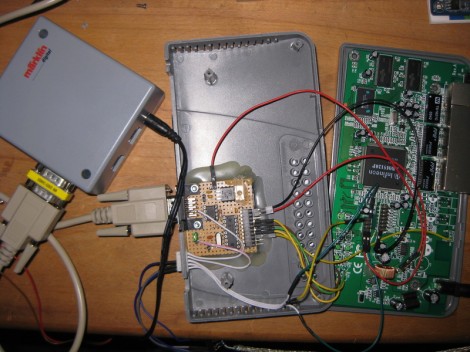
This setup is used to control a model railroad. Well, not entirely this setup. [Gerhard Bertelsmann] already has a proper railroad controller, and it just happens to offer CAN bus communications. He’s using OpenWRT and a cheap router to connect the bus to the network.

Originally he wanted to use a Raspberry Pi board for the project, but the incredible backorder  situation with that hardware led him to grab an old router. After loading OpenWRT he started working out how to connect a couple of ICs (MCP2515 and MCP2551) that will take care of the CAN bus communications. The hardware connections end up being pretty simple, with five data lines (and their pull-up resistors) connecting to the router’s serial header. From there it was a matter of mapping the device in software so that the hardware can be controlled over the network.

We like this example since CAN is used is a lot of other applications.