Bring Your Own Name Badge

It used to be that the contents of your pocket protector directly mirrored your geek level. But that just doesn’t cut it in our fast-paced digital age. We think [Jonathan] is headed down the right track though, by creating a scrolling LED name badge which he takes to conventions with him. With the right enclosure this could reach the same geek level as Woz’s watch. There’s a lot packed into the little device, but readability at close range doesn’t look like one the features so make sure you glance at the tag before you approach him for a conversation.

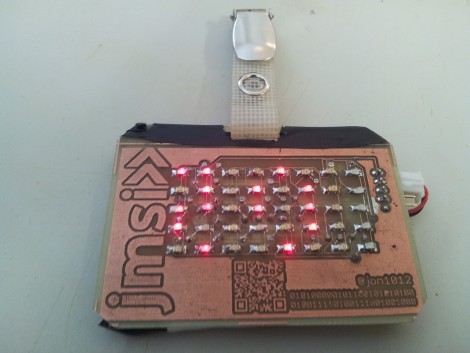
As you can see, the PCB for the project is the same form factor as a landscape ID card. It hosts an 8×5 LED matrix, which meshes nicely with the registers of the MSP430 chip which runs it. He admits that the hardware may not last very long as the chip is multiplexing the display directly, with no resistors or LED drivers for current protection. But there is potential in the design. It uses a rechargeable battery (which we like) and he included a QR code in the board artwork for easy exchange of contact information. We’ve embedded his description of the project after the break. Continue reading “Bring Your Own Name Badge”

Program A Microcontroller Over The Internet

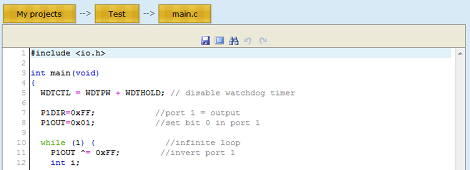
If you’ve ever wanted to program a microcontroller “in the cloud,” you might want to head over to Inventor Town, an online IDE that allows you to write and compile firmware for the MSP430 series of microcontrollers.

After logging in with your Google account, you’re presented with a ‘My Projects’ page. From there, you can make as many projects as you like for the MSP430x2231 or ~x2211 microcontrollers. The online editor has the vital keyword highlighting feature, but sadly not many of the more advanced text editor features, like a red underlined syntax errors. After you’ve written your code, press the compile button, download your .HEX file and upload to your board.

We’re surprised we haven’t seen something like this before. To us, this seems like the ideal basis for a github-style microcontroller code-sharing website. Any enterprising ATtiny fans want to take a crack at this one?

Thanks [Rob] for sending this one in.

Matrix Backpack Was A Fun Design Project

[Greg] is really working on a small scale with his LED Matrix backpack PCB. It’s a toy that he designed as an activity. He constrained himself to a board which would exactly match the outline of an 8×8 bicolor LED matrix package.

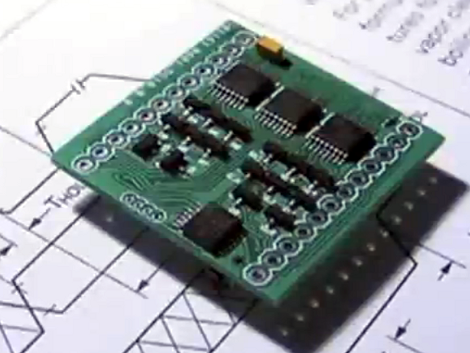
What you see here is the side of the PCB which will be facing the underside of the LED dot matrix module. Let’s call this the top of the board. The underside has a CR2032 battery holder which provides enough juice to run the display. Since the matrix is bi-color there’s a slew of pins to drive. [Greg] uses three shift registers for the high side, and sixteen N-channel MOSFETS for the low side. He’s chosen an MSP430G2201 microcontroller which has a nice sleep mode for power conservation. It has no problem driving tri-color animations as seen the clip after the break, but also has an unpopulated clock crystal footprint if you wanted to use it as a timepiece.

Despite the small footprints and cramped board [Greg] still hand soldered all of the components. He even posted a time-lapse of the process in the page linked at the top.

Continue reading “Matrix Backpack Was A Fun Design Project”

Building A LED Strip The Minimal Way

For his first big build with an MSP430, [Javon] decided to an RGB LED fader. Having worked with Arduinos in the past, he figured that his MSP430 would have a few PWM channels. After being proved wrong by the data sheet, [Javon] needed to figure out a way to switch a bunch of RGB LEDs with only one PWM channel on his microcontroller.

Because there was only one PWM pin on [Javon]’s micro, he needed a way to multiplex his output. He ended up using a 74HC4052 mux/demux chip to drive 20 LEDs. The LEDs were mounted onto hard board and the main part of the circuit built on a bit of perfboard. While there’s no total cost for his build, we’re guessing [Javon] didn’t spend much on his project; certainty much less than this explosion of LEDs.

[Javon] put all the build pictures up as a Google+ album and a few video demos up. Check those out after the break (009 Sound System warning, you might want to hit mute).

Continue reading “Building A LED Strip The Minimal Way”

Giving The Hexbug Spider Freedom To Explore On Its Own

hexbug-hack

[Eric Gregori] recently spent some time messing around with a Hexbug Spider, and wrote in to share some modifications he made to the toy. In its unaltered form the robot can be controlled remotely, and while it’s fun to play with, the excitement is short lived. Using a TI MSP430 along with a small motor controller kit he put together, he gave the Hexbug a bit more personality.

The kit is really just a simple board used for mounting the MSP430 and FAN8200 motor driver, along with an IR emitter/sensor pair. It would be easy enough to put something similar together yourself, though if you are looking for a protoboard/deadbug/PCB etching-free solution, his Spider Hack kit is a quick and easy solution.

[Eric’s] walkthrough shows how to disassemble the Hexbug, and details which components need alterations before the controller board can be properly mounted. A few soldered wires later, the toy is ready to be reprogrammed, a process [Eric] carries out using the Launchpad board from which he lifted the MSP430.

As you can see in the videos below, calling the robot autonomous might be a bit of a stretch (I don’t see it walking to the kitchen to make me a sandwich), but it can navigate and avoid objects with ease.

Continue reading “Giving The Hexbug Spider Freedom To Explore On Its Own”

Pee-light Gives Guidance For Nocturnal Tinkles

This light is a rather dim LED module whose purpose is to give you a very small bit of illumination when using the restroom at night. If you rely on it instead of using the overhead lighting in the bathroom, you’ll be able to find your way back to bed with your night-vision undisturbed.

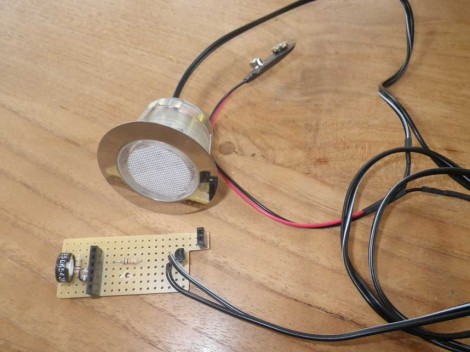
[Fred] built the project as a way to learn more about using MSP430 microcontrollers. The protoboard seen above has a pair of female pin headers designed to accept an MSP430-PIR board, which uses the low-power microcontroller to monitor a PIR motion sensor. The chip can be reprogrammed and [Fred] did just that, using the USB dongle side of the eZ430-F2013 dev stick. Now when the sensor detects motion the chip first checks the light-dependent resistor on the protoboard to see if it’s dark in the bathroom. If so, it switches on the LED and sets a timer to shut if off again.

The system runs on a 9V battery, which is a bit under-powered for the 12V-spec’ed LED module. But [Fred] says the light it produces is just the right intensity.

[Thanks Jeremy]

Follow Up: Star Wars Tree Gets An Upgrade

star-wars-tree-sound

We asked, and [Zach] listened.

Earlier this week, we featured a circuit he built which allowed his tiny Star Wars Christmas tree to visually replicate the series’ theme song. Several of you, along with myself, thought it would be far cooler if the tree also played the music to accompany the light show, so [Zach] set off to add that functionality.

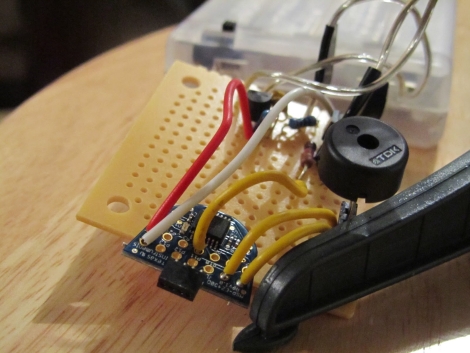
Worried that the music would get annoying if it played along with the lights constantly, he tweaked his circuit design to incorporate a piezo buzzer that could be easily switched on and off. After wiring it to the MSP430 driving the light show, he tweaked the program to output signals to both the light string and buzzer simultaneously.

While the light show accurately represented the song, he initially ignored flat and sharp notes as they would be indistinguishable to the eye. In audio form however, the missing notes would be glaringly obvious, so he re-transcribed the sheet music resulting in the video you see below.

If you happened to follow [Zach’s] lead and put one of these together in your own house, be sure to swing by his site and grab the latest code, complete with audio track.

Continue reading “Follow Up: Star Wars Tree Gets An Upgrade”