An Easy Z80 And VGA Upgrade For The Apple II

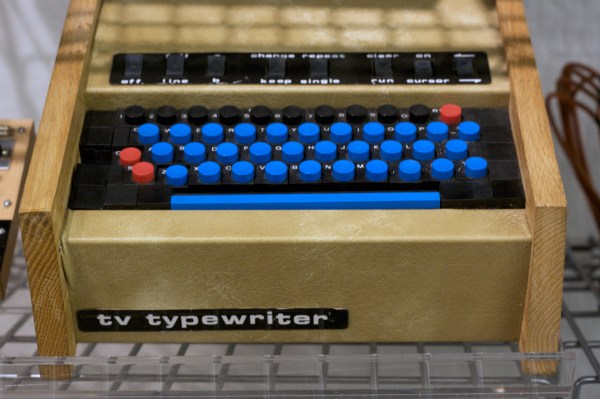
The Apple II was at the forefront of the home computer revolution when it came out in 1977. In its era, nobody really cared about hooking up the Apple II to a VGA monitor, but these days, it’s far easier than sourcing an original monitor. The V2 Analog is a useful tool that will let you do just that, plus some other neat tricks, besides.

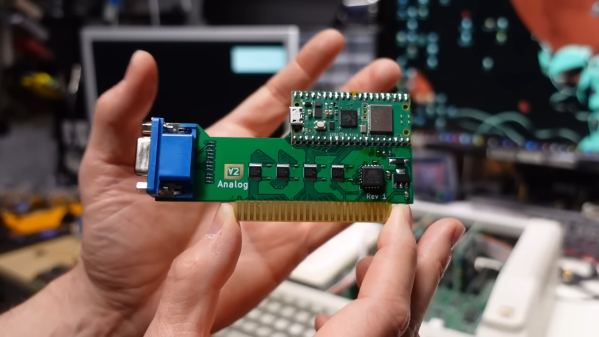
As demonstrated on Youtube by [Adrian’s Digital Basement], The V2 Analog is basically a slot-in video card for the Apple II, II+, and IIe. It’s based upon the AppleII-VGA, which uses a Raspberry Pi Pico to snoop the 6502 CPU bus and copy the video memory. It then outputs a high-quality VGA signal that is far nicer than the usual composite output options.

As a bonus, the V2 Analog can be reconfigured to run as an emulated AppliCard Z80 expansion card instead. This card was originally intended to allow Apple II users to run CP/M applications. The V2 Analog does a great job in this role, though it bears noting it can’t handle VGA output and Z80 emulation at the same time.

Project files are available on Github for the curious. The Apple II may be long out of production, but it’s certainly not forgotten. Video after the break.

Continue reading “An Easy Z80 And VGA Upgrade For The Apple II”

Giant 3D Printer Can Print Life-Sized Human Statues

We’ve seen a few makers 3D scan themselves, and use those to print their own action figures or statuettes. Some have gone so far as building life-sized statues composed of many 3D printed parts. [Ivan Miranda] is no regular maker though, and his custom 3D printer is big enough that he can print himself a life-sized statue in one go.

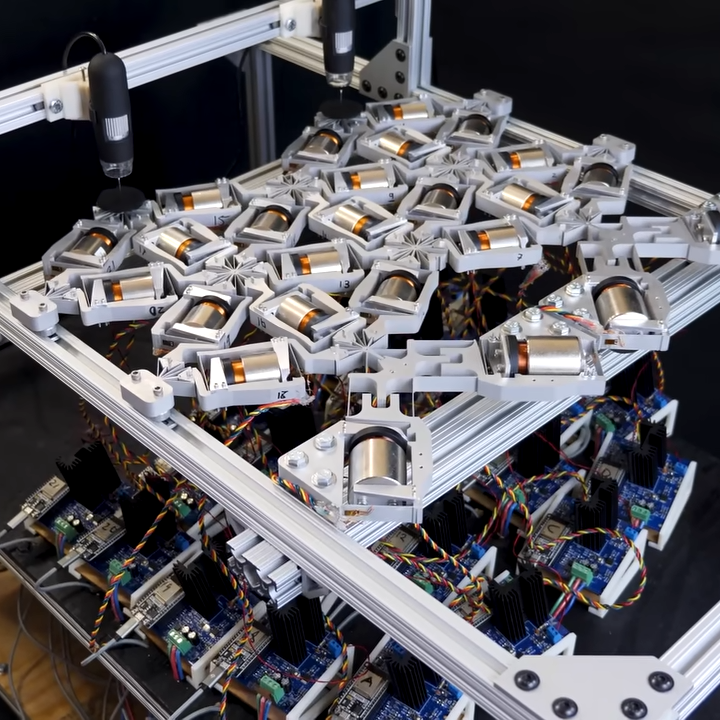
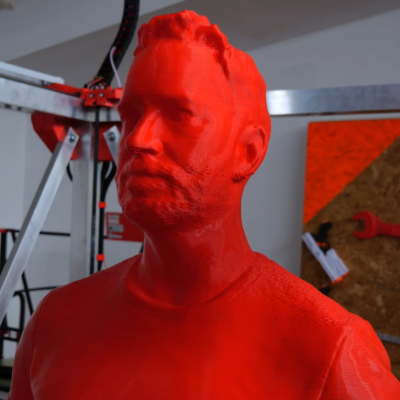
The printer is a gargantuan thing, using an aluminium frame and a familiar Cartesian layout. It boasts a build volume of 1110 mm x 1110 mm x 2005 mm, making it more than big enough to print human-sized statues. Dogs, cats, and some great apes may be possible, too.

Many of the components are 3D printed, including the various braces and adapters that hold the frame together. The build uses NEMA 23 stepper motors, with Duet3D hardware running the show. Notably, it uses V-wheels for the Z-axis, as linear rails would be prohibitively expensive at the sizes required.

[Ivan] shows off the printer by having it produce a statue of his body at 1:1 scale. It’s not a perfect print, with some layer shifts and an awkward moments where the filament supply was interrupted. It took 108 hours in total, with 76 hours of that being actual print time, and is made up of 4375 layers. Despite its flaws, its an incredibly impressive way to demonstrate the capabilities of the machine.

Eager to build such a printer for yourself? [Ivan] will sell you the design files for a reasonable fee.

[Ivan]’s giant printer was once a large tabletop affair; just look how far it’s come. He’s even come up with a system for using smaller printers to create large-scale construction kits, too. We can’t wait to see what mad project he comes up with next. Video after the break.

Continue reading “Giant 3D Printer Can Print Life-Sized Human Statues”

Physical Neural Network Can Be Trained Like A Digital One

Here’s an unusual concept: a computer-guided mechanical neural network (video, embedded below.) Why would one want a mechanical neural network? It’s essentially a tool to explore what it would take to make physical materials work in nonstandard ways. The main part is a lattice of interlinked mechanical components. When one applies a certain force in a certain direction on one end, it causes the lattice to deform in a non-intuitive way on the other end.

To make this happen, individual mechanical elements  in the lattice need to have their compliance carefully tuned under the guidance of a computer system. The mechanisms shown can be adjusted on demand while force is applied and cameras monitor the results.

This feedback loop allows researchers to use the same techniques for training neural networks that are used in machine learning applications. Ultimately, a lattice can be configured in such a way that when side A is pressed like this, side B moves like that.

We’ve seen compliant structures that move in unexpected ways before, and they are always fascinating. One example is this 3D-printed door latch that translates a twisting motion into a linear one. Research into physical neural networks seems like it might open the door to more complex systems, or provide insights into metamaterial design.

You can watch the video below just under the page break, or if you prefer, skip the intro and jump straight into How It Works at [2:32].

Continue reading “Physical Neural Network Can Be Trained Like A Digital One”

Smart Powermeter Uses E-Paper Display

In most places around the world, electricity is getting ever more expensive. Cutting back on your usage is one of the easier ways to escape this pain. This smart powermeter from [JGAguagdo] may prove a useful tool to achieve that goal.

The project uses an ESP32-S2 as the brains of the operation. It’s capable of reading up to six current-transformer clamps for measuring current draw in AC devices. It also features an embedded BMP280 temperature and air pressure sensor. Live data is displayed on a 2.9-inch e-Paper display, making it clear and easy to read under normal lighting conditions. By default, it’s set up to display graphs of power usage both over the last 24 hours, and the last ten days. It can even be set up with the prevailing energy rates in your area to display a realistic figure for what you’ll pay for your daily usage.

It can even be set up to work with Home Assistant for more logging and control options. We can imagine that, with a little work, you could even do some fancy plotting of energy use versus temperature to determine the performance and cost of your home HVAC setup.

If you want one with a minimum of fuss, you can score one on Tindie. Alternatively, design files are available on GitHub, too. We’ve featured some other great power meters over the years, and if you’re cooking up your own smart designs, don’t hesitate to let us know!

Game Boy-Style Camera For Playdate

The Game Boy Camera, while perhaps not the most technologically advanced piece of equipment, left a huge mark on video game and electronics culture. The grayscale photographs are still highly prized, and there are an untold number of projects which interface with original hardware to download authentic Game Boy Camera pictures to modern computers. There are others that look to recreate the feel and style of these images, and the latest comes to us on a Game Boy-like platform as well, the Playdate.

[t0mg] is the creator of this project, utilizing a OV7670 camera module sending data to a Teensy 4.1 which interfaces with the Playdate via USB. The images recorded on the Playdate are 1-bit, slightly different than the 2-bit images the Game Boy Camera was capable of. The case of the camera also physically matches up well with the small console, using magnets to secure it to the device either in normal camera mode, in reverse for selfie mode, and can also support the console in “cover” mode as a way of storing the console to protect the screen. A companion application needs to run on the Playdate to get this all up and running, but with that and a battery plenty of retro-style images are ready to be captured.

All of the source for this project is available on the project’s GitHub page for anyone ready to experience some nostalgia or just experiment with a small camera like this. It’s a clean build that takes advantage of the Playdate’s open-source nature, through which we’ve seen the console turned into a typewriter and inspire other builds like this one-off handheld with a crank-style controller.

Continue reading “Game Boy-Style Camera For Playdate”

TV Typewriter Remembered

With the recent passing of Don Lancaster, I took a minute to reflect on how far things have come in a pretty short period of time. If you somehow acquired a computer in the early 1970s, it was probably some discarded DEC, HP, or Data General machine. A few people built their own, but that was a stout project with no microprocessor chips readily available. When machines like the Mark-8 and, more famously, the Altair appeared, the number of people with a “home computer” swelled — relatively speaking — and it left a major problem: What kind of input/output device could you use?

An ad from Kilobaud offered you a ready-to-go, surely refurbished, ASR33 for $840

At work, you might have TeleType. Most of those were leased, and the price tag of a new one was somewhere around $1,000. Remember, too, that $1,000 in 1975 was a small fortune. Really lucky people had video terminals, but those were often well over $1,500, although Lear Siegler introduced one at the $1,000 price, and it became wildly successful. Snagging a used terminal was not very likely, and surplus TeleType equipment was likely of the 5-bit Baudot variety — not unusable, but not the terminal you really wanted.

A lot of the cost of a video terminal was the screen. Yet nearly everyone had a TV, and used TVs have always been fairly cheap, too. That’s where Don Lancaster came in. His TV Typewriter Cookbook was the bible for homebrew video displays. The design influenced the Apple 1 computer and spawned a successful kit for a company known as Southwest Technical Products. For around $300 or so, you could have a terminal that uses your TV for output. Continue reading “TV Typewriter Remembered”

Open Source OLED Nametag Is Full Of Features

Ever wanted a sweet OLED nametag with fancy features like daylight readability, automatic brightness adjustment, GIF animation support, all-day runtime, easy web interface, and more? [TobleMiner]’s OLED Nametag is the project you want to keep an eye on in that case.

It’s still an early prototype, but the feature list looks great and works with a variety of OLED modules that are easily available. The enclosure can be 3D printed, and while there is very little spare room inside the housing, [TobleMiner] has clearly made the most of all available space. Some PCB fab houses offer component placement these days, and the board is designed with exactly that in mind.

We’ve seen a batteryless E-paper display make a serviceable nametag in the past, and while those offer high contrast and wide viewing angles, they lack the sort of features this project is bursting at the seams with. Affordable access to good components and the ability to have high-quality PCBs made on demand has really raised the bar in terms of what a hacker project can work with in recent years, and we love to see it expressed in projects like this one.