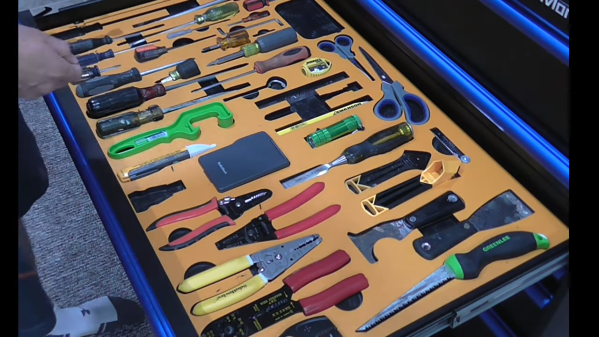
Shadowed tool storage — where a tool outline shows at a glance what’s missing from storage — is a really smart way to keep your shop neat. They’re also super important for cases where a tool left behind could be a tragedy. Think, where’s-that-10-mm-socket-while-working-on-a-jet-engine? important. (It’s always the 10-mm socket.)
But just because shadow boards are smart, doesn’t mean they’re easy to make. That’s why [Scott Prince] came up with this semi-automated method for making toolbox shadow boards. The job of tracing around each tool on some sort of suitable material and cutting out the shapes seems straightforward, but the trick comes in organizing the outlines given the space available and the particular collection of tools.
[Scott]’s method starts with capturing images of each individual tool. He used a PiCam and a lightbox housed, strangely enough, in a storage bench; we’d love to hear the full story behind that, but pretty much any digital camera would do for the job. After compensating for distortion with OpenCV, cropping the images, and turning the image into a vector outline of the tool, [Scott] was left with the task of putting the tools into logical groups and laying them out sensibly. After tweaking the tool outlines and adding finger cutouts for easy pickup, [Scott] put his CNC router to work. He chose to use a high-density polyethylene product made by his employer, which looks fantastic, but MDF would work fine too.
We have to admit to a fair degree of toolbox envy now that we’ve seen what shadow boards can do. We’re a bit torn, though — [Zach Friedman]’s Gridfinity storage system has a lot going for it, too.
The community of Hackaday readers is diverse and talented, and supplies us with plenty of motivation, feedback, knowledge, and of course cool stuff to show you. There are many interest streams within it, but it’s safe to say that we’re more directed towards the hardware scene here. One of those parallel streams which has much overlap is the demoscene, that area in which programming, art, and music come together and push computer hardware to the limit of its abilities in pursuit of the most eye-catching works. I took a road trip with a friend to Outline, a small demo party held on a farm in the eastern Netherlands, to take a look at the world of demos up-close as a hardware-focused outsider.
Like A Hacker Camp, But The Music’s Better
A still from Thrive, a 256 byte demo for the TIC-80 fantasy console.
If I wanted to sum up the flavour of Outline, I’d describe it as very similar to a small hacker camp, but with better music and partying. The hackerspaces are replaced by demo groups and awesome graphics take the place of robots and electronics, but the vibe of people with a passionate interest in the low-level understanding of technology is exactly the same. Even some of the same faces make an appearance. On the benches sit modern high-spec PCs alongside classic consoles and microcomputers, on the projector screen are live coding shaders or some of the most recognisable demos past and present, and in the air is an eclectic mix of live-DJ EDM and chiptunes.
As an outsider at a first demoscene event it’s difficult to appreciate the work from a comparative perspective, while like most of us I’m familiar with quite a few demos that have become popular I’m not well-equipped enough to talk about the code and techniques behind them But I can run through the various sections of the competition, and since everything is online I can link to a few of them. The competition is split up into several sections, which are loosely for all-out technology-no-object demos, space-limited 256 byte and 128 byte demos, and old-school demos for retrocomputing hardware. Each is a test of the programmer’s skill in fitting the most into the least of resources, and for those who appreciate such things it’s the cleverness of the technique which produces the demo that’s as much a draw as the look of the thing. I don’t think I have ever exercised such mastery over any of the computers I have owned. So browse the entries, and marvel at their ingenuity. My personal aesthetic favourites were Thrive by [Agenda] for the TIC-80 fantasy console and It’s about time by [Guideline] for Windows, but you may have different tastes.
Don’t Forget The Hardware
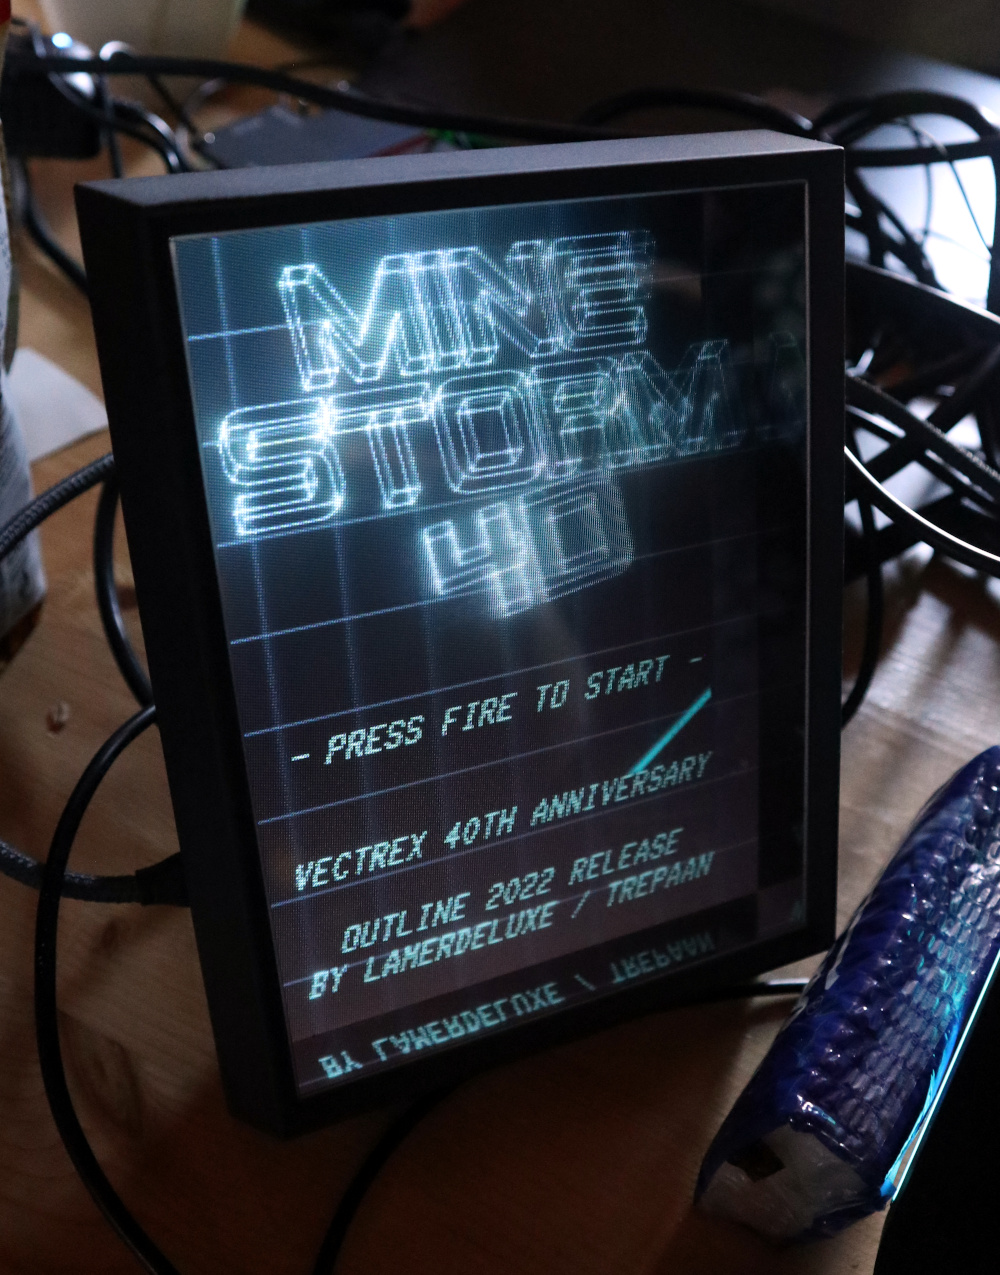
Mine Storm 4D, on a lenticular holographic display.
Beyond the atmosphere and the demos themselves, there was a bit of hardware for the retrocomputer enthusiast. The Atari Falcon and Jaguar were neither destined to set the world on fire when they appeared, but there they were for those of us who drooled over them back in the day to lust for once more.
If the original hardware wasn’t enough then there was some newly minted retrocomputing hardware making a showing, with a couple of minimig Amiga FPGA boards showing Workbench. Star of the hardware show though went to Mine Storm 4D, a version of the classic Vectrex game Mine Storm running on a PC, for the Looking Glass Factory holographic portrait display. With my visual superpower I didn’t quite get a 3D effect, but I definitely got the holographic effect when moving my head.
Having never been to a demo party I didn’t know quite what to expect, but I can safely say I had a fantastic time, saw a lot of really cool stuff, and made some friends along the way. If you’ve never been to a demo party because it’s not quite your scene then all I can say is that you should give it a go. Every hardware hacker should go to a demo party!
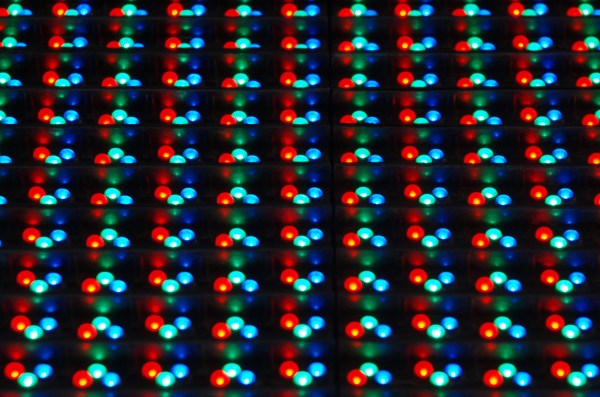
Building an LED matrix is a fun project, but it can be a bit of a pain. Usually it starts with hand-soldering individual LEDs and resistors together, then hooking them up to rows and columns so they can be driven by a microcontroller of some sort. That’s a lot of tedious work, but you can order an LED matrix pre-built to save some time and headache. You’ll still need a driver though, and while building one yourself can be rewarding there are many pitfalls and trade-offs to consider when undertaking that project as well. Or, you can consider one of a number of drivers that [deshipu] has outlined in detail.
The hangups surrounding the driver board generally revolve around the issue of getting constant brightness from LEDs regardless of how many in the row or column are illuminated at one time. Since they are typically driven one row or column at a time, the more that are on the lower the brightness each LED will have. Driver boards take different approaches to solving this problem, which usually involve a combination of high-speed scanning of the matrix or using a constant-current source in order to eliminate the need for resistors. [deshipu] outlines four popular chips that achieve these purposes, and he highlights their pros and cons to help anyone looking to build something like this.
Most of these boards will get you to an 8×8 LED matrix with no problem, with a few going a few pixels higher in either direction. That might be enough for most of our needs, but for something larger you’ll need other solutions like the one found in this 64×32 LED matrix clock. There are also even more complicated drivers if you go into extra dimensions.