Looking Inside A 3D Printer Nozzle With Computed Tomography

Have you ever wondered what’s actually going on inside the hotend of your 3D printer? It doesn’t seem like much of a mystery — the filament gets melty, it gets squeezed out by the pressure of the incoming unmelty filament, and lather, rinse, repeat. Or is there perhaps more to the story?

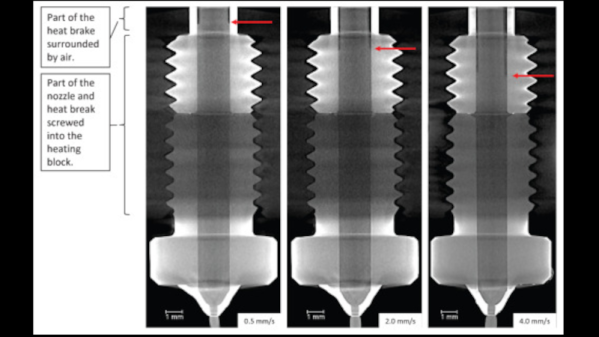
To find out, a team from the University of Stuttgart led by [Marc Kreutzbruck] took the unusual step of putting the business end of a 3D printer into a CT scanner, to get a detailed look at what’s actually going on in there. The test setup consisted of a Bondtech LGX extruder and an E3D V6 hot end mounted to a static frame. There was no need for X-Y-Z motion control during these experiments, but a load cell was added to measure extrusion force. The filament was a bit specialized — high-impact polystyrene (HIPS) mixed with a little bit of tungsten powder added (1% by volume) for better contrast to X-ray. The test system was small enough to be placed inside a micro CT scanner, which generated both 360-degree computed tomography images and 2D radiographs.

The observations made with this experimental setup were pretty eye-opening. The main take-home message is that higher filament speed translates to less contact area between the nozzle wall and the melt, thanks to an air gap between the solid filament and the metal of the nozzle. They also saw an increased tendency for the incoming filament to buckle at high extruder speeds, which matches up with practical experience. Also, filament speed is more determinative of print quality (as measured by extrusion force) than heater temperature is. Although both obviously play a role, they recommend that if higher print speed is needed, the best thing to optimize is hot end geometry, specifically an extended barrel to allow for sufficient melting time.

Earth-shattering stuff? Probably not, but it’s nice to see someone doing a systematic study on this, rather than relying on seat-of-the-pants observations. And the images are pretty cool too.

3D Printer Cuts Metal

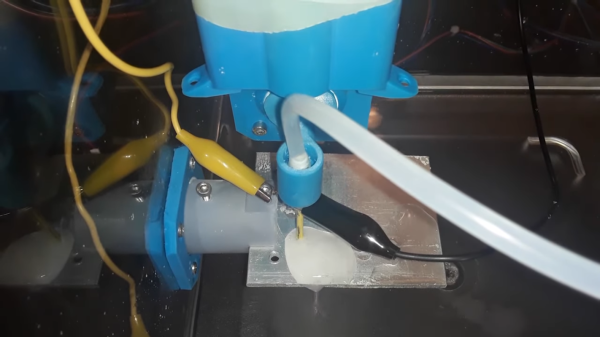
Every now and then we’ll see a 3D printer that can print an entire house out of concrete or print an entire rocket out of metal. But usually, for our budget-friendly hobbyist needs, most of our 3D printers will be printing small plastic parts. If you have patience and a little bit of salt water, though, take a look at this 3D printer which has been modified to cut parts out of any type of metal, built by [Morlock] who has turned a printer into a 5-axis CNC machine.

Of course, this modification isn’t 3D printing metal. It convers a 3D printer’s CNC capabilities to turn it into a machining tool that uses electrochemical machining (ECM). This process removes metal from a work piece by passing an electrode over the metal in the presence of salt water to corrode the metal away rapidly. This is a remarkably precise way to cut metal without needing expensive or heavy machining tools which uses parts that can easily be 3D printed or are otherwise easy to obtain. By using the 3D printer axes and modifying the print bed to be saltwater-resistant, metal parts of up to 3 mm can be cut, regardless of the type of metal used. [Morlock] also added two extra axes to the cutting tool, allowing it to make cuts in the metal at odd angles.

Using a 3D printer to perform CNC machining like this is an excellent way to get the performance of a machine tool without needing to incur the expense of one. Of course, it takes some significant modification of a 3D printer but it doesn’t need the strength and ridigity that you would otherwise need for a standard CNC machine in order to get parts out of it with acceptable tolerances. If you’re interested in bootstraping one like that using more traditional means, though, we recently featured a CNC machine that can be made from common materials and put together for a minimum of cost.

Continue reading “3D Printer Cuts Metal”

Here’s The Dirt On Printing With Pollution

[Anirudh] and his friends were sitting around reminiscing about India. In particular, they recalled riding around in auto-rickshaws in stifling heat, watching their skin turn black from the exhaust. They started thinking about all of the soot and pollution in crowded cities the world over and wondered whether the stuff could be re-purposed for something like printer ink. That’s how they came up with their soot/pollution printer.
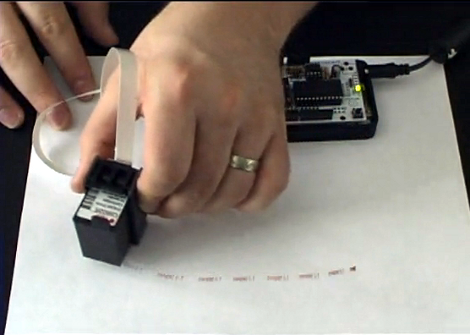
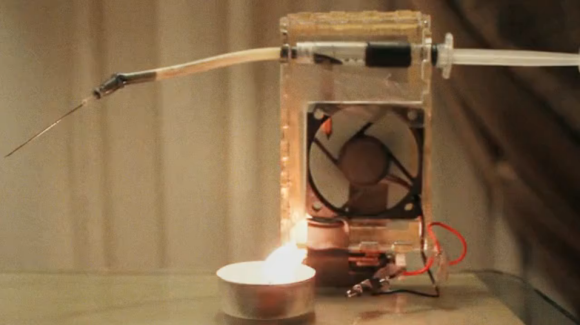
They created a soot-catching pump which they demonstrate with a burning candle. The pump mixes the soot particles with rubbing alcohol and an oil substrate and sends the ink to an HP C6602 inkjet cartridge. They used [Nicolas C Lewis]’s print head driver shield for Arduino to interface with the cartridge, turning it into a 96dpi printing head that uses only five pins.

[Anirudh] and his friends plan to design a carbon separator using charged plates to capture the soot particles from pollution sources and filter out dust. Be sure to check out their demonstration video after the jump.

Update: In response to [Hirudinea]’s comment about mining the carbon from cars, [Anirudh] is now looking for collaborators (tinkerers, filmmakers, DIY enthusiasts) to move forward with the idea of re-purposing carbon. Email him at anirudhs@mit.edu.


Continue reading “Here’s The Dirt On Printing With Pollution”

Inkjet Print Head Driver Shield

[Nicolas C Lewis] is churning out inkjet print head shield kits for Arduino. If you’ve always wanted to label or brand objects as part of a project this greatly simplifies the process. Using his all through-hole design, an Arduino can print at 96 dpi. At first we had trouble figuring out what we could use this concept for, but [Nicolas] has the answer. In is FAQ he links to a couple of his own flat-bed inkjet printer builds based on earlier prototypes, but he also links to other projects using the same concepts like the Nickel-O-Matic, or the ping-pong ball printer (we’ve embedded video of that one after the break).

The shield only requires five connections with a microcontroller. We love the jumper-based connection system that [Nicolas] chose which lets you use several print heads at once by selecting different drive pins. The project is still in the funding stage but is already over funded. Schematic and code will be posted as soon as the first production run is complete.

Continue reading “Inkjet Print Head Driver Shield”