An LM386 Oscillator Thanks To Tungsten Under Glass

Once ubiquitous, the incandescent light bulb has become something of a lucerna non grata lately. Banned from home lighting, long gone from flashlights, and laughed out of existence by automotive engineers, you have to go a long way these days to find something that still uses a tungsten filament.

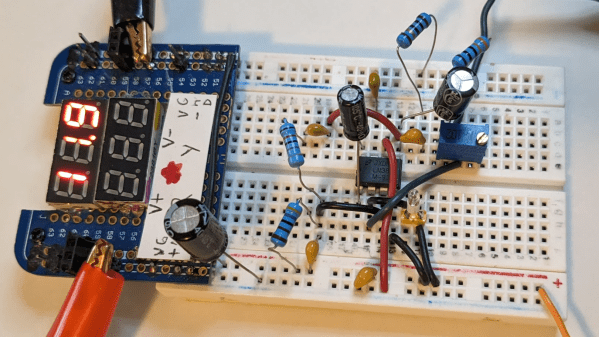
Strangely enough, this lamp-stabilized LM386 Wien bridge oscillator is one place where an incandescent bulb makes an appearance. The Wien bridge itself goes back to the 1890s when it was developed for impedance measurements, and its use in the feedback circuits of vacuum tube oscillators dates back to the 1930s. The incandescent bulb is used in the negative feedback path as an automatic gain control; the tungsten filament’s initial low resistance makes for high gain to kick off oscillation, after which it heats up and lowers the resistance to stabilize the oscillation.

For [Grug Huler], this was one of those “just for funsies” projects stemming from a data sheet example circuit showing a bulb-stabilized LM386 audio oscillator. He actually found it difficult to source the specified lamp — there’s that anti-tungsten bias again — but still managed to cobble together a working audio oscillator. The first pass actually came in pretty close to spec — 1.18 kHz compared to the predicted 1.07 kHz — and the scope showed a very nice-looking sine wave. We were honestly a bit surprised that the FFT analysis showed as many harmonics as it did, but all things considered, the oscillator performed pretty well, especially after a little more tweaking. And no, the light bulb never actually lights up.

Thanks to [Grug] for going down this particular rabbit hole and sharing what he learned. We love builds like this that unearth seemingly obsolete circuits and bring them back to life with modern components. OK, calling the LM386 a modern component might be stretching things a bit, but it is [Elliot]’s favorite chip for a reason.

Continue reading “An LM386 Oscillator Thanks To Tungsten Under Glass”

A Homemade Tube Amplifier Featuring Homemade Tubes

With the wealth of cheap and highly integrated audio amplifier modules on the market today, it takes a special dedication to roll your own from parts. Especially when those parts include vacuum tubes, and doubly so when you make the vacuum tubes from scratch too.

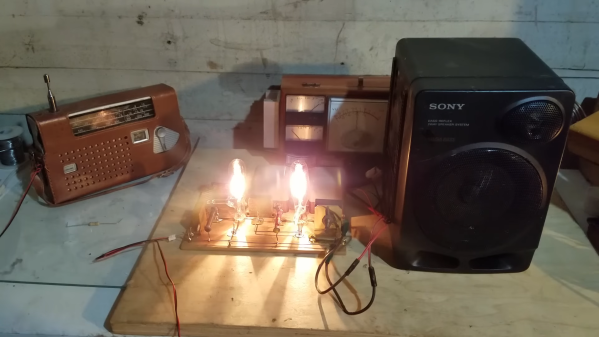
Now, we get it — some readers are going to find it hard to invest an hour in watching [jdflyback] make a pair of triodes to build his amplifier. But really, you’ve got to check this out. Making vacuum tubes with all the proper equipment — glassblower’s lathe, various kinds of oxy-fuel torches, all the right hand tools — is hard enough. But when your lathe is a cordless drill, and you’re using a spot welder that looks like it’s cobbled together from junk, your tube-making game gets a lot harder. Given all that, you’d expect the tubes to look a lot rougher than they are, but even with plain tungsten wire heaters and grids made from thick copper wire, they actually work pretty well. Sure, the heaters glow as bright as light bulbs, but that’s all part of the charm.

Speaking of charm, we just love the amp these tubes went into. Built in 1920s breadboard-style, the features some beautiful vintage mica capacitors and wirewound resistors, plus a variable resistor the likes of which we’ve never seen. The one nod to modernity is the clever use of doorbell transformers, one for a choke and one for the speaker transformer. They don’t sound great, but there’s no doubt they work.

We may have seen other homemade vacuum tubes before — we even recently featured a DIY X-ray tube — but there’s something about [jdflyback]’s tubes that really gets us going.

Continue reading “A Homemade Tube Amplifier Featuring Homemade Tubes”

This Scratch-Built X-Ray Tube Really Shines

On no planet is making your own X-ray tube a good idea. But that doesn’t mean we’re not going to talk about it, because it’s pretty darn cool.

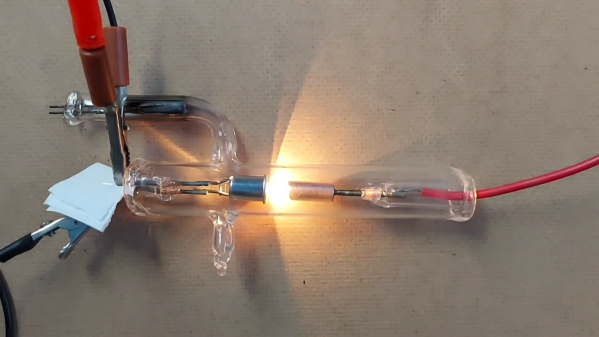
And when we say making an X-ray tube, we mean it — [atominik] worked from raw materials, like glass test tubes, tungsten welding electrodes, and bits of scrap metal, to make this dangerously delightful tube. His tool setup was minimalistic as well– where we might expect to see a glassblower’s lathe like the ones used by [Dalibor Farny] to make his custom Nixie tubes, [atominik] only had a small oxy-propane hand torch to work with. The only other specialized tools, besides the obvious vacuum pump, was a homebrew spot welder, which was used to bond metal components to the tungsten wires used for the glass-to-metal seals.

Although [atominik] made several versions, the best tube is a hot cathode design, with a thoriated tungsten cathode inside a copper focusing cup. Across from that is the anode, a copper slug target with an angled face to direct the X-rays perpendicular to the long axis of the tube. He also included a titanium electrode to create a getter to scavenge oxygen and nitrogen and improve the vacuum inside the tube. All in all, it looks pretty similar to a commercial dental X-ray tube.

The demonstration in the video below is both convincing and terrifying. He doesn’t mention the voltage he’s using across the anode, but from the cracking sound we’d guess somewhere around 25- to 30 kilovolts. The tube really gets his Geiger counter clicking.

Here’s hoping [atominik] is taking the proper precautions during these experiments, and that you do too if you decide to replicate this. You’ll also probably want to check out our look at the engineering inside commercial medical X-ray tubes.

Continue reading “This Scratch-Built X-Ray Tube Really Shines”

Put The Perfect Point On Your Tungstens With This Die Grinder Attachment

Aspiring TIG welders very quickly learn the importance of good tungsten electrode grinding skills. All it takes is a moment’s distraction or a tiny tremor in the torch hand to plunge the electrode into the weld pool, causing it to ball up and stop performing its vital function. Add to that the fussy nature of the job — tungstens must only be ground parallel to the long axis, never perpendicular, and at a consistent angle — and electrode maintenance can become a significant barrier to the TIG beginner.

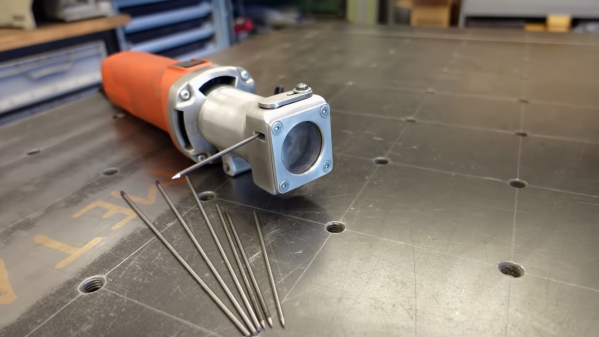
A custom tungsten grinder like this one might be just the thing to flatten that learning curve. It comes to us by way of [The Metalist], who turned an electric die grinder into a pencil sharpener for tungsten electrodes. What we find fascinating about this build is the fabrication methods used, as well as the simplicity of the toolkit needed to accomplish it. The housing of the attachment is built up from scraps of aluminum tubing and sheet stock, welded together and then shaped into a smooth, unibody form that almost looks like a casting. Highlights include the mechanism for adjusting the angle of the grind as well as the clever way to slit the body of the attachment so it can be clamped to the nosepiece of the die grinder. We also thought the inclusion of a filter to capture tungsten dust was a nice touch; most TIG electrodes contain a small amount of lanthanum or thorium, so their slight radioactivity is probably best not inhaled.

We love builds like this that make a tedious but necessary job a little quicker and easier to bear, and anything that stands to make us a better welder — from simple purpose-built fixtures to large-scale rotary tables — is OK in our book.

Continue reading “Put The Perfect Point On Your Tungstens With This Die Grinder Attachment”

Fran Finds Four Foot Alphanumeric Displays From 1910

Video blogger and display technology guru [Fran Blanche] has discovered a splendid retro-tech alphanumeric display from 1910. (Video, embedded below.)

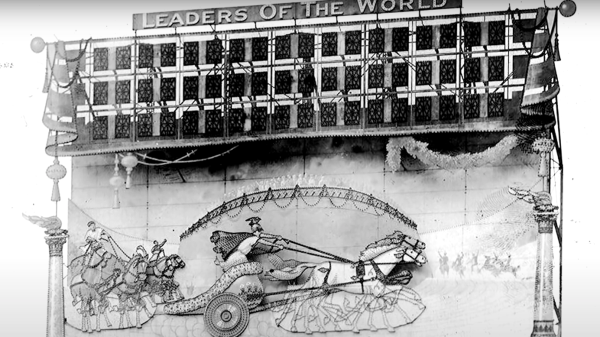
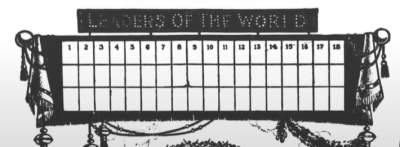
We have always enjoyed her forays into old and unusual displays, including her project researching and reverse engineering an Apollo DSKY unit. This time [Fran] has dug up an amazing billboard from the early 20th century. It was built by the Rice Electric Display Company of Dayton Ohio, and operated in Herald Square for about two years. Requiring $400,000 in 1910-US-dollars to build, this was clearly an Herculean effort for its day and no doubt is the first example of selling advertising time on a computer-controller billboard. It boasts characters that are about 1.3 m tall and 1 m wide which can display letters, numbers, and various punctuation and symbols. These are arrayed into a 3-line 18-character matrix that is about 27 x 4 meters, and that’s up only a third of the total billboard, itself an illuminated and dynamic work of art.

Diagram Depicting the 3×18 Character Display

There are quite a few tantalizing details in the video, but a few that jumped out at us are the 20,000 light bulbs, the 40 Hz display update rate, the 150 km of wire used and the three month long installation time. We would really like to learn more about these two 7.5 kW motorized switch controllers, how were they programmed, how were the character segments arranged, what were their shapes?

In the video, you can see triangles arranged in some pattern not unlike more modern sixteen segment displays, although as [Fran] points out, Mr Rice’s characters are more pleasing. We hope [Fran] can tease out more details for a future video. If you have any ideas or knowledge about this display, please put them in the comments section below. Spoiler alert after the video…

Continue reading “Fran Finds Four Foot Alphanumeric Displays From 1910”

Laser Etches Solar Absorbing Material

Having a laser cutter these days isn’t a big deal. But [Chunlei Guo], a professor at the University of Rochester, has a powerful femto-second pulse laser and used it to create what might be the perfect solar absorber. You can see a video about the work, below.

It stands to reason that white materials reflect most light and therefore absorb less energy than black materials — this is part of what makes a radiometer work. Tungsten, in particular, is a good metal for absorbing solar power, but this new laser treatment — which builds nanostructures on the surface of the metal — increases efficiency by 130% compared to untreated tungsten.

Continue reading “Laser Etches Solar Absorbing Material”

A Beginner’s Guide To X-Ray Crystallography

In graduate school, I had a seminar course where one of the sections was about X-ray crystallography. I was excited, because being able to discern the three-dimensional structure of macromolecules just by shining X-rays on them seemed like magic to me. And thanks to a lackluster professor, after the section it remained just as much of a mystery.

If only I’d had [Steve Mould] as a teacher back then. His latest video does an outstanding job explaining X-ray crystallography by scaling up the problem considerably, using the longer wavelength of light and a macroscopic target. He begins with a review of diffraction patterns, those alternating light and dark bands of constructive and destructive interference that result when light shines on two closely spaced slits — the famous “Double-Slit Experiment” that showed light behaves both as a particle and as a wave and provided our first glimpse of quantum mechanics. [Steve] then doubled down on the double-slit, placing another pair of slits in the path of the first. This revealed a grid of spots rather than alternating bands, with the angle between axes dependent on the angle of the slit pairs to each other.


To complete the demonstration, [Steve] then used diffraction to image the helical tungsten filament of an incandescent light bulb. Shining a laser through the helix resulted in a pattern bearing a striking resemblance to what’s probably the most famous X-ray crystallogram ever: [Rosalind Franklin]’s portrait of DNA. It all makes perfect sense, and it’s easy to see how the process works when scaled down both in terms of the target size and the wavelength of light used to probe it.

Hats off to [Steve] for making something that’s ordinarily complex so easily understandable, and for filling in a long-standing gap in my knowledge.

Continue reading “A Beginner’s Guide To X-Ray Crystallography”