A few months ago, [Shank] built what will almost certainly go down in history as the world’s smallest portable Nintendo Wii. As it turns out, the Wii motherboard is home to a lot of unnecessary hardware, and with a careful hand and an eye for detail, it’s possible to physically cut it down to a much smaller unit; allowing this particularly tenacious hacker to put an actual Wii, along with everything else required to make it portable, into an Altoids tin.
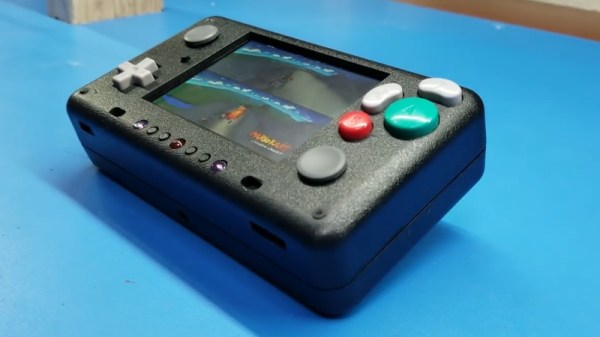
 As you might expect, between the cramped controls, comically short battery life, and the fact that the whole thing got hot to the touch during use, it was a miserable excuse for a portable console. But the incredible response the project received inspired [Shank] to dust off an earlier project: a far more practical portable Wii that he calls PiiWii. This time around the handheld is a more reasonable size, a useful battery life, and proper controls. It even has an integrated “Sensor Bar” so you can use real Wii Remotes with it. It might not be the prettiest portable console conversion we’ve ever seen, but it certainly ranks up there as one of the most complete.
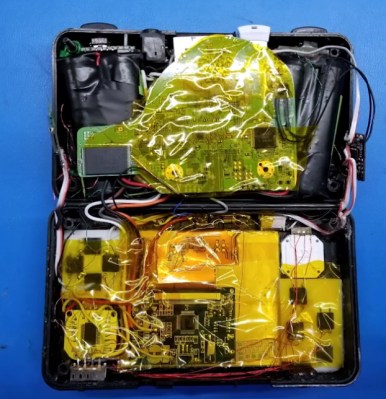
[Shank] actually “finished” the PiiWii some time ago, but in his rush to complete the project he got a little overzealous with the hot glue and ended up with a device that was difficult to diagnose and fix when things started to go wrong. He shelved the project and moved on to his Altoids tin build, which helped him refine his Wii shrinking skills. With a clearer head and some more practical experience under his belt, the PiiWii was revamped and is clearly all the better for it.
Unlike previous Wii portables we’ve seen, there’s no attempt at adding GameCube controller ports or video out capability. It’s built to be a purely handheld system, and that focus has delivered a system that’s roughly the size of the original Game Boy Advance. Beyond the cleverly sliced Wii motherboard, the inside of the PiiWii features a 3.5 inch display, a custom designed audio amplifier PCB, four 3400 mAh cells which deliver a run time of around four hours, a 3DS “slider” analog stick, and a generous helping of Kapton tape in place of hot glue.
If there’s any criticism of the PiiWii, it’s likely going to be about the system’s boxy exterior. But as [Shank] explains, there’s an excellent reason for that: it’s literally built into a project box. He simply took a commercially available ABS project box, the Polycase SL 57, and made all his openings on the front with a laser cutter. Other than the fact taking a laser to ABS releases hydrogen cyanide, he found it a good way to quickly knock out a custom enclosure.
Last year we took a look his ridiculously small Altoids tin Wii, and while that was an impressive project to be sure, we’re glad he revisited the PiiWii and showed that a portable Wii can be more than just a novelty. Compared to other systems, the Wii doesn’t seem to get the portable treatment that often, so we’re always glad to see somebody come in and do the concept justice.
Continue reading “A Practical Portable Wii Emerges From The Memes” →


