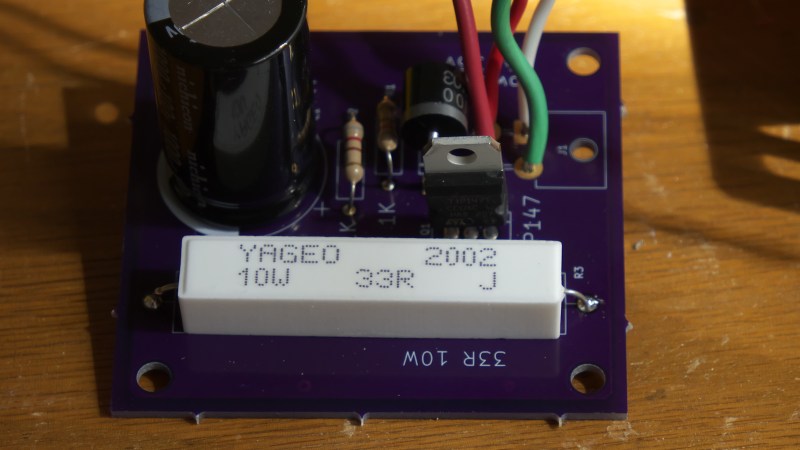
The circuit, assembled on a purple PCB, with a large capacitor and a sizeable white resistor, wires soldered to holes in the PCB

Protect Your Drivers When The Motor Stalls

[Mark Rehorst] tells us about a tragic incident involving an untimely demise of $200 worth of motor driving hardware, and shares a simple circuit so that we can prevent such tragedies in the future. His Arrakis sand table project has quite a few motors involved, and having forgotten to add limits into the software, he slammed a motor-driven mechanism into a well-fixed part of the table. The back EMF of the motor created a burst of energy, taking out the motor driver, the controller board, and the power supply.

With the postmortem done, he had to prevent this from happening again – preferably, in hardware. Based on a small appnote from Gecko Drives, he designed a simple PCB that shunts the motor with a high-power resistor, as soon as the current starts flowing into a direction it’s not supposed to flow into. He goes in depth about the way that the circuit works and the reasoning behind parts selection, as well as shows an LTSpice simulation and shares the PCB files. This was his first time designing PCBs in KiCad, and we believe he’s done a great job! This worklog is certainly worth reading if you’d like to understand how such circuits work and what goes into building one.

He dubs this a “bank account protection” circuit, and we can absolutely relate. It’s not just CNC tables that need such protections of course – we’ve seen a solution for small hacky makeshift electric vehicles, for instance. A motor’s generative properties aren’t always a problem, however – here’s just one example of a hacker trying to put them to good use.

Continue reading “Protect Your Drivers When The Motor Stalls”

PSP Lithium Hack Could Be Called The Franken-Cell

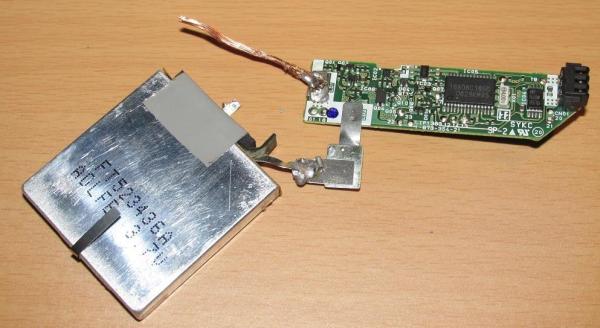
You assume that you’ll be able to get parts forever… after all: The Internet. But what if you can’t justify paying the price for them? [Cristi C.] was in this situation, not wanting to fork over $30+ for a replacement PSP battery. The handheld gaming rig itself was just discontinued this year but supposedly the batteries have been out of production for some time. What you see above is the controller board from an original battery, with the cell from a camera battery.

The key is protection. The chemistry in Lithium cells of several types brings a working voltage of around 3.7V. Swapping the cells — even if they are different capacities — should work as protection circuits generally measure current, voltage, and sometimes temperature as they charge in order to know when the cell is full. With this in mind [Christi] cracked open a used Canon NB-6L type battery and grabbed the prismatic cell as a replacement for the pouch cell in the Sony S110 case (PDF). The Canon cell is enclosed in a metal case and is just a bit smaller than the pouch was. This means with careful work it fit back inside the original plastic enclosure.

On a somewhat related note, be careful when sourcing brand-x batteries. Some manufacturers implement checks for OEM equipment but there are ways around that.

Disabling Under/over Voltage Protection On ATX Power Supplies

voltage

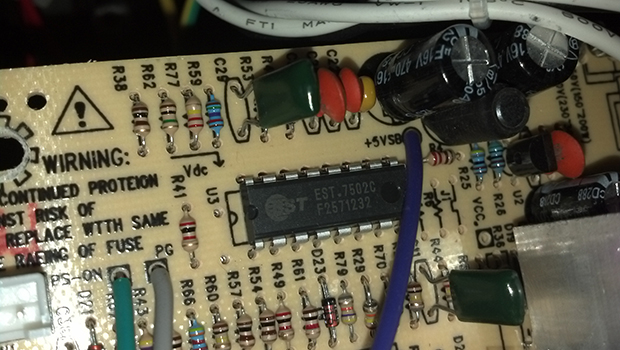
[C] just recently put together a RepRap. Not wanting to spend the money on a dedicated power supply, he looked around for a cheaper solution and found one in an off-the-shelf ATX computer power supply. These ATX supplies are actually a little finicky when not used in a computer, as [C] found, with voltage drops on the +12 line even when a load is connected to the supply. Undeterred, [C] eventually solved this problem by cutting some traces and grounding a few pins on the protection circuit.

The ATX supply [C] used could supply 25 amps on the 12 volt rail, more than enough for a simple RepRap. There was only one problem: the supply would randomly shut itself off, ruining the print. After a little googling, [C] found some people powering 12 volt amplifiers that were running into the same problem. Their solution was to ground a few pins on the protection circuit. Their supply wasn’t quite like [C]’s so he had to do a little experimentations.

It took a few iterations to get right, but [C] managed to figure out exactly which pins on the “power supply supervisor” IC must be grounded to disable the undervoltage protection. With these pins grounded, the protection circuit of the supply is completely disabled, giving him and uninterrupted 25 amps at 12 volts. If you’re looking for a cheap source of power, it would be hard to go wrong with [C]’s tutorial and his power supply of choice.