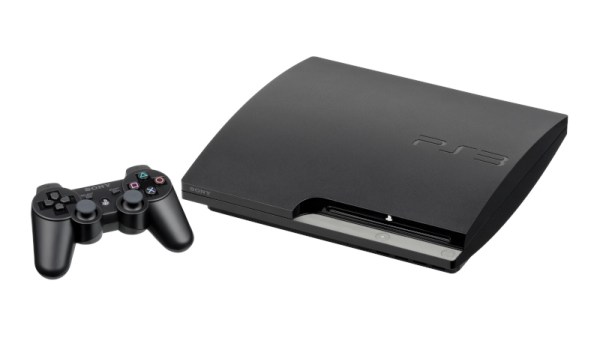
Pi Pico Breathes New Life Into Original PlayStation

Those gamers who were playing in the mid 1990s may retain a soft spot for Sony’s first PlayStation. The grey console was the thing to have a quarter century ago, but we’re guessing few who had one will have a soft spot for their CD mechanisms. These were seemingly manufactured from Sony’s finest chocolate, and would stop working at the slightest hint of getting warm.

With the hardware now long in the tooth, what is to be done with a dead CD drive? Perhaps [Xrider] has the answer, with a CD Drive emulator board which fits in the space left by the original (French language, translation link).

Doing the hard work is a Raspberry Pi Pico, building on the Picostation project. To that it brings a drive-shaped board, as well as a series of daughterboards for the various different revisions of the Sony motherboard. The games meanwhile are loaded from a micro-SD card.

As single board computers have become ever faster, it’s no surprise that one would be able to emulate a ’90s CD mechanism with ease. What this does raise though is the interesting prospect that the Picostation might be adapted for other less-popular CD-based platforms. For those of us for whom games consoles in the CD era were both work and play, we hope that other consoles will receive this benefit.

Exploring The Hall Effect For Haptic Feedback PS4 Joysticks

Modern gaming console controllers aren’t without their annoyances — Joy-Con drift, anyone? The problems might stem from design deficiencies, but we suspect that user enthusiasm and the mechanical stress it can introduce might play a significant role as well. Either way, [Marius Heier] decided to take a look at what would be required to build a better joystick and came up with some interesting results.

The first video below lays the basic groundwork, with a bunch of experiments with 3-axis Hall effect sensors, specifically the Texas Instruments TMAG5273 and TMAG5170. They’re essentially the same sensor with different interfaces — SPI for the 5170 and I2C for the 5273. Using just one of these sensors, he was able to build a joystick with the usual X- and Y- axis control, but also with a rotary axis. What’s more, he built a motorized version using two NEMA 17 steppers to mechanically drive the stick back to center.

The joystick is bulky, but it looks like he’s got plans for a much smaller one with [Carl Bugeja]-style PCB motors that should fit into a PS4 controller. That’s the subject of the second video below, which uses a different Hall sensor — an Allegro A1304 — and is mainly concerned with getting the output of a non-motorized but considerably miniaturized joystick stick talking the language that the controller expects. It’s not a simple process, but it seems to be coming along nicely, and we’ll be watching progress closely.

Continue reading “Exploring The Hall Effect For Haptic Feedback PS4 Joysticks”

Screenshot of the PS4 screen, showing a "Waiting to receive disc image file..." notification on the left, and a Windows commandline window with nc running on the right, sending an .iso file to some IP address - presumably the PS4

Subverting PS4 And PS5 Through The PS2 Emulator

Game console hacking remains a fascinating area, and we’re glad when someone brings the spoils of exploration for us to marvel at. This time, we’re looking at the [mast1c0re] hack story by [cturt] – an effort to find bugs in PS2 emulation toolkit present on Sony PlayStation 4 and 5 consoles, proving fruitful in the end. What’s more, this exploit seems unpatchable – not technically, but under the Sony’s security practices, this emulator falls under the category of things they refuse to patch when identified.

In this story, we’re taken on a journey through the PS2 emulator internals, going through known-exploitable PS2 games and learning about a prospective entry point. Circling around it, collecting primitives and gadgets, bypassing ASLR on the way there, the emulator is eventually escaped, with a trove of insights shared along the way. As a demonstration, [cturt] successfully loaded a different PS2 game from outside the PS2 emulator, transferring it to the PS4 over WiFi! Continue reading “Subverting PS4 And PS5 Through The PS2 Emulator”

Interfacing Broken PS4 Controllers With A Replacement PCB

[Becky] had some PS4 controllers that were sadly no longer functional. However, most of the buttons and joysticks still appeared to be okay. Thus, she set about designing a replacement PCB to breathe new life into these formerly bricked gamepads.

In the case of the PS4 controller, most of the buttons are of a membrane type, that talk to the main board inside via a series of contacts on a flex cable. Thus, [Becky] designed her PCB to interface with that to read most of the buttons. A breadboard and an LED came in handy to figure out which pads corresponded to which buttons on the controller. Replacement joysticks were sourced off Amazon to solder directly on to the replacement PCB.

[Becky] also took advantage of Fusion 360’s design tools to 3D print a simulcra of the final design. This helped get the fit just right inside the gamepad’s shell. Continue reading “Interfacing Broken PS4 Controllers With A Replacement PCB”

Pi Pico Provides Practical PlayStation Pointing

It’s not immediately clear to us why one would need a mouse for the original PlayStation (though we’re sure there’s no shortage of folks eager to jump down into the comments and tell us), but if you ever desire adding improved pointing capabilities to the nearly three decade old console, this project from [Vojtěch Salajka] is certainly one to keep an eye on.

The aptly named “USB to PlayStation Mouse” project does exactly what it sounds like — adapts a generic USB mouse into an input device for Sony’s classic console. Putting one together requires a Raspberry Pi Pico, a 5 V DC-DC USB boost module with female USB-A connector, and a sacrificial controller or peripheral to provide the cable and proprietary connector.

With the hardware assembled per the simple wiring diagram, you just plug the Pico into your computer and copy over the firmware file. [Vojtěch] notes that you’ll need to unplug the mouse before attempting to upload the firmware, presumably because the data pins on the two USB ports have been tied together.

Don’t worry about having to find some obscure title to try out your new peripheral either, [Vojtěch] says the mouse works in the system’s main menu if you boot it without a disc in the drive. Now all you need is a few Raspberry Pi Pico PlayStation Memory Cards to complete the whole set.

PlayStation 2 Gets A Seamless Media Center Makeover

We often see Raspberry Pi boards of various flavors stuck inside vintage computers and the like. [El Gato Guiri] has instead installed one inside a PlayStation 2 Slim, and rather artfully at that. The result is a tidy little media center device.

Pretty tidy, right? All those ports work! Okay, not the memory card slots. But everything else!

The PlayStation 2 was gutted, with a Raspberry Pi 3B installed inside. The original ports on the back, including the USB and Ethernet port, were then wired up to the Pi to make them fully functional. A slot was then cut into the back to allow the HDMI port to be hooked up. The front USB ports work, too, and the optical drive was removed to make way for a 2 TB Toshiba external drive. Adapters are used to make the controller ports work, as well. Finally, a Noctua fan was installed atop the Pi to make sure it never gets too hot.

Whether it’s for watching movies or playing emulated games with the PS2 controllers, the little media center build is sure to do well.

We’ve seen Raspberry Pis stuck in everything from laptops to monitors, as well as plenty of retro hardware too. When a piece of hardware is dead and gone, a Raspberry Pi can be a great way to breathe new life into an attractive old case!

PS5 Goes On Slim-Fast

For the past few decades, most console makers have first come out with a large flagship model, and then a few years later, released a smaller, more compact slim edition. Not content to wait for it, [Matt] at DIY Perks made his own PS5 Slim, and the results are awe-inspiring.

Generally, slim editions are made by lowering the TDP of the chip under the hood. A lower power draw means less cooling is needed, a smaller power supply can be used, and a design that is overall easier to manage. Unfortunately, [Matt] had none of these benefits and instead had to contend with the full 180 W that the AMD CPU inside the PlayStation can draw.

Taking apart the console left him with the main board that was quite thick as it had heat pipes on both sides. His first thought was water cooling as it can rapidly move the heat needed, but even with right-angle fittings, it didn’t fit within the ambitious thickness goal he had set for himself of less than 2 cm (about 3/4″). To do that, [Matt] had to fabricate a copper water block from three sheets of copper. The first one connects to the motherboard via standoffs and has cut-outs for various connectors and parts. The middle layer has a channel through which water can flow, and the last layer seals it together.

With the three layers together, he soldered them in a toaster oven repurposed as a reflow oven. Cleverly, he used silicone grease to prevent solder from getting into areas he didn’t want, like the fins in the CPU block. Luckily, the grease dissolved in alcohol, and after flushing the chamber, he had a solid copper, water-tight, custom loop.  However, on his road to glory, [Matt] ran into a snag. He accidentally covered the intake vent on the radiator, and the PS5 overheated, killing it. With a fried mainboard and a project almost on the cusp of completion, he resorted to using the PS5 he had received for B-roll.

Last-minute motherboard swap aside, the final project is gorgeous. The polished exterior and sheer thinness of it are striking. [Matt] has already disguised his PS5 before and after this, we’re not quite sure where he could possibly take it next. But we’re excited to find out.

Continue reading “PS5 Goes On Slim-Fast”