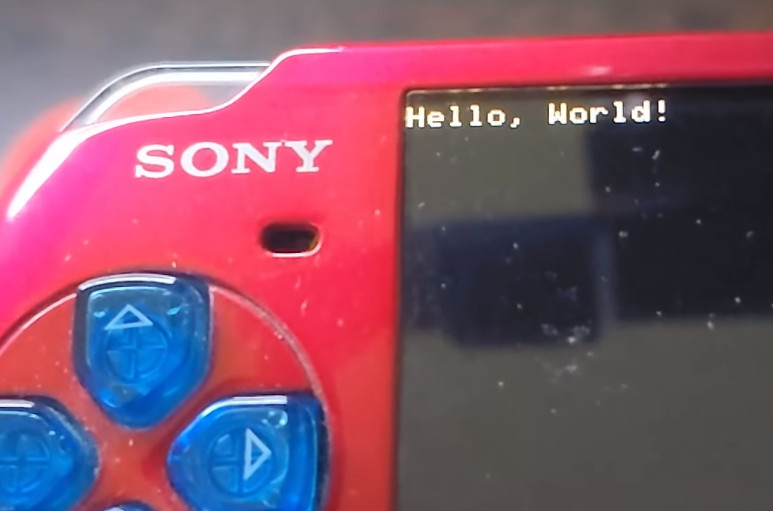
PSP Turned Robot Remote With Custom Software

There’s no question that Sony’s PlayStation Portable (PSP) was an impressive piece of hardware when it was released in 2004, but for all its technical wizardry, it wasn’t able to shake Nintendo’s vice-like grip on the handheld market. Perhaps that explains why we still see so many nostalgia-fueled hacks for Nintendo’s Game Boy and Dual Screen (DS) systems, while PSP hacks tend to be few and far between.

But looking at projects like this one that turn the PSP into a capable robot controller (video, embedded below) we can’t help but wonder if the community has been missing out. Thanks to an open source software development kit for the system, [iketsj] was able to write a WiFi controller program that can be run on any PSP with a homebrew-compatible firmware.

The other side of the equation is a simple robot powered by an ESP8266. To take control of the bot, the user connects their handheld to the WiFi network being offered by the MCU and fires up the controller application from the main menu. It’s all very slick, and the fact that you don’t need to make any modifications to the PSP’s hardware is a huge plus. From the video after the break we get the impression that the remote software is pretty simplistic in its current form, but we imagine the only really limitations are how good you are at writing C code for what by today’s standards would be considered a fairly resource constrained system. We’d love to see that widescreen display lit up and showing live first-person video from the bot’s perspective.

Many of the PSP hack’s we’ve seen over the years have been about repurposing the hardware, or in some cases, replacing the system’s internals with something raspberry flavored. Those projects have certainly been interesting in their own ways, but we really like the idea of being able to push a largely stock system into a new role just by writing some custom code for it.

Continue reading “PSP Turned Robot Remote With Custom Software”

Stock Looking PSP Hides A Raspberry Pi Zero

We don’t see that many PSP hacks around these parts, perhaps because the system never attained the same sort of generational following that Nintendo’s Game Boy line obtained during its heyday. Which is a shame, as it’s really a rather nice system with plenty of hacking potential. Its big size makes it a bit easier to graft new hardware into, the controls are great, and there’s no shortage of them on the second-hand market.

Hopefully, projects like this incredible “PiSP” from [Drygol] will inspire more hackers to take a second look at Sony’s valiant attempt at dethroning Nintendo as the portable king. With his usual attention to detail, he managed to replace the PSP’s original internals with a Pi Zero running RetroPie, while keeping the outside of the system looking almost perfectly stock. It wasn’t exactly a walk in the park, but we’d say the end definitely justifies the means.

The first half of the project was relatively painless. [Drygol] stripped out all the original internals and installed a new LCD which fit so well it looks like the thing was made for the PSP. He then added a USB Li-ion charger board (complete with “light pipe” made out of 3D printer filament), and an audio board to get sound out of the usually mute Pi Zero. He had some problems getting everything to fit inside of the case. The solution was using flat lithium batteries from an old Nokia cell phone to slim things down just enough to close up the PSP’s case with some magnets.

What ended up being the hardest part of the build was getting the original controls working. [Dyrgol] wanted to use the original ZIF connector on the PSP’s motherboard so he wouldn’t have to modify the stock ribbon cable. But it was one of those things that was easier said than done. Cutting out the section of PCB with the connector on it was no problem, but it took a steady hand and a USB microscope to solder all the wires to its traces. But the end result is definitely a nice touch and makes for a cleaner installation.

We’ve covered the exciting world of PSP homebrew, and even DIY batteries built to address the lack of original hardware, but it’s been fairly quiet for the last few years. Here’s hoping this isn’t the last we’ve seen of Sony’s slick handheld on these pages.

Continue reading “Stock Looking PSP Hides A Raspberry Pi Zero”

psp media player

PSP Media Player For The Home Workshop

It’s a common occurrence that some items we buy become more and more obsolete as time passes. This is especially true for electronics gear since technology progresses so quickly. [Rochefoucauld] had a PSP that he didn’t use anymore and was trying to figure out what to do with it. Then one day in his basement shop while yearning for some tunes, it hit him: use the PSP as a media player.

The PSP is actually not modified and uses the standard media player, it is the project’s execution that is interesting. Some old computer speakers were taken apart to harvest the amplifier. [Rochefoucauld] had an external hard drive that broke so he scavenged the sleek looking case and mounted the amplifier PCB inside. The speaker outputs were routed to terminal blocks mounted on the back of the case. The PSP now resides on a mount made out of a floor joist hanging bracket from the hardware store. The PSP and amplifier share the same power supply and master power switch. The whole unit powers a pair of bookshelf speakers.

In the end, [Rochefoucauld] solved his lack-of-music problem with parts he had kicking around and is also now making use of his PSP that was otherwise collecting dust. For more non-traditional uses for PSPs, check out this status monitor or this extended display.

PSP Lithium Hack Could Be Called The Franken-Cell

You assume that you’ll be able to get parts forever… after all: The Internet. But what if you can’t justify paying the price for them? [Cristi C.] was in this situation, not wanting to fork over $30+ for a replacement PSP battery. The handheld gaming rig itself was just discontinued this year but supposedly the batteries have been out of production for some time. What you see above is the controller board from an original battery, with the cell from a camera battery.

The key is protection. The chemistry in Lithium cells of several types brings a working voltage of around 3.7V. Swapping the cells — even if they are different capacities — should work as protection circuits generally measure current, voltage, and sometimes temperature as they charge in order to know when the cell is full. With this in mind [Christi] cracked open a used Canon NB-6L type battery and grabbed the prismatic cell as a replacement for the pouch cell in the Sony S110 case (PDF). The Canon cell is enclosed in a metal case and is just a bit smaller than the pouch was. This means with careful work it fit back inside the original plastic enclosure.

On a somewhat related note, be careful when sourcing brand-x batteries. Some manufacturers implement checks for OEM equipment but there are ways around that.

Driving A PSP Screen With An FPGA

Here’s [FlorianH’s] setup for driving a PlayStation Portable screen with an FPGA. He’s using the DE0-Nano board to do this, and the first order of business was to establish a way to connect the two. He did a great job of etching his own breakout board, which has some traces that are less than 10 mils thick. Soldering the connectors for the screen was a bit of a challenge, and he shared several pictures of the process for your enjoyment.

With everything hooked up he fired it up with just a couple of lines of code to draw a test pattern. From there it was on to building a more intensive driver. [FlorianH] mentioned to us that he’s just starting to learn about FPGAs after having worked extensively with 8-bit microcontrollers. He’s been documenting his work on his site, and finds himself frequently referencing his own material so remember how he did things. Our vicarious enjoyment is an unintended (but welcomed) consequence of that habit.

Up Your FPGA Game By Learning From This LCD Control Prototype

[Cesar] recently got a PSP display up and running with his FPGA development board. That’s a nice project, but what we really like is that he set aside a lot of time to show how it’s done every step of the way. This isn’t just a tutorial on that particular screen, but an overview of the skill set needed to get any piece of hardware working.

The screen itself is a Sharp LQ043T3DX02; a 480×272 TFT display with 16 million colors. Not bad for your project but when you start looking into the control scheme this isn’t going to be like using a Nokia screen with an Arduino. It takes twenty pins to control it; Red, green, and blue take sixteen pins, four pins are used for control, the rest are CK, DISP, Hsync, Vsync.

Wisely, [Cesar] designs his own interface board which includes the connector for the ribbon cable. It also has drivers for the screen’s backlight and supplies power to the device. With hardware setup complete he digs into the datasheets. We just love it that he details how to get the information you’re looking for out of this document, and shows his method of turning that first into a flow chart and then into code for the FPGA.

Reverse Engineering The PSP

The original PSP may be old news but there is an interesting relic of a website (translated) dedicated to the reverse engineering of a PSP (and exploring Saturn?). To determine the true capabilities of the PSP they desoldered most of the ball grid array chips and then hand soldered 157 jumper wires to allow for direct memory access. In later pictures it shows the PSP hooked up to external hardware for on the fly memory modification. Unfortunately the details are sparse and it doesn’t appear as if they will be updated anytime soon because the website has been “deleted and freezed because of spam. may ineffaceable curse prevail on the spammers.” Still this doesn’t detract too much some very impressive soldering.