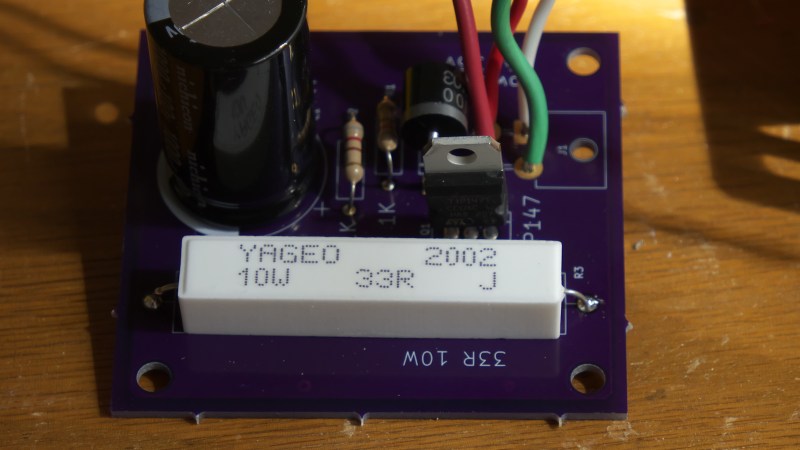
The circuit, assembled on a purple PCB, with a large capacitor and a sizeable white resistor, wires soldered to holes in the PCB

Protect Your Drivers When The Motor Stalls

[Mark Rehorst] tells us about a tragic incident involving an untimely demise of $200 worth of motor driving hardware, and shares a simple circuit so that we can prevent such tragedies in the future. His Arrakis sand table project has quite a few motors involved, and having forgotten to add limits into the software, he slammed a motor-driven mechanism into a well-fixed part of the table. The back EMF of the motor created a burst of energy, taking out the motor driver, the controller board, and the power supply.

With the postmortem done, he had to prevent this from happening again – preferably, in hardware. Based on a small appnote from Gecko Drives, he designed a simple PCB that shunts the motor with a high-power resistor, as soon as the current starts flowing into a direction it’s not supposed to flow into. He goes in depth about the way that the circuit works and the reasoning behind parts selection, as well as shows an LTSpice simulation and shares the PCB files. This was his first time designing PCBs in KiCad, and we believe he’s done a great job! This worklog is certainly worth reading if you’d like to understand how such circuits work and what goes into building one.

He dubs this a “bank account protection” circuit, and we can absolutely relate. It’s not just CNC tables that need such protections of course – we’ve seen a solution for small hacky makeshift electric vehicles, for instance. A motor’s generative properties aren’t always a problem, however – here’s just one example of a hacker trying to put them to good use.

Continue reading “Protect Your Drivers When The Motor Stalls”

Burned Out SKR E3 Mini Gets New Stepper Driver

It didn’t take long to figure out that a dead X axis and an message saying “TMC CONNECTION ERROR” meant that one of the stepper drivers on the SKR E3 Mini 3D printer control board had released the magic smoke. Manufacturer BigTreeTech replaced the board under warranty, and the printer was back up and running in short order. But instead of tossing it in the trash, [Simon] wondered how hard it would be to repair the dead board.

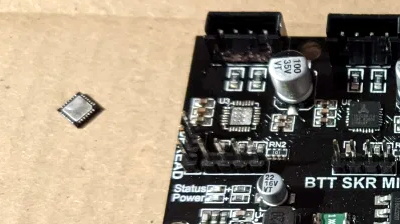
Removing the original stepper driver IC.

The short answer is, not very hard. There was no question as to which of the four TMC2209 drivers was shot, since the X motor was the only one experiencing a problem. The drivers unfortunately aren’t socketed on this board, but after a little kiss with the hot air, the old chip was off.

[Simon] didn’t have any spare TMC2209 chips, but the TMC2208 has the same pinout and is a drop-in replacement. The TMC2208 is rated for a bit less current, but it shouldn’t be a problem under normal circumstances.

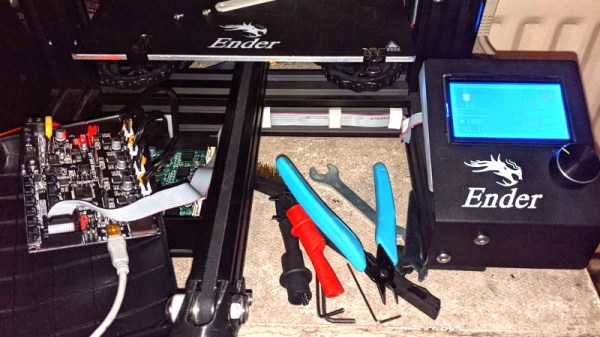
Other than the stepper connector getting a little toasty during the installation, the swap went off without a hitch and the board was up and running again. [Simon] ended up putting the now repaired SKR E3 Mini in his Ender 3; a nice 32-bit upgrade compared to the ATmega1284 that was originally running the show. Though in the past, he’s managed to squeeze a bit more performance out of the older 8-bit board as well.

Microstepping A PCB Motor

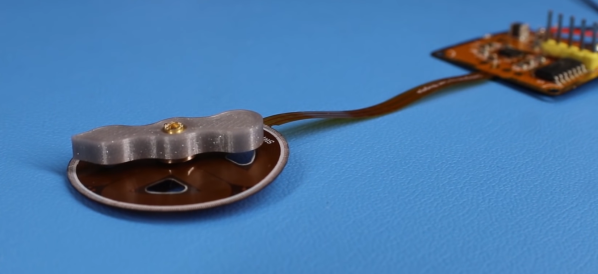
Over the last 2 years [Carl Bujega] has made a name for himself with his PCB motor designs. His latest adventure is to turn it into a stepper motor by adding position control with microstepping.

The NEMA stepper motors most of us know are synchronous stepper motors, while [Carl]’s design is a permanent magnet design. It uses four coils on the stator, and two permanent magnets on the rotor/dial. By varying the current through each of the four poles with a stepper driver (microstepping), the position of the rotor should theoretically be controllable with good resolution. Unfortunately, this was easier said than done. He achieved position control, but it kept skipping steps in certain positions.

The motor and controller consist of a single flexible PCB, to reduce the layer spacing and increase the coils’ magnetic field strength. However, this created other problems, since the motor shaft didn’t have a solid mounting point, and the PCB flexed as the stator coils were energized. Soldering the controller was also a problem, as the through-hole headers ripped out easily and the PCB bulged while reflowing on a hot plate, in one case even popping off components. [Carl] eventually mounted one of the PCB motors inside a 3D printed frame to rigidly constrain all the motor components, but it still suffered from missed steps. Any suggestions for fixing the problem? Drop them in the comments below.

Like his other PCB motors, the torque is very low, but should be suitable for gauges or clocks. A PCB clock with an integrated motor would be pretty cool to have on the workshop wall.

The TMC2300 stepper driver [Carl] used belongs to the same family of drivers that enable silent stepping for 3D printers. We’ve covered a few of [Carl]’s PCB actuator adventures, from his original design to linear actuators and a flexible POV display.

Continue reading “Microstepping A PCB Motor”

A Little Rewiring Teaches A Creality Ender 3 New Tricks

The Creality Ender 3 is part of the new wave of budget 3D printers, available for less than $250 from many online retailers. For the money, it’s hard to complain about the machine, and it’s more than suitable for anyone looking to get make their first steps into the world of FDM printing. But there’s certainly room for improvement, and as [Simon] shows in a recent blog post, a little effort can go a long way towards pushing this entry-level printer to the next level.

The first step was to replace the printer’s stepper drivers with something a bit more modern. Normally the Ender 3 uses common A4988 drivers, but [Simon] wanted to replace them with newer Trinamic drivers that offer quieter operation. Luckily, Trinamic makes a drop-in replacement for the A4988 that makes installation relatively easy. You’ll need to change out a few caps and remove some resistors from the board to make everyone play nice, but that shouldn’t pose a challenge to anyone who knows their way around a soldering iron.

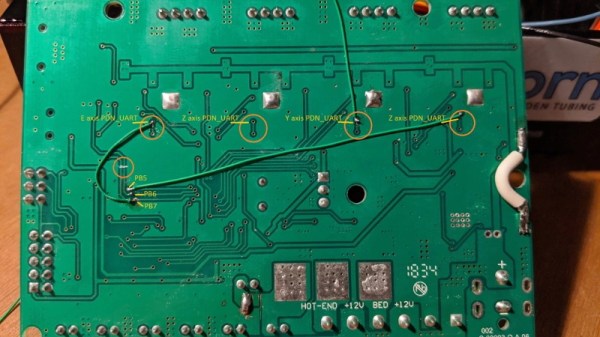
Beyond quieter running steppers, the Trinamic TMC2208 drivers also offer direct UART control mode. Of course the Ender’s board was never designed for this, so the MCU doesn’t have enough free pins to establish serial communications with the three drivers (for the X, Y, and Z axes). But [Simon] realized if he sacrificed the SD card slot on the board, the six pins that would free on the controller could be cut and rewired to the driver’s UART pins.

Combined with the Klipper firmware, these relatively minor modifications allows him to experiment with printing at speeds far greater than what was possible before. Considering the kind of headaches that a ~$200 printer would have given you only a few years ago, it’s impressive what these new machines are capable of; even if it takes a few tweaks.

New Part Day: The Wi-Fi Stepper Gets Ideas Working Faster

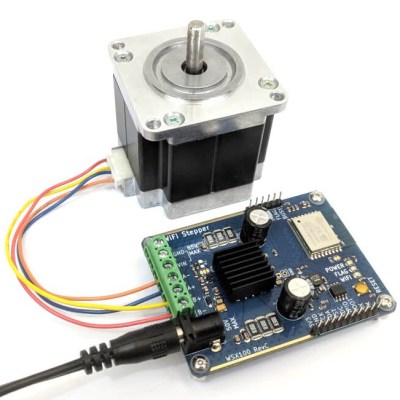
Like most of us, I sometimes indulge in buying a part for its potential or anticipated utility rather than for a specific project or purpose. That’s exactly how I ended up with the WSX100 Wi-Fi Stepper, a single board device intended to be one of the fastest and easiest ways to get a stepper motor integrated into a project. Mine came from their Crowd Supply campaign, which raised money for production and continues to accept orders.

What’s It For?

The WSX100 Wi-Fi Stepper Driver (with motor), by Good Robotics

The main reason the Wi-Fi Stepper exists is to make getting a stepper motor up and running fast and simple, in a way that doesn’t paint a design into a corner. The device can certainly be used outside of prototyping, but I think one of its best features is the ability to help quickly turn an idea into something physical. When prototyping, it’s always better to spend less time on basic bits like driving motors.

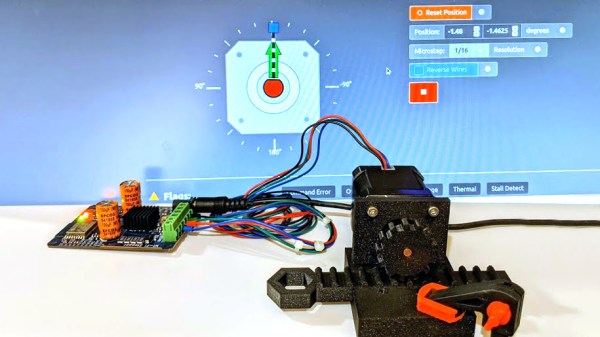
In a way, stepper motors are a bit like RGB LEDs or LCD displays were before integrated drivers and easy interfaces became common for them. Steppers require work (and suitable power supplies) to get up and running, and that effort can be a barrier to getting an idea off the ground. With the Wi-Fi Stepper, a motor can be fired up and given positional commands (or set to a speed and direction) in no time at all. By sending commands over WiFi, there isn’t even the need to wire up any control logic.

Continue reading “New Part Day: The Wi-Fi Stepper Gets Ideas Working Faster”

Bolt-On Stepper Motor Driver For The Raspberry Pi

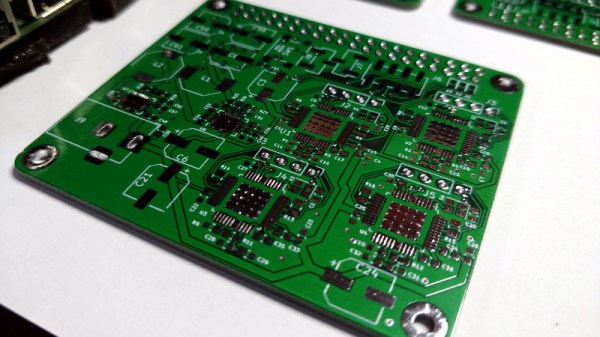
For his entry into the 2019 Hackaday Prize, [Tobius Daichi] is working on adding some motion control capabilities to everyone’s favorite Linux SBC. His 3+Pi board attaches to the Raspberry Pi’s GPIO header and gives you a convenient way to control four individual stepper motors. Perfect for a 3D printer, laser cutter, CNC, or anything else you can think of that needs to move in a few dimensions.

But such a simplistic description of the 3+Pi might be underselling it a bit. While [Tobius] says he was inspired by the classic Arduino CNC Shield that powers countless DIY 3D printers, he’s managed to improve on the concept. Rather than having the host Pi communicate directly with the stepper drivers, the 3+Pi features an onboard STM32F302CBT6 that handles the actual motor control. The Pi just needs to tell it what to do over UART.

If you’re looking to do things in real-time, having an onboard microcontroller handle the low-level aspects of talking to the stepper drivers can be a big help. A natural extension for this board could be support for the Klipper firmware, which leverages the fact that the Raspberry Pi is many times more powerful than your average 3D printer control board. With the Pi handling the math and providing the microcontroller instructions, Klipper allows for faster and more accurate printing than the microcontroller alone could accomplish.

As for the stepper drivers themselves, [Tobius] has decided to go with the Trinamic TMC2041-LA-T. This chip is notable as it puts dual drivers in one 48-QFN package, which is great if you’re looking to save space on your board. Some might complain that the 3+Pi doesn’t allow for easily swapping out the stepper drivers if you manage to cook one like on the Arduino CNC shield, but realistically you could say the same about many purpose-built stepper control boards.

[Tobius] is tackling this project by himself currently, but does mention that he’s open to teaming up with anyone who’s got an interest in this sort of thing. There have been previous attempts at creating Linux-powered 3D printer controllers in the past, but we think this approach holds particular promise if for no other reason than the Raspberry Pi’s popularity.

Coasty The Coaster Toaster

Whether or not you feel the need to laser cut custom drink coasters, you have to be impressed by the amount of thought that went into Coasty.

They say that justice is blind, and while we can’t promise you anything at your next court date, we can at least say with confidence that we’re not the kind of people who will turn down a good hack just because it’s held together with rubber bands and positive vibes. If it works it works, and it doesn’t matter what it looks like. Having said that, we’re blown away by how incredibly finished this particular project is.

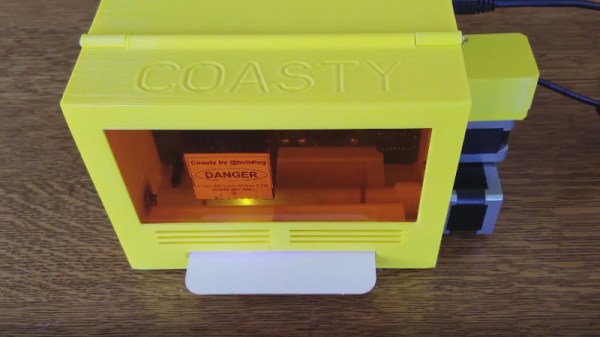
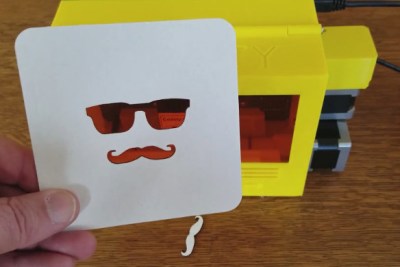
Coasty, designed and built by [Bart Dring] is one of those projects that elevate a hack into something that looks like it could be a commercial product. It takes in a common pulpboard coaster and laser cuts any design you want. It’s just the right size, with just the right components because this is Coasty’s purpose. It has a slot to feed in the coaster, and uses this as one of the axes during the laser cutting process, with the laser’s left to right movement as the other. This method makes for a smaller overall footprint and means you never need to open the protective enclosure for normal operation.

One of the most striking elements of Coasty is how much of the hardware is 3D printed. If it isn’t a motor, smooth rod, or other mechanical component, it’s printed. We’re used to seeing 3D printed parts as brackets or mounts, but rarely do you see an entire chassis printed like this. Not only does it take a serious amount of forethought and design, but the print time itself can be quite prohibitive.

But by designing and printing the majority of Coasty, it really gives it a professional look that would have been harder to achieve if it was a bundle of aluminum extrusions.

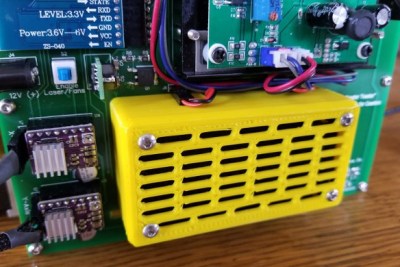
The back of Coasty features an exposed PCB “motherboard” with a dizzying array of plug-in boards. Hardware like the stepper drivers, Bluetooth radio, and laser power supply are separate modules for ease of maintenance and development. There’s a few neat hardware features integrated into the motherboard as well, like the IR sensor for detecting the edge of the coaster.

The printed filter is an especially nice touch. Containing a scrap of commercially available carbon cloth intended for home air filters, Coasty is able to cut down on the smoke that is invariably produced when blasting cardboard with a 3W 450nm laser.

It turns out that custom drink coasters are serious business for some hackers out there. This isn’t the first time somebody has gone all out to make their mark while simultaneously preventing marks.

Continue reading “Coasty The Coaster Toaster”