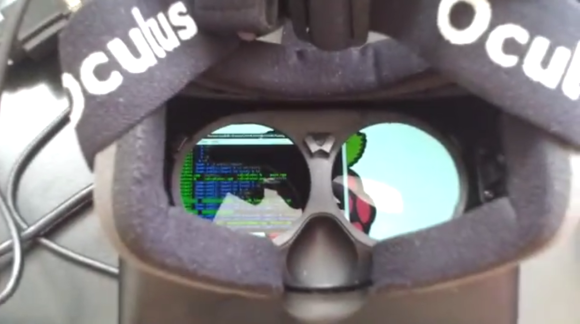
7-Segment Display Matrix Visualizes More Than Numbers

digit-7-segment-visualization

You can pretty much tell that this is an outstretched hand shown on a large grid of 7-segment displays. But the only reason you have to look twice is because it is a still photo. When you see the video below it’s more than obvious what you’re looking at… partly because the device is being used as an electronic mirror.

In total there are 192 digits in the display. To make things easier, four-digit modules were used, although we still couldn’t resist showing you the well-organized nightmare that is the wiring scheme. Each module is driven by its own discrete Arduino (driving 28 LEDs as they’re apparently not connecting the decimal point). All 48 Arduino boards receive commands from a Raspberry Pi which is running openFrameworks to generate the animations.

Now of course the project was well under way before [Peter] discovered a similar display from more than a year ago. But we’re glad that didn’t stop them from forging ahead and even building on the idea. They added a camera to the display’s frame which lets it mirror back whatever is in front of it.

What popped into our minds was one of the recent entries for the Trinket contest.

Continue reading “7-Segment Display Matrix Visualizes More Than Numbers”

Raspis And Arduinos For FM Broadcast Streaming

radio

The biggest Internet provider in Portugal needed a system to turn FM broadcast stations in Angola, Cabo Verde, and Mozambique into a web stream. Like every good project, the people in charge of the engineering turned to Hackaday staples – Raspberry Pis, Arduinos, and TP-Link routers, all stuffed into an awesome modular rackmount cabinet

Each module in this gigantic rackmount system includes an Arduino, a Raspberry Pi, a Silicon Labs Si4705 FM receiver chip, and a TI USB audio capture chip that allows the Pi to turn the audio out from the radio receiver into an audio stream. All the Pis are connected to a 24 port Ethernet switch and to a separate master Raspi that converts data received from each module into an icecast stream.

The engineering behind each module is pretty impressive – they’re all hot swappable, have remote shutdown capability, and have voltage divider on the backplane to detect where in the rack it’s placed. It’s a very cool piece of engineering and a very cool example of using off-the-shelf hardware to do something that could be much, much harder.

Raspberry Pi Smart TV

[Tony] decided his “smart” LED TV wasn’t quite smart enough. So he stuffed a Raspberry Pi in it.

Upon opening the case of his 40″ Hisense Smart LED TV, he discovered that the logic board actually had two unused USB pads — what luck! He tapped off of them to get 5V @ 500mA to power the Pi… Later on he realized this wasn’t the ideal solution — when the TV turned off, it cut the Pi’s power too. So he pulled out his multimeter and probed the board, this time finding a 5V source that remained on while the unit was plugged in.

Next up was the placement of the Raspberry Pi. The included speakers on this particular TV weren’t that good, and since [Tony] uses a surround sound system anyway, he decided to make use of their space better. Cutting out the grill and removing the whole assembly left him with more than enough room to store the Pi and mount a 3D printed LAN and USB port cover!

He’s running Raspbmc which lends the TV tons of functionality. If you don’t mind voiding your warranty, this is a great hack!

Retropie Gaming Table

rasp pi gaming table

[Jody] just finished the write up on this awesome coffee table he’s been working on. It’s an all-in-one gaming table that makes use of Retropie.

When they finally got rid of the kids’ train-play-set table, they needed something to replace it. Eager to use his new collection of tools (including a 3D printer and a laser cutter!), [Jody] decided to build this thing from scratch. He admits he isn’t a very skilled woodworker, but we think he did an excellent job!

The screen is an old laptop LCD that [Jody] took apart and refitted into the nice wood frame you see above. He’s added speakers with 3D printed grills, and the whole thing turns on and off when the screen is lifted, all thanks to a pantry door switch he installed. In the side compartments he has wireless keyboards, mice, and xBox 360 controllers to play the games with. He and his son have already put many hours into the classic Cave Story, first released back in 2004.

There’s a great build log on his site, so if you’re interested in making your own, check it out!

Google Glass? How About This Home-brew Solution?

[Codeninja] has been sending us some great hacks over the years, and we’ve just learned that his attention has been on building wearable computers lately! He’s currently on his third iteration of a Google Glass-like prototype, which features a motorized element which allows for the retraction of the screen.

There’s not too much info on his blog about them, but we do know he’s using a Raspberry Pi, a few small servos, and a pico LCD screen. Most of the frame is 3D printed, and it also features a hidden camera, accelerometers, and a few environmental sensors.

He’s uploaded an animated gif of the mechanism that moves the display away from his eye, and it looks straight out of some science fiction movie — check it out after break!

Continue reading “Google Glass? How About This Home-brew Solution?”

Battery Backup For RasPi Keeps Your Data Safe

We’ve all raised a clench fist in anger over lost data, and it’s usually the result of unjustified optimism and lack of planning. [George] shared his solution that prepares for the worst: a circuit that provides backup power to a RasPi and its hard drives. [George’s] Pi setup runs as both an Apple Time Machine server and a website backup server, and a power outage could corrupt the data stored on the Pi’s attached hard drives.

Rather than turn to commercial solutions, however, [George] wanted to take advantage of the Pi’s low power consumption and create an inexpensive custom circuit that would safely and automatically power down the devices upon loss of power. To detect a power failure, the build connects one of the Pi’s GPIOs to an opto-isolator, which—through a zener diode—connects to the 12V wall adapter: though [George] welcomes suggestions for alternative methods of safely identifying a mains power loss. The rest of the circuit serves as a trickle charger for the two attached 9V batteries and as a regulator to supply the correct voltage to the RasPi. Power MOSFETs connected to a GPIO handle the delayed power off.

You can view (and edit!) the circuit online here and find the relevant source code on [George’s] website. If you want to build your own RasPi file server, try cramming all the parts into an old optical drive enclosure.

Unbricking A Router With A Raspi

About a decade ago, [Mansour] learned of the Linksys WRT54G, a wireless router that’s been shoved into just about every project under the sun. After learning of this device’s power, he decided a firmware upgrade was in order. Unfortunately, he accidentally bricked this router and left it sitting on a shelf for a few years.

Idle devices are the devil’s playthings, and when [Mansour] discovered a Samsung hard drive with a an SDRAM that was compatible with the WRT54G, he decided he would have a go at repairing this ancient router. There was only one problem: the most popular utility for programming the router through the JTAG header required a PC parallel port.

No problem, then, as [Mansour] had a Raspberry Pi on hand. The parallel port utility bit-banged the new firmware over to the router, something the GPIO port on the Pi could do in spades. By adding Pi support to the debricking utility, [Mansour] had a functional WRT54G with just a little bit of patience and a few wires connecting the GPIO and JTAG header.