LayerOne Badges Stop Bullets; Drive Away

We love badges. And we’ve really got to thank [Charliex] for taking the time to write a huge post about this year’s LayerOne badges, especially since they’ve got their backs up against the deadline for pulling everything together in time.

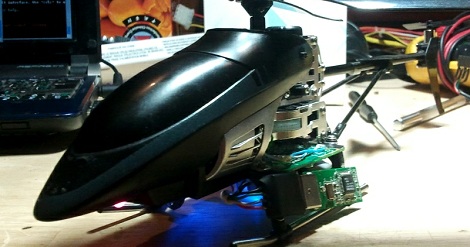
Here it is, the stock badge on the left, with an add-on shield on the right. Now the original intent was to make this badge the chassis of an RC car. [Charliex] chewed through his development time trying to source toy cars that could be gutted for parts that would mount easily on the badge. This looked promising at first, but turned out to be folly. Instead what we have here is an Arduino compatible board with an RF transmitter which can be cut off and used separately if you wish. Attendees will be able to use the badge to take control of the toy cars (cases of them have been shipped to the conference), with the option to use the USB functionality to facilitate automation.

So what about stopping bullets? There is a bug in the module [Charliex] used to export the board design from Eagle. They came back from the fab house as 0.125″ substrate. That’s pretty beefy!

The conference is this weekend… better get on that!

Reverse Engineering An RGB LED Remote

In the quest to add some mood lighting in his basement, [Mohonri] found an infrared wireless remote that is able to control several RGB LED strips. The only problem with this remote is the inability to control it via a wall-mount panel or even a computer. Obviously this would not stand for such a swank basement, so [Mohonri] did the reasonable thing and reverse engineered one of these remotes.

The build started with ripping the remote apart and figuring out how it ticks. [Mohonri] found the small IR LED transmitter and hooked up an oscilloscope to capture some data. After a bunch of trial and error and a big help from relevant documentation he had the entire button matrix – and thus the functions available to the LED strip – available to output via wall panel or computer.

[Mohonri] hasn’t completed his build yet; this was just the reverse engineering and documentation stage. Now, though, it shouldn’t be hard to control the RGB LED strips through an Arduino, a computer, or even an Android/iOS device with a small IR LED plugged into the headphone jack.

(Model) Helicopter Physics

sideways helicopter

If you’ve ever wondered how a helicopter is able to fly, or would just like to see some awesome RC piloting, the four videos after the break should be just the thing! Although the basic physics of how one works is explained in the last three, one would still be hard pressed to explain how [Carl] is able to fly his RC helo the way he does. The video has to be seen to be believed or even explained, but one of the simpler tricks involved taking off a few feet, doing a forward flip, and flying off backwards and upside-down!

As explained in detail in the other videos, a helicopter is controlled by something called a swash plate on the main rotor, which in short translates a linear action into a rotational one. The same thing is done with the tail rotor, but you’ll have to check out the videos after the break for a full explanation! Really ingenious that someone could come up with this analog control system to use before computers were available.

Of particular interest to physics geeks, an explanation of gyroscopic precession is given in the fourth video. Controlling a helicopter may not work exactly the way you thought!

Continue reading “(Model) Helicopter Physics”

Whistle Controls For You Home Electronics

You know how to whistle don’t you? You just put your lips together and blow. But do you know how to make the electronics around you react to your whistled commands? Well [Befi] figured out a system that allows him to assign a whistled command to various home electronics.

He’s using a set of RF remote control outlets to switch power to various devices like a desk lap, or a turn table. The board you see in the image above is the remote control that came with the system, but that chip is an ATmega8 which he added to give round-about USB connectivity using a serial-to-USB converter. The technique is simple enough that we’d bet you can get this to work with an ATtiny2313 and the V-USB project but that’s another story.

The additional piece is the use of embedded Linux to detect and process whistled commands. In the video after the break [Befi] explains that he’s using a Dockstar along with a microphone to capture audio input. It uses a Fast Fourier transform algorithm to process the clip and pushes commands to the remote control after processing is complete. Continue reading “Whistle Controls For You Home Electronics”

The RC Transmitter That Does Everything

[Demetris] sent in a project he’s been working on over the last year. It’s called the Open Source Radio Control, and promises to be a modular platform for every imaginable remote control transmitter need. If you’d like to control a bipedal android or a 3D aerobatic model plane, the OSRC can do it while transmitting video from the cockpit down to your hands.

Last summer, we caught wind of the OSRC project to build an extensible and open source remote control radio that would do anything; from displaying video from the cockpit to serving as the brain of a UAV rig, the OSRC promised to do everything.

A fully decked out OSRC can be had for about $1400, putting it in the upper echelon of remote control radios. For that price, though, you get a fully customizable radio with your choice of shoulder buttons and a 4.8 inch LCD that receives a video feed from the cockpit of your favorite model. The base unit starts out around $700; still very expensive for a remote control radio, but reasonable when you consider all the possible upgrades.

[Demetris] and the rest of the team put together an outrageously long yet surprisingly beautiful video showing off a few features of the OSRC. You can check that out after the break.

Continue reading “The RC Transmitter That Does Everything”

ATtiny44 Drop-in Replacement For Ikea Dioder’s Stock PIC Controller

The Ikea Dioder is an LED light sold at the big blue and yellow building that lets you mix your own colors using a simple button and wheel controller. [Marco Di Feo] looked at all of the other projects out there that alter the controller and figured out that the IC can be directly replaced with an ATtiny44 microcontroller. With that chip soldered onto the board he added IR control so that he can change colors using his universal remote control (translated).

[Marco] removed the potentiometer normally responsible for selecting the color. This frees up one pin on the microcontroller which he then uses to receive signals from a TSOP1736 IR receiver. The video after the break shows the device, which illuminates the back of his home entertainment center, reacting to commands from his remote control.

Of course this can be done without the chip swap as the PIC 16F684 that comes with it can be reprogrammed in place. But [Marco] didn’t have a PICkit or other programmer on hand. Continue reading “ATtiny44 Drop-in Replacement For Ikea Dioder’s Stock PIC Controller”

Workout Timer Has Its Own Fight Bell

This workout timer turned out great. We think [Douglas] managed to end up with a professional look and a full range of features even though he was doing a lot of learning along the way.

He wanted a clock that was capable of counting up or down to time different segments of his workout. In order to be really useful it needed to have a remote control and a way to signal when time had run out. He grabbed an Arduino and started prototyping with an LED marquee at first, but after adding a second Arduino to deal with the display scanning issues he finally switched over to these LED segment displays.

The timer includes an IR receiver so that it can be controlled with a handheld remote. The large red bell to the side has a heck of a ding and is used to signal the start and end of timing. Perhaps the driver for that bell could be incorporated into the home automation project from Wednesday. Once the hardware decisions were finalized [Douglas] set out to build an enclosure that he could be proud of (mission accomplished!). Don’t miss the video after the break where he walks through all various aspects of the user interface. Continue reading “Workout Timer Has Its Own Fight Bell”