The Basics Of SCRs

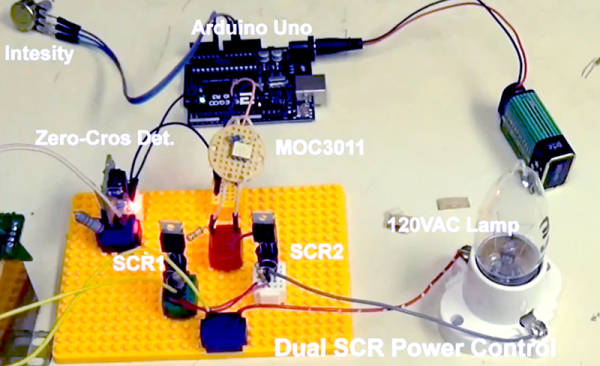
Although the silicon controlled rectifier or SCR has been around since 1957, it doesn’t get nearly the love an ordinary transistor does. That’s a shame because they are quite handy when it comes to controlling AC and DC voltages in things such as lamp dimmers, motor speed controllers, and even soldering iron temperature controllers. [Lewis Loflin] has a short video introduction that will help you get started with these devices.

One of the interesting properties of the device is that once you turn it on it will stay on until you do something specific to turn it back off — sort of, [Lewis] explains it in the video.

Continue reading “The Basics Of SCRs”

Fun With A Hydrogen Thyratron

There’s something oddly menacing about some vacuum tubes. The glass, the glowing filaments, the strange metal grids and wires suspended within – all those lead to a mysterious sci-fi look and the feeling that strange things are happening in there.

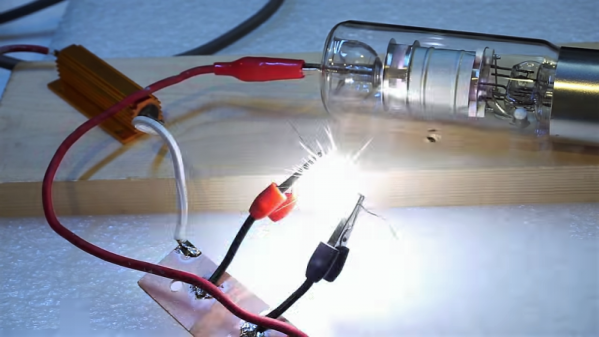
Add in a little high voltage and a tube that makes its own hydrogen, and you’ve got something extra scary. This hydrogen thyratron ended up being just the thing for [Kerry Wong]’s high-voltage, high-current experiments. One would normally turn to the solid-state version of the thyratron, the silicon controlled rectifier (SCR), to switch such voltages. But the devices needed to handle the 30 amps [Kerry] had in mind were exorbitant, and when the IGBTs he used as a substitute proved a little too fragile he turned to the Russian surplus market for help. There he found a TGI1-50/5 hydrogen thyratron, a tube that has a small hydrogen gas generator inside – thyratrons are actually gas-filled rather than vacuum tubes and switch heavy currents through plasma conduction. [Kerry] set up a demo circuit with a small RC network to provide the fast switching pulse preferred by the thyratron, and proceeded to run 3500 volts through a couple of 1/4-W resistors with predictable results. The video below shows the fireworks.

Can’t get enough of the thyratron’s lovely purple glow? We’ve seen it before on this beautiful old switch-mode power supply. The versatile tubes also helped rebuild the first vocal encryption system.

Continue reading “Fun With A Hydrogen Thyratron”

A Look At Chinese Value Engineering

Seventy cents doesn’t buy you a lot these days. Maybe some sweets or candies at most. How about a string of LEDs that you can use to decorate your home during the festive season? [Amaldev] was curious to know what was, or wasn’t, inside these blinky LED strings which made them so cheap. He’s done a Christmas LED Light Teardown and shows how blinky LED string lights can be built with the bare minimum of components.

The string he purchased had 28 LEDs – seven each in four colors, a controller box with one push button and a  power cord. Without even knowing what is inside the controller box, the cost of the product seems astonishing based on this BoM. The single push button cycles through eight different light patterns for each press. It even has a faux CE mark for the supply plug. Cracking open the case, he finds that the controller board is sparsely populated with just seven through hole components and a COB (chip on board) module. A simple, 8-bit, 8-pin microcontroller is possibly what controls the device.

[Amaldev] sketches out a schematic to figure out how it works. There are two arms with 14 LEDs of alternating colors, each of which is controlled by an SCR. Two GPIO output pins from the COB control the gates of each of these SCR’s. The button is connected to a GPIO input, and a second input is connected to the AC supply via a current limiting resistor. Most likely, this is used to determine the zero crossing of the waveform so that the COB can generate the appropriate trigger signals for the gate outputs.

It is unlikely that these products are manufactured using automated processes. The PCB production could be automated, but soldering all the wires, fitting it all in the enclosure and preparing the LED string itself would require manual labor. At US$ 0.7 retail on the street, it is difficult to imagine the cost breakdown even when the quantities are in large numbers. Maybe a combination of cheap components, recycled or rejected parts (mains cord/enclosure), lack of safety and protection measures (no fuses, no strain reliefs) and reducing the component BoM to an absolute, bare minimum, coupled with very high volumes lets them pull it off? What are your thoughts – chime in with comments.

Simple Concepts Behind Complex Coilguns

Coil guns use electromagnetic coils to propel a metal projectile. On the surface they may look rather complicated. But when you break down the concepts it’s pretty easy to learn. If you’ve ever thought of dabbling in this field this lengthy coilgun primer will be a great help.

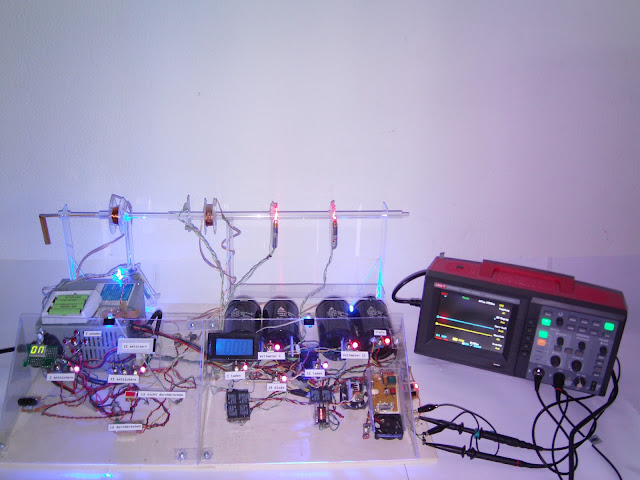
The basic concept of a coilgun comes in three parts: the coil, the voltage source, and the switch that combines the two. In the build above you can see two spools of wire on the clear barrel of the gun. These make up a pair of accelerators which connect to those huge black capacitors supplying the voltage. The switch they used can’t really be seen but from the article we know it’s a Thyristor; a Silicon Controlled Rectifier (2N6504).

In the video after the break you can see these three parts coming together for a test firing. This is the first step in a longer journey. To achieve higher projectile velocities you must add coils, as in the image above. But spacing and timing quickly complicate the simple concept. But if you can work out all the kinks you end up with some pretty great hardware.

Continue reading “Simple Concepts Behind Complex Coilguns”