Reanimating Boney The Robot Dog

[Divconstructors] cashed in after Halloween and picked up a skeleton dog prop from the Home Depot, for the simple and logical purpose of turning it into a robot.

The first step was to cut apart the various body parts, followed by adding bearings to the joints and bolting in a metal chassis fabricated from 1/8″ aluminum stock. This is all pretty standard stuff in the Dr. Frankenstein biz. For electronics he uses a Mega with a bark-emitting MP3 shield on top of it. Separately, a servo control board manages the dozenish servos — not to mention the tail-wagging stepper.

[Divconstructors] actually bought two skeletons, one to be his protoype and the other to be the nice-looking build. However, we at Hackaday feel like he might have missed an opportunity: As any necromancer can tell you, a freakish combination of two skeletons beats out two normal skeletons any night of the week. Also, two words for you to consider: cyberdog ransomeware. We imagine you don’t really feel ransomware until there’s the family robodog ready to test out its high-torque jaw servos on your flesh. Of course if he were a real dog we could either remotely control him with a hot dog, or just give him a talking collar.

A Look At Chinese Value Engineering

Seventy cents doesn’t buy you a lot these days. Maybe some sweets or candies at most. How about a string of LEDs that you can use to decorate your home during the festive season? [Amaldev] was curious to know what was, or wasn’t, inside these blinky LED strings which made them so cheap. He’s done a Christmas LED Light Teardown and shows how blinky LED string lights can be built with the bare minimum of components.

The string he purchased had 28 LEDs – seven each in four colors, a controller box with one push button and a  power cord. Without even knowing what is inside the controller box, the cost of the product seems astonishing based on this BoM. The single push button cycles through eight different light patterns for each press. It even has a faux CE mark for the supply plug. Cracking open the case, he finds that the controller board is sparsely populated with just seven through hole components and a COB (chip on board) module. A simple, 8-bit, 8-pin microcontroller is possibly what controls the device.

[Amaldev] sketches out a schematic to figure out how it works. There are two arms with 14 LEDs of alternating colors, each of which is controlled by an SCR. Two GPIO output pins from the COB control the gates of each of these SCR’s. The button is connected to a GPIO input, and a second input is connected to the AC supply via a current limiting resistor. Most likely, this is used to determine the zero crossing of the waveform so that the COB can generate the appropriate trigger signals for the gate outputs.

It is unlikely that these products are manufactured using automated processes. The PCB production could be automated, but soldering all the wires, fitting it all in the enclosure and preparing the LED string itself would require manual labor. At US$ 0.7 retail on the street, it is difficult to imagine the cost breakdown even when the quantities are in large numbers. Maybe a combination of cheap components, recycled or rejected parts (mains cord/enclosure), lack of safety and protection measures (no fuses, no strain reliefs) and reducing the component BoM to an absolute, bare minimum, coupled with very high volumes lets them pull it off? What are your thoughts – chime in with comments.

Bolt-Together Belt Grinder For The No-Weld Shop

Belt grinding offers a lot of advantages for the metalworker, and since belt grinders are pretty simple machines, shop-built tools are not an uncommon project. A bolt-together belt grinder makes this tool even more accessible to the home gamer.

With no access to a welder but with a basic milling machine and an ample scrap bin at his disposal,  [IJustLikeMakingThings] had to get creative and modify some of the welding-required belt grinder designs he found online to be bolt-up builds.  The key to a cool running belt grinder is for the belt to be as long as possible, and the 2″x72″ belt seems to be the sweet spot, at least here in the States. Machined drive and idler wheels with the crown needed for proper belt tracking were sourced online, as was the D-bracket for holding the two guide wheels. But the rest of the parts were fabricated with simple tools and bolted together. [IJustLikeMakingThings] provides a lot of detail in his write-up, and it shouldn’t be too hard to build a belt grinder just like this one.

Looking for other belt grinder plans to compare notes? Here’s a grinder with an even simpler design, but with welding required.

Flip-Dot Display Brought Out Of Retirement By New Drivers

LED matrix displays and flat-screen monitors have largely supplanted old-school electromechanical models for public signage. We think that’s a shame, but it’s also a boon for the tinkerer, as old displays can be had for a song these days in the online markets.

Such was the case for [John Whittington] and his flip-dot display salvaged from an old bus. He wanted to put the old sign back to work, but without a decent driver, he did what one does in these situations — he tore it down and reverse engineered the thing. Like most such displays, his Hannover Display 7 x 56-pixel flip-dot sign is electromechanically interesting; each pixel is a card straddling the poles of a small electromagnet. Pulse the magnet and the card flips over, changing the pixel from black to fluorescent green. [John] used an existing driver for the sign and a logic analyzer to determine the protocol used by the internal electronics to drive the pixels, and came up with a much-improved method of sending characters and graphics. With a Raspberry Pi and power supply now resident inside the case, a web-based GUI lets him display messages easily. The video below has lots of details, and the code is freely available.

You may recall [John] from a recent edge-lit Nixie-like display. Looks like he’s got a thing for eye-catching displays, and we’re fine with that.

Continue reading “Flip-Dot Display Brought Out Of Retirement By New Drivers”

Anouk Wipprecht: Robotic Dresses And Human Interfaces

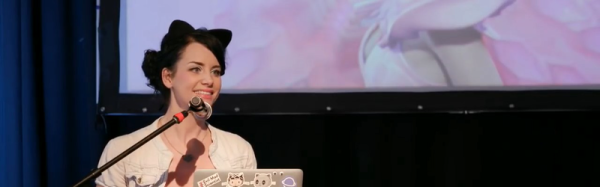
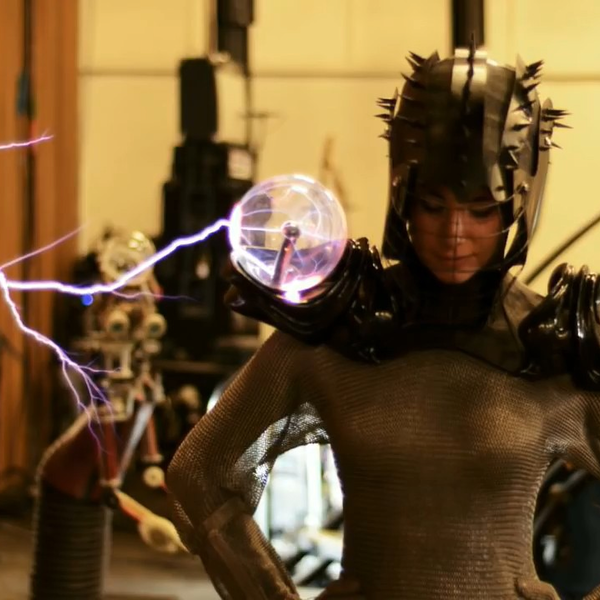
Anouk Wipprecht‘s hackerly interests are hard to summarize, so bear with us. She works primarily on technological dresses, making fashion with themes inspired by nature, but making it interactive. If that sounds a little bit vague, consider that she’s made over 40 pieces of clothing, from a spider dress that attacks when someone enters your personal space too quickly to a suit with plasma balls that lets her get hit by Arc Attack’s giant musical Tesla coils in style. She gave an inspiring talk at the 2017 Hackaday Superconference, embedded below, that you should really go watch.

Anouk has some neat insights about how the world of fashion and technology interact. Technology, and her series of spider dresses in particular, tends to evolve over related versions, while fashion tends to seek the brand-new and the now. Managing these two impulses can’t be easy.

For instance, her first spider was made with servos and laser-cut acrylic, in a construction that probably seems familiar to most Hackaday readers. But hard edges, brittle plastic, and screws that work themselves slowly loose are no match for human-borne designs. Her most recent version is stunningly beautiful, made of 3D printed nylon for flexibility, and really nails the “bones of a human-spider hybrid” aesthetic that she’s going for.

The multiple iterations of her drink-dispensing “cocktail dress” (get it?!) show the same progression. We appreciate the simple, press-button-get-drink version that she designed for a fancy restaurant in Ibiza, but we really love the idea of being a human ice-breaker at parties that another version brings to the mix: to get a drink, you have to play “truth or dare” with questions randomly chosen and displayed on a screen on the wearer’s arm.

Playfulness runs through nearly everything that Anouk creates. She starts out with a “what if?” and runs with it. But she’s not just playing around. She’s also a very dedicated documenter of her projects, because she believes in paying the inspiration forward to the next generation. And her latest project does something really brilliant: merging fashion, technology, and medical diagnostics.

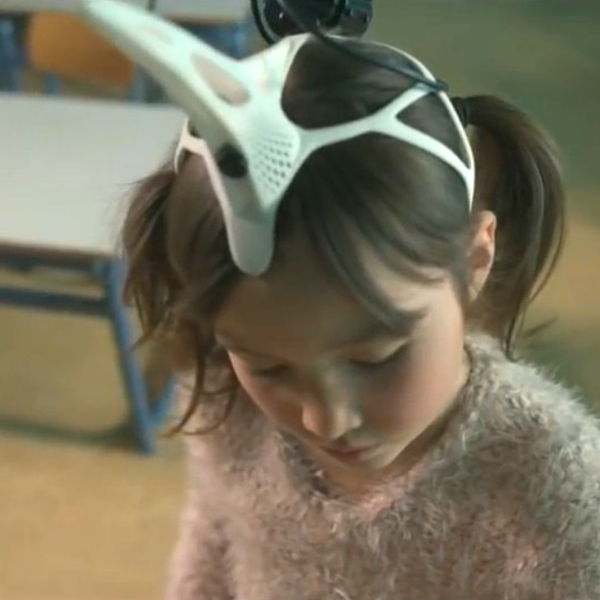
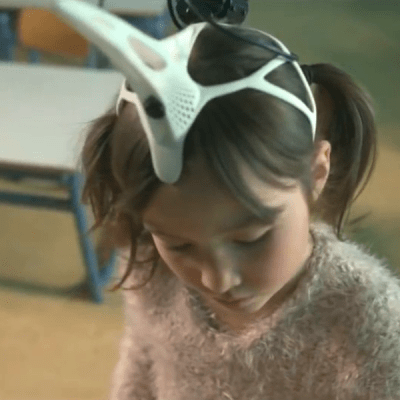
It’s a stripped-down EEG that kids with ADHD can wear around in their daily lives that triggers a camera when their brains get stimulated in particular ways. Instead of a full EEG that requires a child to have 30 gel electrodes installed, and which can only be run in a medical lab, stripping down the system allows the child to go about their normal life. This approach may collect limited data in comparison to the full setup, but since it’s collected under less intimidating circumstances, the little data that it does collect may be more “real”. This project is currently in progress, so we’ll just have to wait and see what comes out. We’re excited.

There’s so much more going on in Anouk’s presentation, but don’t take our word for it. Go watch Anouk’s talk right now and you’ll find she inspires you to adds a little bit more of the human element into your projects. Be playful, awkward, or experimental. But above all, be awesome!

Continue reading “Anouk Wipprecht: Robotic Dresses And Human Interfaces”

Joan Feynman Found Her Place In The Sun

Google ‘Joan Feynman’ and you can feel the search behemoth consider asking for clarification. Did you mean: Richard Feynman? Image search is even more biased toward Richard. After maybe seven pictures of Joan, there’s an endless scroll of Richard alone, Richard playing the bongos, Richard with Arline, the love of his life.

Yes, Joan was overshadowed by her older brother, but what physicist of the era wasn’t? Richard didn’t do it on purpose. In fact, no one supported Joan’s scientific dreams more than he did, not even their mother. Before Richard ever illuminated the world with his brilliance, he shined a light on his little sister, Joan.

Continue reading “Joan Feynman Found Her Place In The Sun”

Python Keeps A Gecko Happy: Terrarium Automation With Raspberry Pi

For better or worse, pets often serve as inspiration and test subjects for hardware hacks: smarten up that hamster wheel, tweet the squirrel hunting adventures from a dog’s point of view, or automate and remote control a reptile enclosure. [TheYOSH], a gecko breeder from the Netherlands, chose the latter and wrote TerrariumPi for the Raspberry Pi to control and monitor his exotic companion’s home through a convenient web interface.

The right ecosystem is crucial to the health and happiness of any animal that isn’t native to its involuntarily chosen surroundings. Simulating temperature, humidity and lighting of its natural habitat should therefore be the number one priority for any pet owner. The more that simulation process is reliably automated, the less anyone needs to worry.

TerrariumPi supports all the common temperature/humidity sensors and relay boards you will find for the Raspberry Pi out of the box, and can utilize heating and cooling, watering and spraying, as well as lighting based on fixed time intervals or sensor feedback. It even supports location based sunrise and sunset simulation — your critter might just think it never left Madagascar, New Caledonia or Brazil. All the configuration and monitoring happens in the browser, as demonstrated in [TheYOSH]’s live system with public read access (in Dutch).

It only seems natural that Python was the language of choice for a reptile-related system. On the other hand, it doesn’t have to be strictly used for reptiles or even terrariums; TerrariumPi will take care of aquariums and any other type of vivarium equally well. After all, we have seen the Raspberry Pi handling greenhouses and automating mushroom cultivation before.