An Hour To Surface Mount

Most of us have made the transition from through hole parts to surface mount. There are lots of scattered tutorials, but if you want to learn some techniques or compare your technique to someone else’s, you might enjoy [Moto Geek’s] hour-long video on how he does surface mount with reflow soldering. You can see the video below.

What makes the video interesting is that it is an hour long and covers the gamut from where to get cheap PCBs, to a homebrew pick and place pencil. [Moto Geek] uses a stencil with solder paste, and he provides links to the materials he uses. Continue reading “An Hour To Surface Mount”

Ambitious ATtiny85 Board Tests A Beginner’s Skills

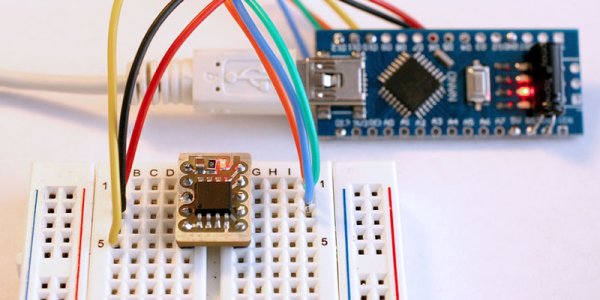
[Chris O’Riley] has been playing around with Arduinos for around a year, and decided he wanted a breadboardable ATtiny85 in order to prototype using the actual controller that would be used in the final project. He wants to use it to interface with a Bosch BMP280 pressure sensor, but for now it stands alone.

It’s a simple board with the Tiny85, 3.3 V and 5 V regulators, a power LED, as well as the usual resistors and caps [Ed: not resistor sand caps]. The double-sided PCB [Chris] milled himself — he’s an illustrator and photographer by day, so it’s no surprise the board turned out gorgeous. He designed the board in Illustrator after taking a stab at Eagle, then ran it through his CNC to mill the circuits using a .017 inch end mill as well as drilling the vias. He add solder paste using the tip of a knife, but after messing around with an iron, he ended up investing in a hot air rework station.

We love our Tiny85s here on Hackaday. Check out the ATtiny85 gaming console, the NTSC-generating ATTiny85, and making DIY I2C devices with the chip.

Cameo Cutter Makes SMD Stencils

You never know what you might find in an arts and craft store. A relatively recent addition to crafting is automatic cutting machines like the Cricut and Cameo cutters. These are typically used to cut out shapes for scrapbooking, although they will cut or engrave almost anything thin. You can think of them as a printer with a cutting blade in place of the print head. [Mikeselectricstuff] decided to try a Cameo cutter to produce SMD stencils. The result, as you can see in the video below, is quite impressive.

If you’ve ever wanted to do SMD soldering with a reflow oven, stencils are invaluable for putting solder paste on the board where you want it quickly. The board [Mike] has contains a boat-load (over 2,000) of LEDs and dropping solder on each pad with a syringe would be very time consuming (although he did do some touch up with a syringe).

The board he’s using doesn’t have any extreme fine-pitched parts. However, he did some test patterns and decided he could get down to a finer pitch, especially with a little tweaking. However, the stencil he used didn’t need any changes. All he did was export the solder paste layer as a DXF and bring it straight into the Cameo software.

This isn’t the first time we’ve seen one of these cutters pressed into stencil service. You can also get some use out of your 3D printer.

Continue reading “Cameo Cutter Makes SMD Stencils”

From Zero To Nano

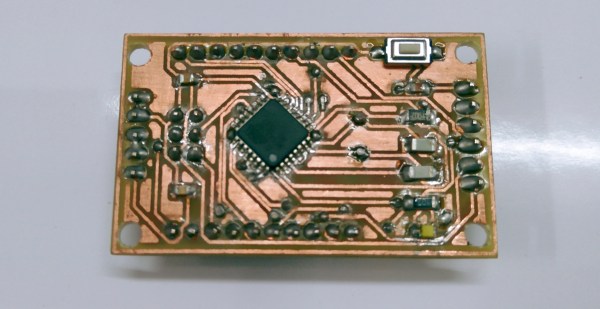
Have you ever wanted to build your own Arduino from scratch? [Pratik Makwana] shares the entire process of designing, building and flashing an Arduino Nano clone. This is not an entry-level project and requires some knowledge of soldering to succeed with such small components, but it is highly rewarding to make. Although it’s a cheap build, it’s probably cheaper to just buy a Nano. That’s not the point.

The goal here and the interesting part of the project is that you can follow the entire process of making the board. You can use the knowledge to design your own board, your own variant or even a completely different project.

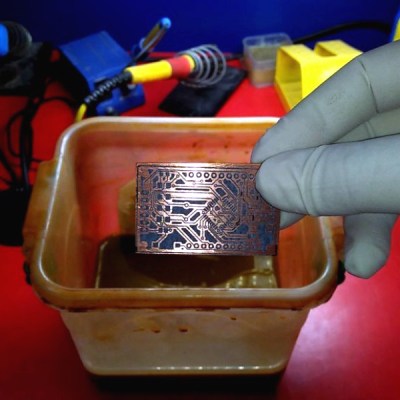
from-zero-to-nano-thumb[Pratik Makwana] starts by showing how to design the circuit schematic diagram in an EDA tool (Eagle) and the corresponding PCB layout design. He then uses the toner transfer method and a laminator to imprint the circuit into the copper board for later etching and drilling. The challenging soldering process is not detailed, if you need some help soldering SMD sized components we covered some different processes before, from a toaster oven to a drag soldering process with Kapton tape.
Last but not least, the bootloader firmware. This was done using an Arduino UNO working as master and the newly created the Arduino Nano clone as target. After that you’re set to go. To run an actual sketch, just use your standard USB to UART converter to burn it and proceed as usual.

Voilá, from zero to Nano:

Continue reading “From Zero To Nano”

[Dave’s] Not Just A Member Of The Air Club For Tweezers

We are always surprised how much useful hacking gear is in the typical craft store. You just have to think outside the box. Need a hot air gun? Think embossing tool. A soldering iron? Check the stained glass section. Magnification gear? Sewing department.

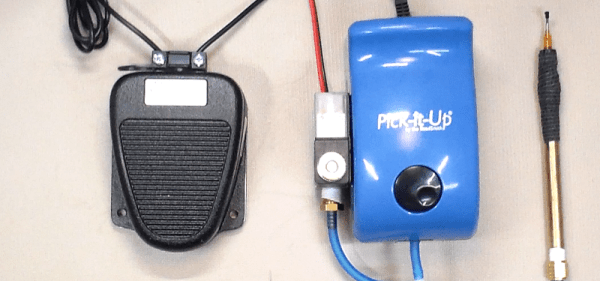
We’ve figured out that people who deal with beads use lots of fine tools and have great storage boxes. But [Dave] found out they also use vacuum pickup tweezers. He had been shopping for a set and found that one with all the features he wanted (foot pedal, adjustable air flow, and standard tips) would run about $1000.

By picking up a pump used for bead makers and adding some components, he put together a good-looking system for about $200. You can see a video of the device, below, and there are several other videos detailing the construction.

Continue reading “[Dave’s] Not Just A Member Of The Air Club For Tweezers”

Reflow Soldering At Another Level

We’re used to reflow soldering of our PCBs at the hacker level, for quite a few years people have been reflowing with toaster ovens, skillets, and similar pieces of domestic equipment and equipping them with temperature controllers and timers. We take one or two boards, screen print a layer of solder paste on the pads by using a stencil, and place our surface-mount components with a pair of tweezers before putting them in the oven. It’s a process that requires  care and attention, but it’s fairly straightforward once mastered and we can create small runs of high quality boards.

But what about the same process at a professional level, what do you do when your board isn’t a matchbox-sized panel from OSH Park with less than 50 or so parts but a densely-packed multilayer board  about the size of a small tablet computer and with many hundreds of parts? In theory the same process of screen print and pick and place applies, but in practice to achieve a succesful result a lot more care and planning has to go into the process.

This is being written the morning after a marathon session encompassing all of the working day and half of the night. I was hand-stuffing a row of large high-density boards with components ranging from 0402 passives to large QFPs and everything else in between. I can’t describe the board in question because it is a commercially sensitive prototype for the industrial customer of the friend I was putting in the day’s work for, but it’s worth going through the minutiae of successfully assembling a small batch of prototypes at this level. Apologies then, any pictures will be rather generic.

Continue reading “Reflow Soldering At Another Level”

Turn Cheap USB Soldering Irons In To Tweezers

This is 2016, and almost every hacker dabbles with SMD parts now, unlike back in the day. This means investing in at least some specialized tools and equipment to make the job easier. One handy tool is the SMD soldering tweezers – useful not only for manual soldering of parts, but also for de-soldering them quickly and without causing damage to the part or the board. Often, especially when repairing stuff, using a hot air gun can get tricky if you want to remove just one tiny part.

smd_tweezer_04[adria.junyent-ferre] took a pair of cheap £5 USB soldering irons and turned them into a nifty pair of SMD soldering tweezers. The two irons are coupled together using a simple, 3D printed part. [adria]’s been through a couple of iterations, so the final version ought to work quite well. The video after the break shows him quickly de-soldering a bunch of 0805 SMD resistors in quick succession.

Earlier this year, we had posted [BigClive]’s tear down of these 8 watt USB soldering irons which turned out to be surprisingly capable and this spurred [adria] to order a couple to try them out.

The 3D printed part is modeled in SolveSpace – a parametric 2D and 3D CAD software that we blogged about a while ago. Continue reading “Turn Cheap USB Soldering Irons In To Tweezers”