Hacklet 85: Alternative Audio Amplifiers

When you think of amplifiers, you’re probably thinking of audio or some big ‘ol power amps for radios. While interesting, there are some very interesting ‘alternative’ amplifiers floating around hackaday.io that are more than just power amps, and exceedingly useful, to boot.

1601181393316190625[Ronald] bought an XMS amplifier a few years ago, and although it worked well, every time he changed the input, the loudness had to be toggled. One thing led to another, and he realized this amplifier had a four-channel audio processor that could be controlled by I2C. This was the beginning of his Network Amplifier.

Inside the box is a Raspberry Pi that controls a PT2314-based amplifier. Also included is a 2×16 character LCD, a few LEDs, switches, and a rotary encoder.  There was an Android app that controlled the amplifier, but this was discarded for a better looking web-based solution. Now [Ronald] has every audio source available over WiFi.

973501443636885535What if you want an audio amplifier without a speaker? Wait, what? That’s what [DeepSOIC] is doing with his experiments in ion wind loudspeakers.

‘Ion wind lifters’ have been around for decades now, mostly in the labs of slightly off-kilter people who believe this is the technology aliens are using to visit earth. Nevertheless, ion wind lifters produce an airflow, and if you make that wind variable, you get sound. Pretty cool, huh?

The amplifier for this project uses a tube to modulate kilovolt supply through the ion ‘blower’. Does it work? Sure does. [DeepSOIC] got a piece of 0.2 mm nichrome wire to discharge ions into the air, after which the ions drift into the second electrode. The result is sound, and the entire project is built deadbug style. It really doesn’t get cooler than this.


2981611414932529525Continuing with the tube amp trend, [Marcel] built the cheapest little tube amp around.

The design of an audio tube amp is fairly simple business. First, you start with a big ‘ol transformer, and rectify the AC into DC. This gets fed into a preamp tube, and this is fed into a bigger power tube.

In about 50 years of development, tube designers had the technology down pat by the mid 1950s, and triode/pentode tubes were created. This allowed tube designers to condense two amplifier stages into a single tube. While this setup was usually used for cheap, toy-like electronics, you can still buy the ECL82 tube today.

[Marcel] took one of these tubes, added a rectifier tube, transformer, and big cap to create the simplest possible tube amp. Use it for guitars, use it for hi-fis, it’s all the same. It’s not going to sound great, but it is a very easy amp to build.

All of these interesting audio amplifier projects are curated on this new list! If you have a build that amplifies sound in an interesting way, don’t be shy, just drop [Adam] a message on Hackaday.io and he’ll add it. That’s it for this week’s Hacklet. As always, see you next week. Same hack time, same hack channel, bringing you the best of Hackaday.io!

Solar-Cell Laser Communication System

Forget the soup cans connected by a piece of string. There’s now a way to communicate wirelessly that doesn’t rely on a physical connection… or radio. It’s a communications platform that uses lasers to send data, and it’s done in a way that virtually anyone could build.

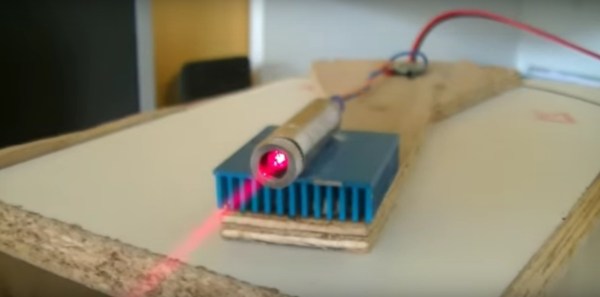
This method for sending information isn’t exactly new, but this project is one of the best we’ve seen that makes it doable for the average tinkerer. A standard microphone and audio amplifier are used to send the signals to the transmitter, which is just a typical garden-variety laser that anyone could find for a few dollars. A few LEDs prevent the laser from receiving too much power, and a solar cell at the receiving end decodes the message and outputs it through another amplifier and a speaker.

Of course you will need line-of-sight to get this communications system up and running, but as long as you have that taken care of the sky’s the limit. You can find incredibly powerful lasers lying around if you want to try to increase the communication distance, and there are surprisingly few restrictions on purchasing others that are 1W or higher. You could easily increase the range, but be careful not to set your receiving station (or any animals, plants, buildings, etc) on fire!

Continue reading “Solar-Cell Laser Communication System”

Laminated iPod Dock Speaker

Solid Plywood Enclosure IPod Speaker Dock

Portable Media Players are great for listening to music on the go. At home though, using headphones may not be the most convenient or comfortable option. [decpower] didn’t have a stereo to connect his iPod to. Since he didn’t want to shell out a bunch of money to buy one, he decided to build his own iPod dock and powered speaker combo.

Laminated iPod Dock Speaker The case is made out of plywood: many, many layers of plywood. Each layer of plywood was cut out using a laser cutter. Unlike most speaker cabinets that have a distinct boxy enclosure, this unit is mostly solid with cutouts in each layer only where voids were designed to be. [decpower] tried to replicate the Bose Wave Radio internal sound passages. Up top a dock slot complete with a 30-pin connector makes connecting an iPod super simple.

Unfortunately, [decpower] doesn’t say what he’s using for an amplifier or where his speakers came from. He does indicate that there is an internal battery for powering the setup and it appears there is a volume knob out back. Regardless, the final project looks pretty good and [decpower] deserves some kudos for the unique construction method.

boom box

Get Blown Away By The Boominator

You have a greater chance of squeezing 5 amps through a 2N2222 than you do remembering the 1980s and not thinking about the legendary ‘boom box’. They could be seen perched on the shoulders of rockers and rappers alike – many sporting the Members Only or red leather jackets. The boom boxes visual characteristics can best be described as a rectangular box with two very large speakers on each end. It is no accident that The Boominator shares these features.

[Jesse van der Zouw] did a good job of showing how he created The Boominator. It has not two, but four 10 inch woofers that delivers 360 degrees of awesomeness at 115dB. The on board battery can sustain it for up to twenty hours, and the project is topped off with some blue LED rings the encircle each speaker.

We’ve seen boom boxes here before, but this is the first with some nice LED accents. Be sure to check out this build and let us know what you might have done differently.

[via Hackaday.io]

DIY Speaker Build

There is something refreshing about a neat, portable audio hack – especially one than involves making a DIY Speaker Box from scratch. [Dave] had some time to spare and his ShapeOko was lying idle and hankering for some attention. He needed a small speaker that he could place outside when entertaining guests. After some quick homework, he zeroed in on the speakers he would use.

Using some online resources , he did some basic math to figure out the box size and shape, but then eventually threw caution to the wind and went ahead with the design he had in mind. Most speaker box builds use some form of wood or MDF. [Dave] had 9mm thick ABS sheets lying around and decided to use them instead. He used an interesting technique for putting the box together. The front and rear panels had slots milled in to them to follow the shape of the side panels. The two side panels had strategically cut slots half way through the thickness of the ABS to make it easier to heat bend them. He then used a heat gun to bend the side panels to fit them to the slots on the front and back panels. In the end, we’re guessing he used just four pieces of ABS to build a complex shape. Since the HiVi B3N speakers are full range, he also built a 1st order crossover to make sure the highs were diverted to the tweeters. All in all, a neat, clean build.

Converting Morse Code To Text With Arduino

Morse code used to be widely used around the globe. Before voice transmissions were possible over radio, Morse code was all the rage. Nowadays, it’s been replaced with more sophisticated technologies that allow us to transmit voice, or data much faster and more efficiently. You don’t even need to know Morse code to get an amateur radio license any more. That doesn’t mean that Morse code is dead, though. There are still plenty of hobbyists out there practicing for the fun of it.

[Dan] decided to take a shortcut and use some modern technology to make it easier to translate Morse code back into readable text. His project log is a good example of the natural progression we all make when we are learning something new. He started out with an Arduino and a simple microphone. He wrote a basic sketch to read the input from the microphone and output the perceived volume over a Serial monitor as a series of asterisks. The more asterisks, the louder the signal. He calibrated the system so that a quiet room would read zero.

He found that while this worked, the Arduino was so fast that it detected very short pulses that the human ear could not detect. This would throw off his readings and needed to be smoothed out. If you are familiar with button debouncing then you get the idea. He ended up just averaging a few samples at a time, which worked out nicely.

The next iteration of the software added the ability to detect each legitimate beep from the Morse code signal. He cleared away anything too short. The result was a series of long and short chains of asterisks, representing long or short beeps. The third iteration translated these chains into dots and dashes. This version could also detect longer pauses between words to make things more readable.

Finally, [Dan] added a sort of lookup table to translate the dots and dashes back into ASCII characters. Now he can rest easy while the Arduino does all of the hard work. If you’re wondering why anyone would want to learn Morse code these days, it’s still a very simple way for humans to communicate long distances without the aid of a computer.

Spy Pen

Turning An Ordinary Pen Into A Covert Radio Receiver

[Ben Krasnow’s] latest project will be good for anyone who wants a complicated way to cheat on a test. He’s managed to squeeze a tiny FM radio receiver into a ballpoint pen. He also built his own bone conduction microphone to make covert listening possible. The FM radio receiver is nothing too special. It’s just an off the shelf receiver that is small enough to fit into a fatter pen. The real trick is to figure out a way to listen to the radio in a way that others won’t notice. That’s where the bone conduction microphone comes in.

A normal speaker will vibrate, changing the air pressure around us. When those changes reach our ear drums, we hear sound. A bone conduction mic takes another approach. This type of microphone must be pressed up against a bone in your skull, in this case the teeth. The speaker then vibrates against the jaw and radiates up to the cochlea in the ear. The result is a speaker that is extremely quiet unless it is pressed against your face.

Building the bone conduction mic was pretty simple. [Ben] started with a typical disk-shaped piezoelectric transducer. These devices expand and contract when an alternating current is passed through them at a high enough voltage. He cut the disk into a rectangular shape so that it would fit inside of the clicker on the ballpoint pen. He then encased it in a cylinder of epoxy.

The transducer requires a much higher voltage audio signal than the litter radio normally puts out. To remedy this problem, [Ben] wired up a small impedance matching transformer to increase the voltage. With everything in place, all [Ben] has to do to listen to the radio is chew on the end of his pen. While this technology might help a cheater pass an exam, [Ben] also notes that a less nefarious use of this technology might be to place the speaker inside of the mouthpiece of a CamelBak. This would allow a hiker to listen to music without blocking out the surrounding noise. Continue reading “Turning An Ordinary Pen Into A Covert Radio Receiver”