Programming A Microcontroller One Bit At A Time

Imagine you’re stuck on a desert island, hundreds of miles away from the nearest person, and you finally have time to finish that project you’re working on. You have a single microcontroller, but you’re lacking a computer and you need to program an ATtiny13. How do you do it? [androidruberoid] figured out how to manually flash a microcontroller (Russian, surprisingly good translation) using just three switches and a lot of patience.

[androidruberoid]’s ATtiny13 – like nearly all Atmel microcontrollers – are programmed using an SPI interface. This interface requires four signals: SCK, a data clock, MOSI, the data line from master to slave, MISO, data from slave to master, and RESET. By connecting these data lines to buttons, [androidruberoid] is able to manually key in new firmware one byte at a time.

This technique of manually programming bits relies on the fact that there is no minimum speed for an SPI interface. In the video after the break, you can see [androidruberoid] manually programming an ATtiny13 with a simple program. It only lights up an LED, but with enough patience he could key in a simple ‘blink a LED’ program.

Continue reading “Programming A Microcontroller One Bit At A Time”

Gaining Low-level SPI Access On The Raspberry Pi

Raspberry Pi - rpi

We’ve seen a ton of projects that interface hardware with the Raspberry Pi. But they usually depend on bit-banging. That means they toggle the pins in software to match a specific protocol. The thing is that the beefy Broadcom SoC that anchors the board has a lot of built-in peripherals that are just waiting to be used instead of bit banging. In this case, it’s the hardware SPI peripheral which can be accessed via the bcm2835 library for RPi.

One of the things that would have really complicated this process is the pin mapping between the Broadcom chip and the RPi GPIO header. Since not all pins are broken out, it was either luck or good design forethought that made all of the SPI0 pins from the chip available on the RPi breakout header. The library page (linked above) explains this well. But if you’re looking for more of a working example check out [EngineerByNight’s] project with adds an accelerometer using hardware SPI.

Linux Picture Frame Serves As Wireless Raspberry Pi Display

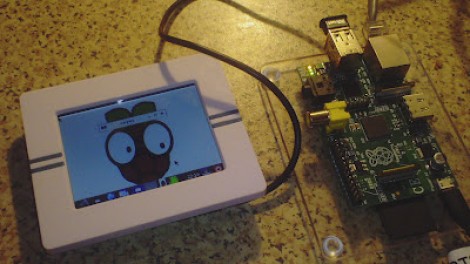
Here’s a novel approach to adding a display to your Raspberry Pi. Instead of using a wired display — either via the HDMI (which can feed a DVI port with a simple hardware adapter) or the composite video out — [Chris Bryden] decided to use Bluetooth to provide a wireless display. This really depends on the hardware that you have available. He snapped up a hackable digital picture frame for a song and used the 320×240 display for this project.

You can see the USB nub plugged into the RPi in the image above. It’s a Bluetooth dongle and there’s with a matching one on the digital frame. With the two networked in such a way [Chris] got to work setting up a VNC that would let him pull up the X desktop over the network.

This ends up being one of the best uses we’ve seen for the Bluetooth protocol, and the small screen offers a huge advantage over the use of a simple character display.

Salvaged LCD Screen Hacking

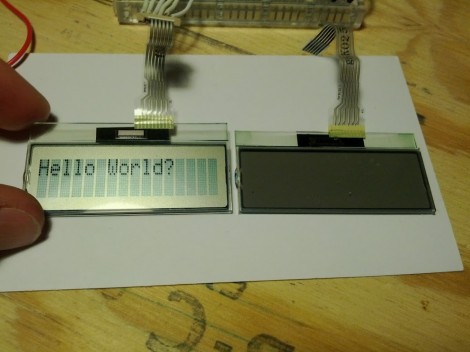
You can find all kinds of LCD screens in broken electronics. But it’s often a chore to figure out how they are controlled if you don’t have a working device that can be used to sniff the communications protocol. [Justin] grabbed this character LCD screen from an old Brother printer and decided to see if he could reuse it in his own projects. Luckily the driver card still worked so he patched into the LCD’s control lines and sniffed the signals when the printer is powered on.

He used the OpenBench Logic Sniffer for this project. It easily captured the data, and also provided analysis tools. The SPI analyzer managed to decode the command signals and message of “Please wait” that pops up at power up. After a bit of folly with the pin out of the display, he is now able to control it thanks to an Arduino library which he wrote. Check out the demo after the break to seem him scrolling through a bunch of different functions for the device.

Continue reading “Salvaged LCD Screen Hacking”

Simple Hardware And Python Drive This Splunk LED Meter

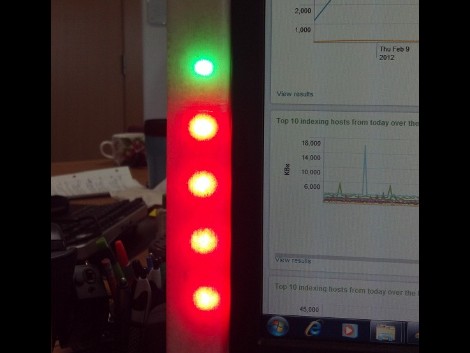
Want to monitor the company system without continually loading up the Splunk dashboard? It turns out that they’ve got their own Python package which makes pulling down data a snap. All [Rick] needed to do was hook up an LED meter as an external display.

It used to be that this would take a lot of wire and bit of soldering (or some special Christmas lights), but the advent of affordable LED strips has really taken the guess-work out of it. He’s using an RGB version acquired from Adafruit Industries. These strips are driven using SPI and multiple-colors mean you can display multi-dimensional data using one column. He chose to use a Teensy microcontroller, grabbing some plastic packaging for welding rods as the enclosure. These strips are extremely bright and to help soften the impact he added wax paper to the inside of the enclosure to act as a diffuser.

Looking for more projects that use strips like this one? They make fantastic addressable accent lighting for your home.

Smother Yourself In Addressable LEDs

Guess where this guy’s headed in his suit of many colors? If you said Burning Man give your self a pat on the back. After making a half-hearted EL suit for the festival in 2010 [Sander] decided he needed to step it up this year. He bought and affixed 200 LED modules to this suit so that he could light up the night.

They’re mounted in a grid, and in order to keep the changing patterns orderly he mapped the physical location of each in his code using a two-dimensional array. The controller uses an Arduino nano to push the patterns out to the array via SPI.

[Sander] included several different visual effects for the controller. One strobes the suit starting from the right cuff when he shakes someone’s hand. There’s also an audio spectrum analyzer chip and microphone that let him pulse the lights to music. You can see how bright this thing is in the image above, but to get the full effect shouldn’t skip the video after the break.

He’s entered the project into the Full Spectrum Laser Cutter giveaway. If he wins, we expect laser cut goodness for next year’s festival!

Continue reading “Smother Yourself In Addressable LEDs”

Video Display From RGB Strips Makes It Seem So Easy

[Fabien] wrote in to share a link to this RGB video display which he made. He’s got some pretty cool routines that make it more functional than you would think, but first we want to comment on the construction. He used an RGB strip, which makes this look like an incredibly simple build. The strip has a data and power bus running the length of it. You can it into smaller segments, then just solder jumper wires to reconnect the buses. That’s exactly what he did here, making it what must be the fastest method of putting together a display of this size (16×10 pixels).

It’s driven by a Netduino which easily addresses the LPD8806 drivers responsible for the LEDs. It gets input from a computer via Xbee, making it easy to include data from the net, or to push visualizations. The video after the break shows a [Van Gogh] self-portrait. Since 160 pixel resolution wouldn’t do it justice, the visualization software shows a zoomed in portion of the painting which is constantly panning to let you see the entire work. It’s a fabulous effect.

Continue reading “Video Display From RGB Strips Makes It Seem So Easy”