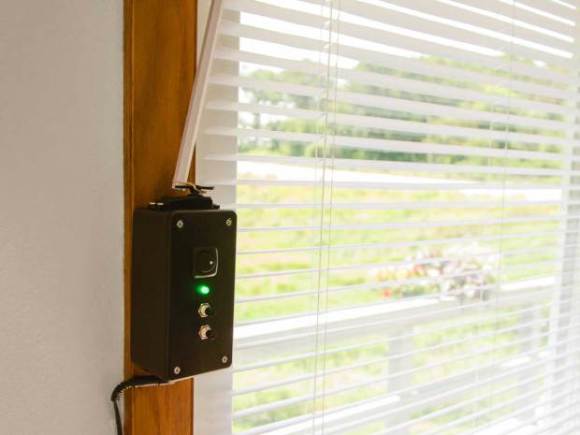
Standalone USB Temperature Logger

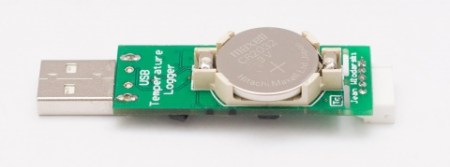
[Jean] wrote in eager to share his latest project, a standalone temperature logger with USB connectivity. Back in November, [Jean] found himself wanting a temperature logger that was roughly the size of a USB memory stick. What he found on the market was not quite adequate in terms of price or size, so he decided to design his own. His would be the size he wanted and wouldn’t require any software or drivers to run. You simply plug it in, edit the configuration text file to set your intervals, and off you go!

You can follow along through the entire design and fabrication on his site. He’s really great about discussing why he made each decision and how he resolved any errors he ran into. You can download the schematics and source code on his site.

Continue reading “Standalone USB Temperature Logger”

Garden Sensors Measure Soil Moisture And Greenhouse Temperature

[Andy] is getting his garden up and running. This year it’s been pretty cold so he decided to get small plastic domed tunnel which acts as a mini greenhouse. To help monitor that environment he built this sensor array which displays temperature and soil moisture readings.

Temperature is quite simple. He’s using a TMP36 sensor which is held a few inches above the soil. The moisture sensor is of his own design. It uses two building screws embedded in foam. These are pushed into the soil and a resistance reading indicates moisture level. By driving voltage on one screw, and measuring voltage on the other he gets some useful data. It’s not a standardized value, but observation over time will let him know how the scale relates to dry or wet soil.

During the build process he found that he needed a pull-down resistor on the probe used to take the moisture measurement. He also uses an I/O pin to drive the other screw. This gives him a way to shut off the juice when not taking a reading. We just hope he’s either got a current limiting resistor, or is using a transistor to drive it high.

Upgrading A Digital Multimeter To Tell The Temperature

[Rajendra] tipped us off to this really slick hack he’s done to allow his multimeter to tell the ambient temperature. He’s basically measuring the output of an LM35 temp sensor that he has mounted in the case. The circuit is extremely simple and only requires the sensor, a couple resistors, and a switch so that you can return to normal function. When finished, you’ll have a multimeter that will display the ambient temperature when set to to the correct range (0-200 mV in his case). The switch is there so that you can return your multimeter to normal function afterwards.  While [Rajendra] chose to display ambient temperature, you could just as easily create an external probe for measuring other things.

A Simple Project To Get You Started With The Android ADK

simple-adk-exercise

If you just got your hands on a shiny new Android phone and are looking for a fun project to try out, you might want to check out this simple Arduino exercise that [Mike Mitchel] put together. Everyone needs a starting off point for hacking, and [Mike] thought that combining and Arduino and Android handset together for the purpose of temperature sensing and light metering would be a great place to begin.

The prerequisites for this project are a bit beyond a simple breadboard and a few ICs, requiring an $80 Android ADK board to go along with your phone and Arduino. If your focus is going to be on interfacing your phone with microcontrollers however, it’s purchase you’ll make sooner than later anyhow.

The setup is pretty simple as you might expect. A photocell and TMP36 temperature sensor are connected to the Arduino, then with a bit of code and USB host magic, the Android app shows the temp and amount ambient light present in the room.

[Mike] has made all of his easy to read and well commented code available online, so be sure to check it out if you have been thinking about (but putting off) playing around with the Android ADK.

Hot Dirt Keeps Your Plants Happy In The Winter Months

[Craig] tried heating his greenhouse last winter, but really only managed to push the limits of his utility bills. This time around he took a different approach by building a system to warm the soil in which his vegetation is planted.

The core of the system is this box which houses the plants. It is lined with heating tape along the bottom which warms a layer of dirt. The plants are in pots, but since those are surrounded by the dirt it doesn’t really inhibit the warming properties of the soil. The controller takes into account the temperature inside the box, as well as ambient temperature in the greenhouse. When it’s a bit too cold the controller will close the lid, which is covered with translucent plastic. This makes sure the temperature around the plants won’t fall below about 41.5 degrees Fahrenheit.

This really takes the work out of caring for you plants in the winter. What would have been a multiple-times-per-day visit can be limited to every day or two. Now he just needs to expand this to regulate temperature and humidity in the greenhouse itself, kind of like this other hack.

Wireless Solar Water Heater Controller Ensures Hot Water Every Time

water-heater-controller

[Peter Sobey] had a solar hot water heater installed in his home, which worked great until he relocated his kitchen to a neighboring room. Now a good bit further from the tank, the hot water reaching his sink was tepid at best due to the increased distance and temperature limiting mixer valve in the new heater.

He installed a salvaged solar panel and water tank solely for use in his kitchen, but as the panel was located above the tank, he had to find a way to actively monitor and control the water temperature. His pump and valve system was originally driven with an off the shelf PICAXE-based controller, but he eventually got the urge to add a wireless display and control panel to the mix.

A pair of Arduino Nanos run the show now, one of which resides in the pump controller box, while the other is used in the temperature display box in his kitchen. He uses a set of Bluetooth modules to link the Arduinos together, relaying temperature data and allowing him to send the pump controller manual commands if needed.

He says the system works a treat, and he’s much happier with his homebrew controller than the one he used originally.

Sensor Array Tries To Outdo The Other Guys

The team over at the Louisville Hackerspace LVL1 is not going to be outdone when it comes to collecting environmental data. They put together this Frankenstein of sensor boards that lets you collect a heap of data showing what is going on around it.

At the center-left a small Arduino clone is responsible for collecting the data. Data storage is not talked about on their write-up, but if that’s an ATmega328 chip you should be able to work out an easy way to store data on the 1k of internal EEPROM. If that’s not enough, there is an I2C bus included on the board making it easy to add a compatible EEPROM.

The sensor on the bottom left should look familiar. It’s a DHT11 temperature and humidity sensor we’ve seen popping up in projects lately. But wait, there’s also a TMP102 temperature sensor; but that’s not the end of it. A BMP085 pressure sensor also includes a third temperature sensing option. Want to see when the lights go on in the room? There’s a CdS sensor and a TSL230R Lux sensor for that. An op-amp circuit can measure the sound level in the room via one of the Arduino’s ADC pins. And finally, an RTC board is used for time stamping the data.

Obviously this is overkill, and we’re sure it’s meant as a test platform for various sensors. All of them have been mounted on the protoboard and wired up using the point-to-point soldering method.