Hands On With The Electric Imp

A while ago we caught wind of the Electric Imp, a very cool little device that packs an ARM microcontroller and a WiFi adapter into an SD card. We got our hands on an Imp last week, and now it’s time to show off what this little device can do. You can check out the rest of this hands on tutorial with the Electric Imp after the break.

Continue reading “Hands On With The Electric Imp”

Arduino WiFi Shield Available, Costs $85 USD

Over on the Arduino blog, the release of the official Arduino WiFi shield was just announced. On the spec page for this WiFi shield. we can see this new board isn’t a slouch; it’s powered by a 32-bit ATMega 32UC3 microcontroller, has provisions for WEP and WPA2 encryption, and supports both TCP and UDP with the Arduino WiFi library. It also costs €69/$85/£55 from the Arduino store.

Now that the announcement of the Arduino WiFi shield is over with, we’ll take this opportunity to go through a few other WiFi adapters for the Arduino that don’t cost an arm and a leg.

The WiFly shield – available from Sparkfun – is a WiFi adapter with the same form factor as the ever popular XBee modules. Of course, it’s possible to make your own breakout board; the WiFly only needs a TX, RX, power and ground connection to connect your Arduino project to the Internet.

We’ve seen a few projects use the WiShield from async labs. It’s a WiFi module packaged in the familiar Arduino shield form factor, and costs $55 USD.

For the hardcore hackers out there, you could always get a bare Microchip WiFi module and get it to work with an AVR as [Quinn Dunki] attempted to. In all fairness, [Quinn] was trying to de-Arduinofy the WiFi library; if you’re cool with Arduino code swimming around in your project, this method will probably work.

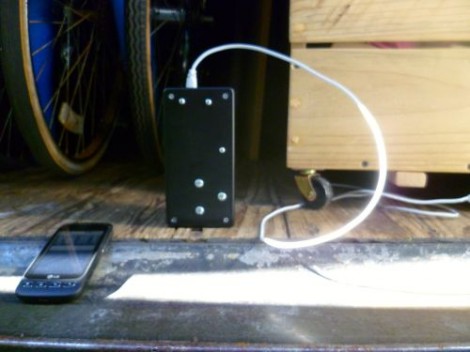
There’s also the very, very cool Electric Imp. Basically, it’s an SD card with a built-in WiFi module. After configuring the Imp by holding it up to patterns flashing on your smartphone screen, this device serves as a transparent bridge to the magical ‘cloud’ we’ve been hearing about. The Electric Imp was supposed to have been released in late July/early August, and we’ll put a post up when this cool device actually launches.

Of course we’re neglecting the simplest solution to getting WiFi running on an Arduino project: just use a wireless router. Really, all you need is a pair of TX and RX pins and a copy of OpenWRT. Easy, and you probably have the necessary hardware lying around.

We’re missing a few methods of Arduinofying a WiFi connection (or WiFying an Arduino…), but we’ll let our readers finish what we started in the comments.
Seeing Through Walls Using WiFi

Turns out you don’t need to be Superman to see through walls. Researchers at University College London have developed a way to passively use WiFi as a radar system. Unlike active radar systems (which themselves send out radio waves and listen for them to echo back), passive radar systems cannot be detected.

The system is small enough to fit in a briefcase, and has been tested through a one-foot-thick brick wall. It can detect position, speed, and direction of a person moving on the other side of that wall, but cannot detect stationary object. [Karl Woodbridge] and [Kevin Chetty], the engineers behind the prototype, think it can be refined to pick up motion as minuscule as a person’s rib cage moving with each breath. For some reason we get the picture in our mind of that body scanner from the original Total Recall.

[via Reddit]

[Image Credit]

Getting Connected With Your Home Security System

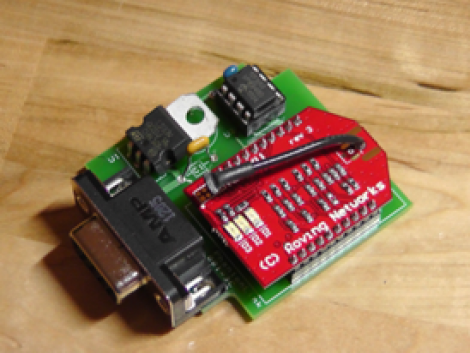
This simple device, paired with some creating code will let you become your own home security monitoring service. It’s called the PhantomLink and [Adam] started the project as a commercial venture. He recently decided to go open source with the hardware and will soon be posting a guide on how to program your own web interface too.

We just looked in on a project which takes control of a security panel using an Arduino. The PhantomLink is focused on not just reusing the input hardware, but monitoring the whole system. It sounds like several different protocols are supported.

The DB9 jack is intended for use with an adapter you can wire yourself. Basically just tap into the terminal block on the alarm controller for your house, then route those connections to the proper pins. A PIC 12F683 monitors the alarm system, pushing data via the WiFi module mounted on the board. With that web connection you can do anything you want by catching and formatting the data.

Set Your Arduino Free With Wifino

[Tod] wrote in to tell us about his latest project. It’s called wifino, and aims to set your Arduino free by offering a web-based IDE, online storage for your Arduino sketches, and even WiFi enabled hardware to upload sketches wirelessly.

The wifino was conceived with the same train of thought as the codebender IDE we saw earlier this week. Instead of only providing a web-based programming environment, the wifino works in conjunction with wifino hardware, meaning you can upload sketches over a wireless connection.

On the software side of things, the wifino IDE features code editing, compiling, and uploading right from a browser. There are plans for a github-style interface in the works, allowing for the easy sharing of Arduino sketches from makers around the world.

[Tod] is planning on getting a Kickstarter underway in the next few weeks to get the wifino boards out into the wild. We’ll be sure to keep you updated with any info or specs that come our way.

You can check out [Tod] uploading code from the Windows and iOS clients after the break.

Continue reading “Set Your Arduino Free With Wifino”

Knut Logs Data, Sends It To Your Email

[Richard] and [Jay] needed a WiFi connected data logger for remotely monitored aquariums. After working diligently for three years, they’re finally finished. While the Knut was originally designed to keep tabs on a few huge aquariums, it’s more than capable to log all sorts of data and send those sensor readings to your email address.

Knut is a small WiFi enabled device replete with a few plugs for temperature, humidity, accelerometer, and other sensors. All this data goes directly into the memory of Knut, and when the memory is full the data is sent to an email address. As a bonus, there’s also an iDevice app (Android and Windows coming soon) to parse the generated .CSV file and display the results on an iPhone

The Knut may be a touch expensive for our tastes, but if you’re looking for an off-the-shelf solution for sending alerts, logging data, or just reading a few sensors via WiFi, Knut may be just the ticket.

[Richard] and [Jay] put together a demo video showing off the capabilities and operation of the Knut app; check that out after the break.

Continue reading “Knut Logs Data, Sends It To Your Email”

Adding Wireless To The Raspberry Pi

For those of us who haven’t received their Raspberry Pis yet, it may come as a bit of a shock to realize the RasPi doesn’t have an on board WiFi adapter. While the Model B RasPi has an RJ45 Ethernet plug, but the Model A must rely on USB-bound networking dongles. [Mike] over at Mitch Tech put up a great guide to using a Realtek WiFi dongle with his Raspberry Pi.

Stock, the standard Debian install recommended by the folks at Raspberry Pi has the drivers for the Realtek WiFi adapter, but no firmware. [Mike] goes over how to get the firmware for this series of WiFi adapters to keep the kernel from complaining. Interestingly, [Mike]’s instructions also work for a slew of Realtek-based wireless dongles, so the installation instructions should work for a bunch of adapters available from DealExtreme or eBay.

[Mike] also has a guide for installing Quake 3 on a RasPi. Combine these two builds and you’ve got the perfect setup for a Raspberry Pi LAN party. Anyone want to host?