[Giovanni Aggiustatutto] creates a DIY weather station to measure rain fall, wind direction, humidity and temperature. [Giovanni] has been working on various parts of the weather station, including the rain gauge and anemometer, with the weather station build incorporating all these past projects and adding a few extra features for measurement and access.
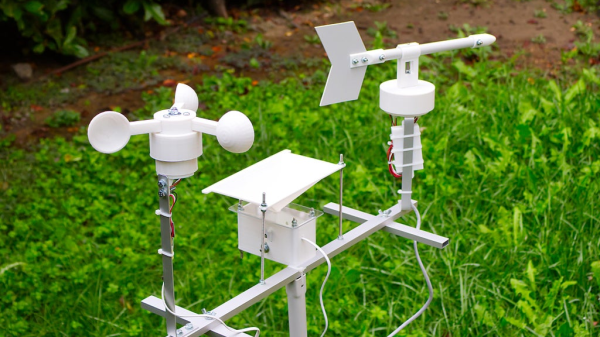
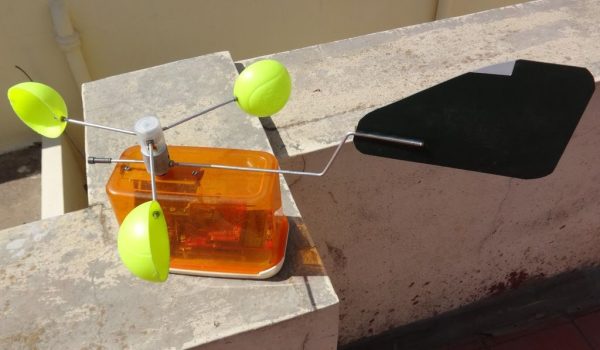
For temperature and humidity, a DHT22 sensor is located in a 3D printed Stevensen screen, giving the sensor steady airflow while protecting the module from direct sunlight and rain. A mostly 3D printed wind vane is printed with the base attached to a ball bearing and magnet so that the four hall sensors positioned in a “plus” configuration at the base can detect direction. The 3D printed anemometer uses a hall sensor to detect the revolution speed of the device. The rain gauge uses a “tipping bucket” mechanism, with a magnet attached to it that triggers the hall sensor affixed to the frame. The rain gauge (or pluviometer if you’re fancy) needs extra calibration to adjust for how much water the buckets take on before tipping.
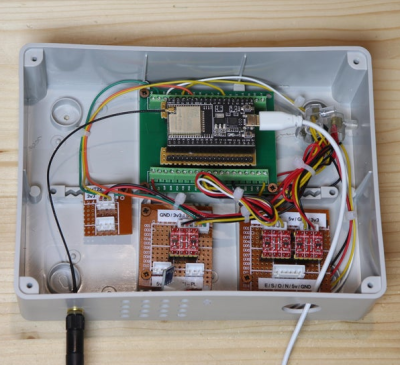
An ESP32, with additional level shifters and BMP180 atmospheric pressure sensor module, are placed in a junction box. The ESP32 is used to communicate with each of the sensors and allows for an external internet connection to a Home Assistant server to push collected data out.
[Giovanni] has done an excellent job of documenting each piece, including making the 3D STL files available. Weather stations are a favorite of ours with a lot of variety in what gets collected and how, from ultrasonic anemometers to solar powered weather stations, and it’s great to see [Giovanni]’s take.
Video after the break!
Continue reading “A Weather Station For Whether It Rains Or Shines”
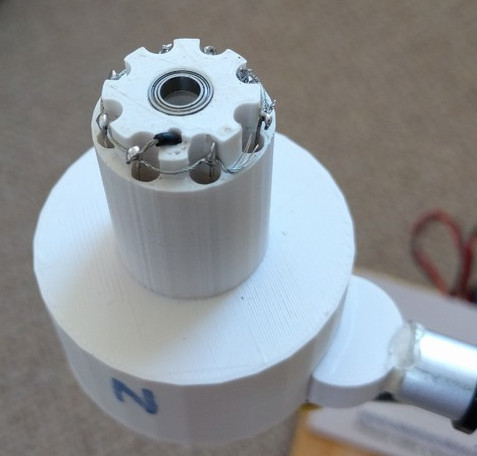
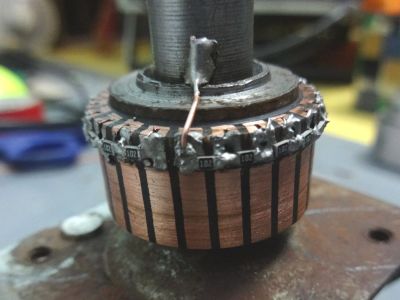 We have to admit that when we first saw [Ajoy Raman]’s Instructables post, we figured that he used a universal motor to generate a voltage from the anemometer. But [Ajoy]’s solution to the coaxial shafts problem is far more interesting than that. A discarded universal motor donated its rotor and bearings. The windings were stripped off the assembly leaving nothing but the commutator. 1kΩ SMD resistors were soldered across adjacent commutator sections to form a series resistance of 22kΩ with taps every 1k, allowing 0 to 2.2V to be read to the ADC of a microcontroller depending on the angle of the vane.