A True 3D Printed Weather Station

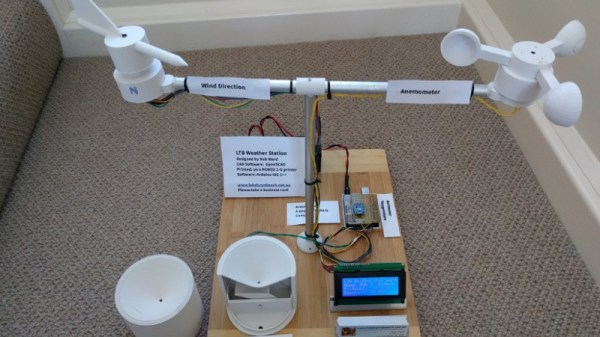
If the term “3D printed weather station” makes you think of a printed enclosure for off-the-shelf sensors, don’t feel bad. We thought the same thing when we first read the message [Rob Ward] sent in about his latest project. Surely he couldn’t mean that he actually printed all the principal parts of a serious weather station setup, such as the wind vane, anemometer, or rain gauge?
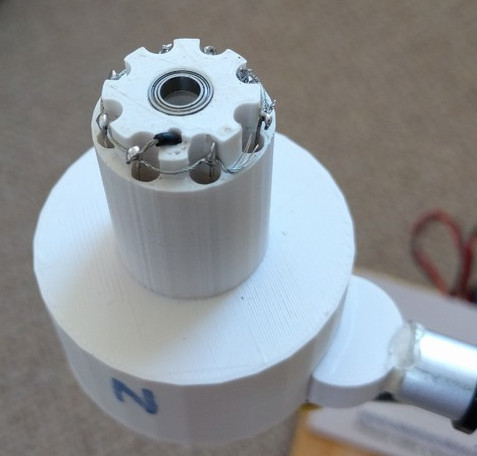
Except, on closer inspection, that’s exactly what he did. Every part of the weather station is designed in OpenSCAD, printed out, and infused with various vitamins to turn them into functional pieces of hardware. Interestingly enough, most of the magic is done with simple reed switches and magnets.

For example, the wind vane uses eight reed switches and an embedded magnet to communicate the current wind direction to the Arduino Uno which handles the user interface. Wind speed, on the other hand, it done with a single reed switch as it just needs to count rotations to calculate speed.

[Rob] did “cheat” by using an off-the-shelf barometric pressure sensor, but we’ll give him a pass for that one. Unless somebody wants to hit the tip line with a design for a printable barometer, we’ll consider this the high water mark in printable weather stations.

This isn’t the first time we’ve seen a DIY anemometer or rain gauge, of varying degrees of complexity. But the clean look of the final version, completely open nature of the OpenSCAD source, and the low part count make this an extremely compelling option for anyone looking to up their home forecasting game.

Magic 8 Ball Business Card Will Answer All Your Questions

The PCB business card has long been a staple amongst the freelance EE set. It’s a way to show potential clients that you can do the job, as well as leave a great first impression. Some are simple blinkenlights devices, others have contact information on USB storage. We reckon that [Seamus] has really hit it out of the park with this one, though.

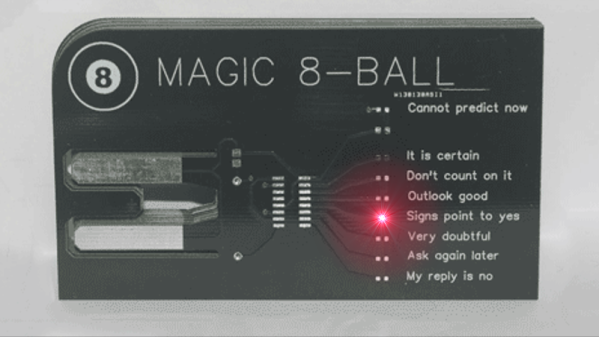
That’s right- this business card riffs on the classic Magic 8-ball toy. Ask a question, shake the card, and it’ll light an LED with the corresponding answer to your query. Use it as a desk toy, or break deadlocks in meetings by looking to the card for the correct course of action.

It’s a very tasteful build, showing off [Seamus]’s minimalist chops – consisting of just a decade counter, a tilt sensor, and some LEDs. When the card is shaken, the tilt sensor outputs a series of pulses to the clock line of the decade counter, whose outputs are the 8 LEDs. When the tilt sensor settles, it lands on the final answer.

We think it’s a great card, which shows off both fundamental technical skills as well as a certain flair and creativity which can be key to landing exciting projects. It doesn’t hurt that it’s good fun, to boot. For another take on the Magic 8-ball, check out this build that can give you a Yes/No answer on demand.

Soda Can Lamp Pinpoints Your Interests

We’ve said it a million times before: 3D printing will expand your horizons. The more you print, the more you think about things you could print and new ways to use printing in the process of building projects. [AHNT] knows all about this phenomenon, because he thought of a way to use soda cans as canvases for customizable pixel art lamp shades.

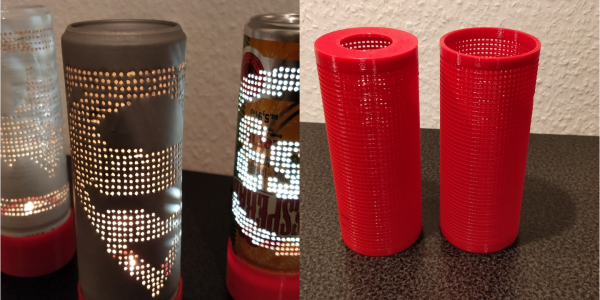
[AHNT] designed a printable sleeve that fits perfectly over 250mL cans. It provides a sturdy grid for poking tiny holes with a medical needle, and can be reused indefinitely with any pattern imaginable. He created two different printable bases to illuminate the lamp: one is sized to hold a votive candle, and the other is made for an LED strip circuit with a rocker switch and 12 VDC barrel jack. We suppose it wouldn’t take much to use an RGB LED instead—a Trinket or a Gemma would surely fit in the base.

In the video after the break, [AHNT] talks about prepping the can by cleanly removing the lid, which he does by filing the top edge until the layers separate. He also discusses a few methods for removing the paint, and notes that sandblasting worked the best.

Don’t need another lamp? There’s a million things you can do with that empty soda can. You could make a theremin, or a battery, or even a treasure box. Cut it open and make a solder stencil. Or do something else entirely, and send us a tip.

Continue reading “Soda Can Lamp Pinpoints Your Interests”

Kniwwelino Is An ESP8266 Micro:Bit

Kniwwelino is the latest in a line of micro:bit-inspired projects that we’ve seen, but this one comes with a twist: it uses an ESP8266 and WiFi at the core instead of the nR51 ARM/BTLE chip. That means that students can connect via laptop, cellphone, or anything else that can get onto a network.

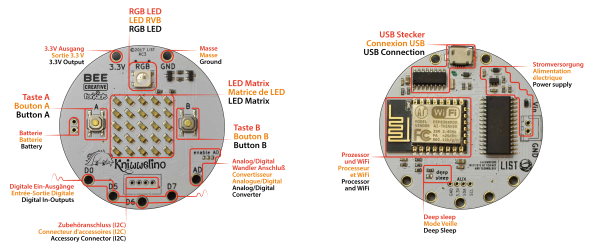
That’s not the only tradeoff, though. In order to get the price down, the Kniwwelino drops the accelerometer/magnetometer of the micro:bit for a programmable RGB LED. With fewer pins to break out, the Kniwwelino is able to ditch the love-it-or-hate-it card-edge connector of the micro:bit as well. In fact, with all these changes, it’s hard to call this a micro:bit clone at all — it’s more like a super-blinky ESP8266 development kit.

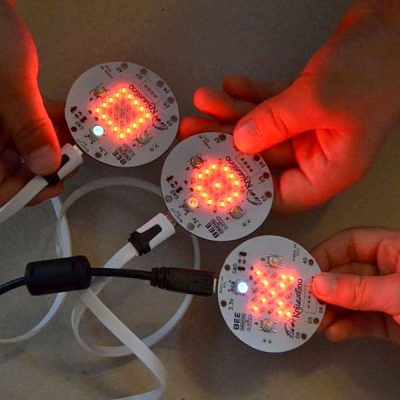
So what have they got left in common? The iconic 5×5 LED matrix in the center, and a Blockly visual programming dialect dedicated to the device. Based on the ESP8266, the Kniwwelino naturally also has an Arduino dialect that students can “graduate” to when they’re tired of moving around colored blobs, and of course you could flash the chip with anything else that runs on an ESP8266.

We don’t have one in our hands, but we like the idea. An RGB LED is a lot of fun on Day One, and the fact that the Kniwwelino fits so neatly into existing bodies of code makes the transition from novice to intermediate programmer a lot easier. These things are personal preference, but WiFi beats Bluetooth LE in our book, for sheer ubiquity and interoperability. Finally, the Kniwwelino comes in at about half the manufacturing cost of a micro:bit, which makes it viable in schools without large manufacturer subsidies. They’re estimating $5 per unit. (Retail is higher.) On the other hand, the Kniwwelino is going to use more juice than its ARM-based competitor, and doesn’t have an accelerometer.

Kniwwelino is apparently derived from a luxembourgish word “kniwweln” that apparently means to craft something. The German Calliope Mini is named after Zeus’ daughter, the programmer’s muse. We’re stoked to see so many cute dev boards getting into the hands of students, no matter what you call them.

Lawn Dog Faithfully Cuts The Grass

As a kid, [Josh] always dreamed of building robots to do his boring, dangerous chores like mowing and weed-eating the lawn. Now that he’s built Lawn Dog, an all-terrain robotic lawn mower, he can kick back and mentally high-five his younger self.

Lawn Dog is the result of hitching the business end of a Jazzy electric mobility chair to a Ryobi lawn mower with a custom flexible bracket, and then tweaking it to handle the worst that [Josh]’s lawn has to offer. It’s powered by two 24 V lawn and garden batteries and driven with a Sabertooth 2X12 motor controller. After a slippery maiden voyage, Lawn Dog now masters rough and green with aplomb thanks to doubled-up omniwheels on the Ryobi and very special tires on the Jazzy.

[Josh] wants nothing to do with weed-eating and mowing the ditch, so it’s important that the Lawn Dog is up to the job. He put some solid rubber tires on the Jazzy and then drove 50 screws into each one to add serious traction. Prime the carburetor and pull that cord there to see Lawn Dog’s mowing and ditch handling skills.

Continue reading “Lawn Dog Faithfully Cuts The Grass”

Mechanisms: Couplings

I was splitting wood one day a few years back, getting next winter’s firewood ready on my hydraulic splitter. It normally handled my ash and oak with ease, but I had a particularly gnarly piece of birch queued up, and the splitter was struggling. The 20-ton cylinder slowed as the wedge jammed in the twisted grain, the engine started to bog down, then BANG! I jumped back as something gave way and the engine revved out of control; I figured a hydraulic hose gave out. Whatever it was, I was done for the day.

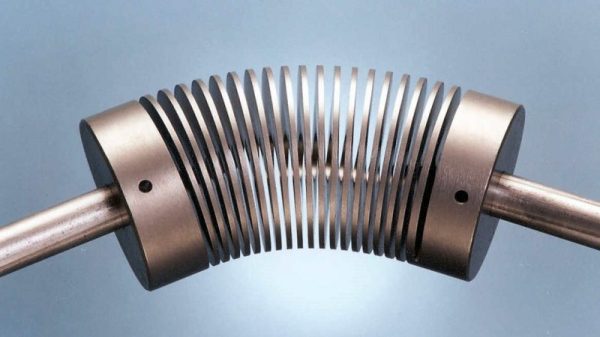
I later discovered that a coupler between the engine shaft and the hydraulic pump failed dramatically. It was an easy fix once I ordered the right part, and I’ve since learned to keep extras in stock. Couplings are useful things, and they’re the next up in our series on mechanisms.

Continue reading “Mechanisms: Couplings”

Persistence Of Phosphorescence Clock Displays YouTube Stats Too

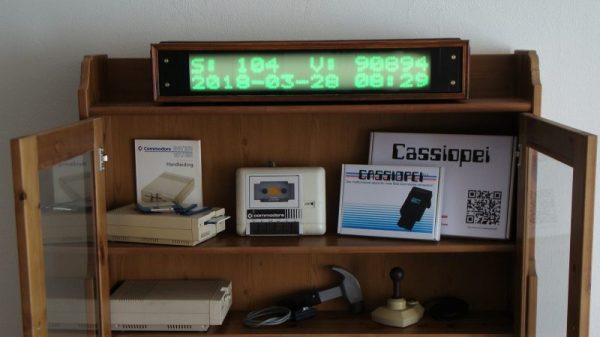
Looking for an eye-catching and unique way to display the time and date? Want the flexibility to add other critical information, like the number of YouTube subs you’ve got? Care to be able to read it from half a block away, at least at night? Then this scrolling glow-in-the-dark dot-matrix display could be right up your alley.

Building on his previous Morse code transcriber using a similar display, [Jan Derogee] took the concept and went big. The idea is to cover a PVC pipe with phosphorescent tape and rotate it past a row of 100 UV LEDs. The LEDs are turned on as the glow-in-the-dark surface passes over them, charging up a row of spots. The display is built up to two rows of 16 characters by the time it rotates into view, and the effect seems to last for quite a while. An ESP8266 takes care of driving the display and fetching NTP time and YouTube stats.

We’ve seen “persistence of phosphorescence” clocks before, but not as good looking and legible as this one. We like the approach, and we can’t help but think of other uses for glow-in-the-dark displays.

Continue reading “Persistence Of Phosphorescence Clock Displays YouTube Stats Too”