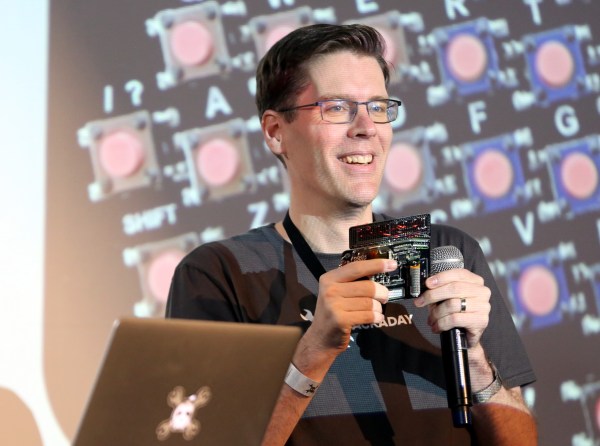
posted Feb 9th 2012 2:39pm by
Mike Szczys
filed under:
wearable hacks

If you needed a reason to dress up for your next Dungeons & Dragons adventure this is surely it. Not only will this attractive wrist adornment go right along with your medieval theme, but the gauntlet doubles as a multi-sided digital die.
Sparkfun whipped up this tutorial which details the build. Yep, they’re hawking their own goods but we must say this is one of the few projects using sewable electronics which we thoroughly enjoy. It calls for several Lilypad modules, including an Arduino board, accelerometer, and slide switches. The switches let you select the number of sides for the die you are about to roll. The accelerometer starts the fun when you shake your wrist back and forth (that’s what she said). The project is powered by a rechargeable battery, which we always like to see, and uses a four-digit seven segment display located where the face of a wristwatch is normally found.
Of course, you could get the shaking action and use no batteries at all if you wish.
posted Feb 9th 2012 1:39pm by
Mike Szczys
filed under:
transportation hacks

[Iron Jungle] just finished building this gear indicator for his motorcycle. It uses a red 7-segment display to show the rider what gear is currently engaged. This hack is pretty common and makes us wonder why all motorcycles don’t come standard with the feature? But then again, if they did you wouldn’t have a reason to hack them.
The motorcycle does have a gear sensor; apparently it only lacks a way to display this data. The sensor outputs a signal between 0 and 5V which [Iron Jungle] reads using a PICAXE 18M2 microcontroller. Patching into that signal wasn’t hard at all. Once he found the correct wire he simply removed a portion of the insulation and soldered a lead to the conductor. This should stand up to the vibrations encountered in an automotive application like this one. Since the computing power is already there, he also included a DS18B20 to take ambient air temperature readings. Check out the quick demo after the break.
This is not the first time we’ve seen the V-Storm get a custom gear indicator. But if you really want to go all out, perhaps you need to build an interface for your tablet or smart phone. Read the rest of this entry »
posted Feb 9th 2012 9:58am by
Mike Szczys
filed under:
Microcontrollers

The V-USB library is a pretty handy piece of code that lets you add USB connectivity to ATtiny microcontrollers (it was previously named tinyUSB). But if you’ve ever looked into adding the library to your own projects you may have been stymied by the complexity of the code. There are many examples, but there’s a lack of a concise quick-start for the uninitiated. [Joonas Pihlajamaa] has been working to correct that shortfall with his four-part V-USB tutorial series. It’s not for the absolute newbie; you should already be comfortable working with AVR chips but that’s the only real prerequisite we can see.
He starts the series with a look into the hardware considerations. USB provides a 5V power rail but the data lines expect 3.3V logic so this must be accounted for. With the test rig built on a breadboard he moves on to pick apart the code, covering various user-defined variables that you’ll need to set based on your project’s needs. We’re going to keep this on the back burner and hopefully the Troll Sniffing Rat will get a makeover (although we must say comments have been a lot nicer as of late… keep it up!).
We’ve embedded links to all four tutorial parts after the break.
Read the rest of this entry »
posted Feb 9th 2012 8:58am by
Mike Szczys
filed under:
security hacks

[Navic] added a slew of abilities to his RFID reader. It’s now a full-featured RFID reader and smart card writer with extras. When we looked at it last time the unit was just an RFID and smart card reader in a project enclosure. You could see the RFID code of a tag displayed on the LCD screen, but there wasn’t a lot more to it than that.
The upgrade uses the same project enclosure but he’s added four buttons below the display. These allow him to access the different features that he’s implemented. The first one, which is shown in the video after the break, allows him to store up to six tags in the EEPROM of the Basic Stamp which drives the unit. He can dump these tag codes to a smart card (pictured above), but also has the option of interfacing with a PC to read from and write to that card.
We don’t think you can directly write RFID tags with the device, but we could be wrong.
Read the rest of this entry »
posted Feb 8th 2012 12:01pm by
Mike Szczys
filed under:
Hackaday links
Most useless machine

We love ‘em, and we hope you do too. Here’s [Phase2plus'] take on the most useless machine.
Scratching like it’s 1989

[Nick] spent three bucks at the thrift store and ended up buying days worth of fun with this cassette player. He hacked it to scratch like vinyl.
3D printed jawbone

This lady now has her own 3D-printed jawbone. We’re not talking about the Bluetooth headset… it’s an actual bone replacement! And yes, the skeleton for the Terminator was 3D printed… we’re that much closer now. [Thanks Steve]
Hexbug superbowl

Why not let robots decide our sports gambling choices? [Eric] let this slew of HexBugs battle it out as an early indicator for who would win the Super Bowl. Seems he has no shortage of the little toys, all of which received an MSP430 upgrade. The firmware actually implements obstacle avoidance, but he makes a poke at the Chicago Bears who seem to have the same mission.
Foil fix for worn out remotes

[Viktor] found an interesting repair tip. If you’ve got remote controlers whose buttons are not working so well anymore you may be able to fix them with tin foil. He uses a single-hole punch to clip out circles which are attached to the underside of the misbehaving button. Worth a try!
posted Feb 8th 2012 11:01am by
Mike Szczys
filed under:
multitouch hacks

To us it makes a lot of sense to hold the tablet in one hand and type with the other. That’s exactly how [Adam Kumpf] has implemented this one-handed typing interface which was originally conceived by [Doug Engelbart].
As you can see, there’s a large contextual area for each finger on your right hand. Letters and navigational keystrokes are input through this interface based on single touches, or combinations up to and including all five digits. This offers up 32 possible combinations (including all on and all off) which is enough to cover the modern English alphabet.
[Adam's] demo page works for most tablets so give it a whirl. Yes, it works with iDevices too which is a surprise as we would have thought this was using Flash. If you’re not near a touch-sensitive device you can get the gist of the operation from the demo video embedded after the break.
Now, who’s going to be the first to make this into a replacement keyboard on iOS 5?
Read the rest of this entry »
posted Feb 8th 2012 10:01am by
Mike Szczys
filed under:
wireless hacks

[Abhimanyu Kumar] has been hard at work building and posting about his quadcopter. So far he’s published ten installments for this build, letting us relive the adventure vicariously. But it’s number 11 that we’re really excited about as he plans to share the first free-flight footage in that one.
The bug was planted in his brain after hearing that a quadcopter was used to shoot some of the footage in Spiderman 2. He wanted one to call his very own but the cost of a ready-made unit was out of his league. So he decided to build one instead. The first version uses aluminum bracket for the cross making up the motor mounts. He added LEDs to liven things up and even made a demo video of the thing tied to a table (no IMU yet so free flight would be fatal). After this stepping stone he decided to go with a Wii Motion Plus and Wii Nunchuck as the positioning feedback sensors. There is also a body redesign with helps lighten the load.
It’s a fun project, and we can’t wait to see where he goes from here!
posted Feb 8th 2012 8:51am by
Mike Szczys
filed under:
green hacks

Add some fruit to your indoor bounty with this hydroponic strawberry farm. [Dino] whipped this up as his 45th hack a week episode (getting pretty close to his year-long goal). He used parts you probably already have sitting around the house somewhere. But even if you bought everything and used it once you still wouldn’t be out much.
A plastic storage container serves as the base. [Dino] also grabbed four identical plastic containers (large yogurt containers would work here) to host the plants. He cut off the bottom half and inserted some netting to keep the plant from falling through. After tracing the size of the container on the enclosure’s lid he cut out holes which will host each plant. This provides a way to dangle the roots into the nutrient solution which is kept oxygen rich with an aquarium pump and two air stones. It certainly deserves a place next to that salad farm you threw together. Don’t miss [Dino's] build video after the break.
Read the rest of this entry »