Reverse Engineering A Classic ThinkPad Battery

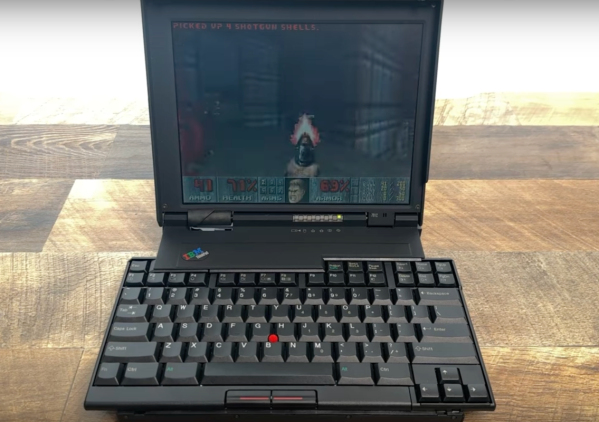
The ThinkPad 701 is an iconic laptop series from the mid-90s and is still highly sought after today because of its famous butterfly keybaord. The laptop itself is tiny even by the standards of the time, so in order to fit a full-size keyboard IBM devised a mechanism where the keyboard splits and slides over itself to hide away as the screen is closed. But, like most 30-year-old laptops, the original batteries for these computers are well past their prime. [polymatt] takes us through all of the steps needed in order to recreate a battery from this era down to the last detail.

He starts by disassembling an old battery with extensive damage from the old, leaky batteries. The first part of the recreation is to measure the battery casing so a new one can be modeled and printed. The control boards for the batteries of these computers were not too sophisticated, so [polymatt] is able to use a logic analyzer with a working unit to duplicate its behavior on an ATtiny microcontroller. With that out of the way, a new PCB is created to host the cloned chip and a new battery pack, made out of 9 NiMH cells is put together.

[polymatt] wanted this build to be as authentic as possible, so he even goes as far as replicating the label on the underside of the battery. With everything put together he has a faithful recreation of this decades-old battery for a famous retro laptop. ThinkPads are popular laptops in general, too, due to their fairly high build quality (at least for their enterprise lineups) and comprehensive driver support especially for Linux and other open-source software projects like coreboot and libreboot.

Thanks to [Roman UA] for the tip!

Continue reading “Reverse Engineering A Classic ThinkPad Battery”

The ThinkPad You All Wish You Had, With A Brain That’s Not Ancient

An IBM (or, later, Lenovo) ThinkPad is a popular choice in our community. They’re prized for their rugged design, longevity, and good software support. Over the many years that the line has been available, there have been a few models which have captured the attention more than others, and among those, probably the most sought-after is the ThinkPad 701c. It would be an unremarkable mid-1990s 486 laptop were it not for the party piece of that flip-out butterfly keyboard (see video, below). [Karl Buchka] has one that’s profoundly dead, and rather than use it as a novelty paperweight, he’s giving it a new lease of life with a Framework motherboard.

This is very much a work in progress, so there will be plenty more to come, but so far, he’s taken the display panel from an iPad and made it work with the Framework board, and designed an entirely new lower case for the Thinkpad. This will hold the Framework board with its USB-C ports at the edge, so in the place of its USB-based expansion modules, he’s made a custom external port replicator. Meanwhile, a Teensy handles that unique keyboard. We’re told that the design files will all eventually be put online should anyone else want to try.

We’d normally be slightly upset were someone to butcher something as unusual as a 701c, however, in thic ase we can see that it turns a broken computer into one that should see quite a bit of use.  We can’t help envying him this project.

Understandably not many 701c owners have dived inside their machines, but we have previously brought you a contemporary processor upgrade. If you’ve never seen the 701c’s keyboard — or you just want to see it again — here you go:

Thanks [Ł. Juszczak] for the tip.

E-Bike Battery Tapped For Off-Grid Laptop Power

If you’ve travelling via bike, you’ll know there’s a certain advantage to packing light. But what if you need to take your beefy desktop-replacement laptop with you on one of these trips? These power hungry machines can’t go far without their chargers (or a place to plug them in), which generally makes them poor traveling companions.

Luckily, [transistor-man] came up with a solution to this particular problem by reusing his e-bike’s battery pack as a mobile power source for his Lenovo laptop. The energy demands of this particular computer are too high for USB-C Power Delivery, and as such, he had to hack up a way to feed it 20 volts DC via its proprietary square power connector. His bike’s battery puts out between 30 and 42 VDC depending on charge, so at least on paper, it should work out fine. Continue reading “E-Bike Battery Tapped For Off-Grid Laptop Power”

A Miniature MNT For Every Pocket

Last time Hackaday went hands on with a product from German company MNT, it was the Reform laptop; a full size computer with a full feature set and fully open source design. Now they’re back with the same value proposition and feature set crammed into a much more adorable (and colorful!) package with the MNT Pocket Reform. If you want the big Reform’s open source philosophy in a body fit for a coat pocket, this might be the computing device for you.

To refresh your memory, MNT is a company that specializes in open source hardware and the software to support it. They are probably best known for the Reform, their first laptop. Its marquis feature is a fully open design, from the mechanical components (designed with OSS tools) to the PCBAs (designed with KiCad) to the software (designed with, uh, software). When originally shipped that product packed a DIMM-style System On Module (SOM) with a default configuration containing a quad core NXP i.MX8M Quad and 4GB of RAM, as well as mini PCIe Card and M key m.2 2280 slots on the motherboard for storage and connectivity. That computer was designed to be easily serviceable and included a plethora of full sized ports along with easy to source cylindrical battery cells. The Pocket Reform takes the same intent and channels it into a much smaller package.

Continue reading “A Miniature MNT For Every Pocket”

An expansion board with two 8-bit ISA slots plugged into a Sharp laptop

New Expansion Module Brings Standard Slots To Ancient Laptop

Upgrading and repairing vintage laptops is often a challenge — even if their basic hardware is compatible with ordinary PCs, they often use nonstandard components and connectors due to space constraints. The Sharp PC-4600 series from the late 1980s is a case in point: although it comes with standard serial and parallel ports, the only other external interface is a mysterious connector labelled EXPBUS on the back of the case. [Steven George] has been diving into the details of this port and managed to design a module to turn it into a pair of standard ISA ports.

Apparently, no peripherals were ever released for the EXPBUS port, so reverse-engineering an existing module was out of the question. [Steven] did stumble upon a service manual for the PC-4600 however, and as it turned out, the connector carried all the signals present in an 8-bit ISA bus. Turning it into something useful was simply a matter of designing an adapter board with the EXPBUS connector on one side and regular ISA slots on the other.

An expansion board plugged into a laptop, carrying two ISA cardsThe board also has an external power connector, to avoid overloading the laptop’s internal power supply, as well as a couple of buffer capacitors to smooth out the power rails. [Steven] tested the expansion board with a network adapter and a sound card, and it appears to be functioning well. It should be noted that only the +5 V power rail is available by default, so if any cards need +12 V or any negative rail, those should be provided externally.

Gerber files for this project are available on [Steven]’s website, so if you’ve got one of these machines lying around, now might be the time to upgrade it. This isn’t the first expansion for the PC-4600 series that [Steven] developed, either: he also designed an external floppy drive adapter that should ease data transfer with other PCs.

It’s great to see how the hacker community keeps classic portables like this one alive: one day it might also need a broken screen replaced or a dodgy power supply repaired.

Laptop Motherboard? Let’s Boot And Tinker

Last time, I’ve shared my experience on why you might want to consider a laptop motherboard for a project of yours, and noted some things you might want to keep in mind if buying one for a project. Now, let’s go through the practical considerations!

Making It Boot

Usually, when you plug some RAM and a charger into a board, then press the power button, your board should boot up and eventually show the BIOS on the screen. However, there will be some caveats – it’s very firmware-dependent. Let me walk you through some confusing situations you might encounter.

If the board was unpowered for a while, first boot might take longer – or it might power on immediately after a charger has been plugged in, and then, possibly, power off. A bit of erratic behaviour is okay, since boards might need to do memory training, or recover after having lost some CMOS settings. Speaking of those, some boards will not boot without a CMOS battery attached, and some will go through the usual ‘settings lost’ sequence. Sometimes, the battery will be on a daughterboard, other times, especially with new boards, there will be no CR2032 in sight and the board will rely on the main battery to provide CMOS settings saving functions – in such case, if you don’t use the battery, expect the first boot to take longer, at least. Overall, however, pressing the power switch will cause the board to boot. Continue reading “Laptop Motherboard? Let’s Boot And Tinker”

Showing the end result - a Defender machine copy in all its glory, with a colourful front panel with joysticks.

Defender Arcade Rebuilt To Settle A Childhood Memory

[Jason Winfield] had a nemesis: the Defender arcade machine. Having put quite a number of coins into one during his childhood, he’s since found himself as a seasoned maker, and decided to hold a rematch on his own terms. For this, he’s recreated the machine from scratch, building it around the guts of a Dell laptop, and he tells us the story what it took to build a new Defender in this day and age.

Defender was a peculiar machine — it was in cocktail table format, unlike many other arcade machines of that period. From pictures, he’s redesigned the whole thing in Fusion 360, in a way more desk-friendly format, but just as fancy looking as before.

As for the laptop, gutting it for its mainboard, screen, and speakers was a surprisingly painless procedure — everything booted up first try. A few board-fitted brackets and a swap from a HDD to a USB flashdrive for the OS later, the electronics were ready. As he was redesigning the entire arcade machine anyway, the new design control panel was also trimmed down for ease of use, while preserving the original colorful look.

All in all, an impressive build from [Jason]. After all was set and done, we don’t doubt that he went on to, let’s say, settle some old scores. It’s not the first time we see a desktop-sized arcade cabinet, and you gotta admire the skills making such a machine smaller while sticking to the old-timey aesthetic! Or, perhaps, would you like a cabinet that’s more subtle?

Continue reading Defender Arcade Rebuilt To Settle A Childhood Memory”