A Nifty Tool For Counting Neopixels

Picture it. You’ve got a big roll of NeoPixels, but you have no idea how many are actually on the tape. Or you need to count how many WS2812B LEDs are in a display to properly plan your animations. Fear not, for [Gustavo Laureano] has built the perfect tool for counting the addressable LEDs.

The tool is based on a Raspberry Pi Pico, so it’s easy to replicate at home. The LED strip is simply connected to the microcontroller via a set of jumper wires going to the 5V and GND pins, while one of the Pico’s ADC pins is then connected to the strip’s GND pin after the jumper. A further GPIO pin is used to send data to the strip.

Essentially, this uses the jumper wire as a rudimentary current shunt. The code steps through the string of LEDs, turning each one on and then off in turn, comparing the value read by the ADC pin at each state. When the Pico detects no difference in current draw between the on and off states, that suggests it’s trying to turn on an LED beyond the end of the string, and thus the count is concluded.

You don’t need to understand any of that to put this device to good use, however. You can easily whip it up on a breadboard with a Pi Pico and parts you have lying around in the shop. Video after the break.

Continue reading “A Nifty Tool For Counting Neopixels”

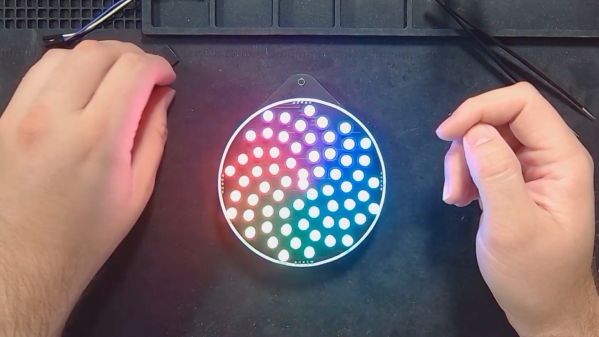
A black work mat holds a circular badge with 64 addressable LEDs in a spiraling shape akin to the center of a sunflower. The LEDs have a rotating rainbow spiraling around the circle with red touching violet on one end. The colors extend in bands from the center to the rim of the circle.

Math You Can Wear: Fibonacci Spiral LED Badge

Fibonacci numbers are seen in the natural structures of various plants, such as the florets in sunflower heads, areoles on cacti stems, and scales in pine cones. [HackerBox] has developed a Fibonacci Spiral LED Badge to bring this natural phenomenon to your electronics.

To position each of the 64 addressable LEDs within the PCB layout, [HackerBox] computed the polar (r,θ) coordinates in a spreadsheet according to the Vogel model and then converted them to rectangular (x,y) coordinates. A little more math translates the points “off origin” into the center of the PCB space and scale them out to keep the first two 5 mm LEDs from overlapping. Finally, the LED coordinates were pasted into the KiCad PCB design file.

An RP2040 microcontroller controls the show, and a switch on the badge selects power between USB and three AA batteries and a DC/DC boost converter. The PCB also features two capacitive touch pads. [HackerBox] has published the KiCad files for the badge, and the CircuitPython firmware is shared with the project. If C/C++ is more your preference, the RP2040 MCU can also be programmed using the Arduino IDE.

For more details on beautiful RGB lights, we’ve previously presented Everything You Might Have Missed About Addressable LEDs, and for more details on why they can be so fun to wear, check out our Hackaday Badgelife Documentary.

(Editor’s note: HackerBox makes and sells kits, is run by Hackaday Contributor [Joseph Long] IRL.)

Continue reading “Math You Can Wear: Fibonacci Spiral LED Badge”

A three picture sequence, with the first picture being a woman in a blue lit up prom dress touching a wand to her hand, the second picture being a woman in a pink lit up dress touching a wand to her hand and the third picture being the same woman in a lit up pink prom dress holding a blue glowing star wand over her head

Be The Star Of The Evening With This Light Up Prom Dress

[Kellechu] went full parent beast mode by creating a prom dress for her daughter. This incredible build is a tour-de-force of DIY crafting, combining sewing, electronics, 3D printing and programming.

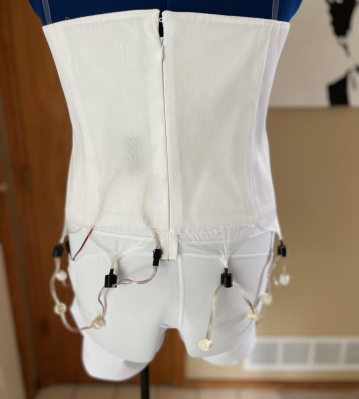
The dress skirt is made of tulle that allows for the LED strip underneath to diffuse through. The top bodice is made of fiber optic fabric sewn between the fabric form with the dangling fiber optic threads grouped into bundles. The dangling fiber optic bundles were then inserted and glued into “out caps” that forced the strands to sit next to a NeoPixel LED. A 20 NeoPixel “Dots Strand” strip was strung around the waist line, affixing 12 of the NeoPixels with an “out cap” to light up the fiber optic bodice. The remaining NeoPixels were outfitted with a diffuser cap and hung lower to light up the tulle skirt portion of the dress.

A bodice of a prom dress hanging on a form with fiber optic fabric bundles dangling underneath with some of them installed into a NeoPixel "Dots Strand" strip installed along the waist line

A wand was 3D printed and housed with an RFM69HCW Packet Radio M0 Feather, a NeoPixel LED color ring and a TCS34725 Flora color sensor powered by a 2.2 Ah 3.7 V LiPo battery. Another RFM69HCW Packet Radio M0 Feather was placed in the dress to be able to receive messages from the wand so that the sensed color could be transmitted and the LED strip could be updated with the sensed color. The dress portion was powered by a 10 Ah 3.7 V LiPo, with the battery and electronics fitting snugly into yoga bike shorts with side pockets.

[Kellechu]’s Instructable is full of details about the process and is worth checking out. For example, [Kellechu] goes into detail about the troubles and care taken when dealing with the different media, making sure to avoid ironing the fiber optics so as not to melt the lines and experimenting with different sewing needles to limit the amount of dead fibers as collateral damage from the sewing process.

Dresses with LEDs and other lights are a big hit, as can be seen from our feature on an LED wedding dress.

Continue reading “Be The Star Of The Evening With This Light Up Prom Dress”

Tree Of Life Branches Out With A Twist

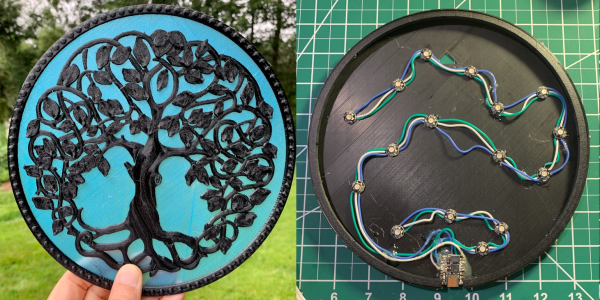
In the middle of 2020, [charlie] challenged himself to conceive of and finish one project every month for the next twelve. Here we are a year later with [charlie]’s last project of the challenge: a tree of life with a bit of a twist to it.

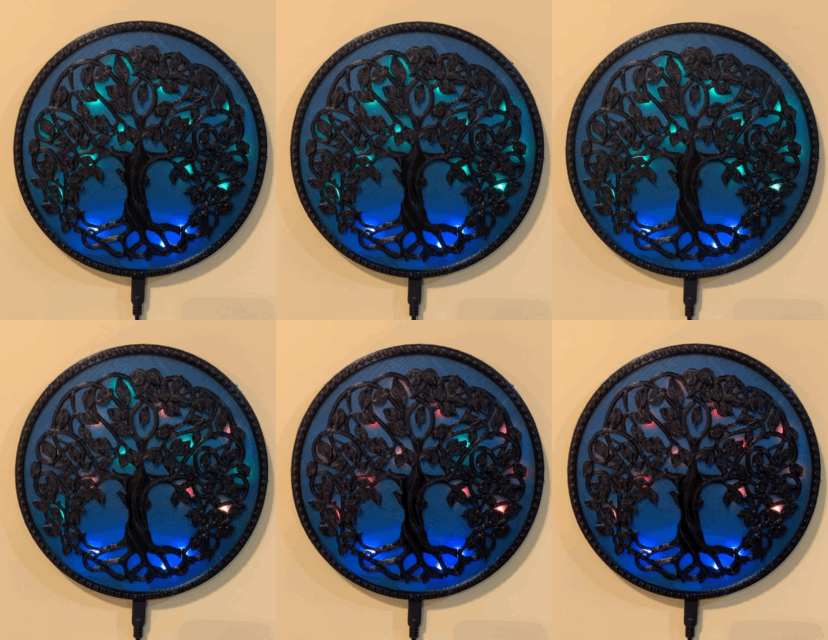
The idea was to build a tree with lights that would represent the leaves and change as the tree went through the seasons. After a lot of searching, he found a really elaborate model meant for CNC carving, but the model maker converted it to an STL. [charlie]’s original plan was to poke the LEDs through the print. After consulting a wise woman, he decided to take the two-color approach and make the background translucent so that the 16 RGB LEDs can shine through.

So, what’s the twist? Well, over time, the tree will develop dementia. One by one, the leaves will lose awareness and go through the seasons backward, or slow down their cycle, or speed up. Eventually, the entire tree recedes into a rainbow of confusion. Sadly beautiful, isn’t it?

No printer? No problem. Trees of life come in all forms, including free-form.

One Giant Button To Mute Them All

The second round of this year’s Hackaday Prize is coming to a close, and we asked you to come up with ways of refreshing work-from-home life. Well here’s one we probably all could use — a large emergency mute button that can also turn off video with an extra click. You know, in case your kid or your roommate decides to walk around in their birthday suit.

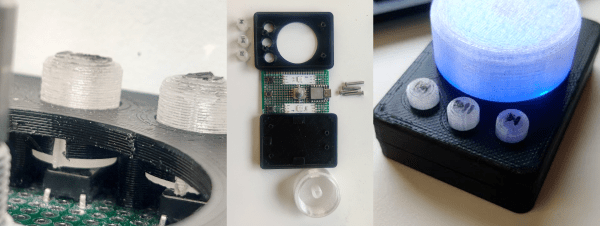
[Colin Russell-Conway]’s software-agnostic mute button uses a Seeeduino Xiao and rotary encoder, plus three momentaries that give it a second function as a media controller. Two chunks of LED strip go blinky blinky when the mute is on, and are otherwise solidly lit and color-coded by videoconference type — blue for Zoom and Starleaf, green for Webex, and purple for Teams.

The companion app that [Colin] created is using the Windows Management Instrumentation (WMI) to check which program is control of the microphone. Whenever the mute button is pressed, the app makes note of the current program in focus, switches to the active videoconference, mutes it, and then switches back to reddit or twitch or whatever you had in focus when the kid started screaming for you from the bathroom. Check out the demo after the break.

Some of us like to celebrate a little when videoconferences are over. For those people, there is the pull-chain exit.

Continue reading “One Giant Button To Mute Them All”

Linear Pong Loses A Dimension But Remains Challenging

When Pong hit the scene in the early 70s, there was something about the simplicity of the 2D monochrome tennis game that made it engaging enough that enthusiastic proto-gamers shorted-out machines by stuffing their coin boxes to overflowing.  But even with the simplicity of Pong’s 2D gameplay, the question becomes: could it by made simpler and still be playable?

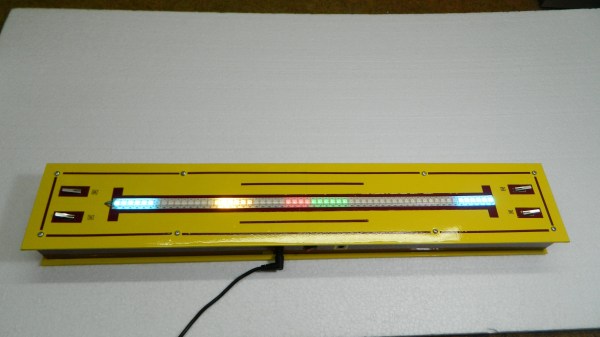
Surprisingly, if this one-dimensional Pong game is any indication, it actually seems like it can. Where the original Pong made you line up your paddle with the incoming ball, with the main variable being the angle of the carom from your opponent, [mircemk]’s version, limited to a linear game field, makes the ball’s speed the variable. Players take control of the game with a pair of buttons at the far ends of a 60-LED strip of WS2812s. The ball travels back and forth along the strip, bouncing off a player’s paddle only if they push their button at the exact moment the ball arrives. Each reflection back to the opponent occurs at a random speed, making it hard to get into a rhythm. To add some variety, each player has a “Boost” button to put a little spice on their shot, and score is kept by LEDs in the center of the play field. Video of the game play plus build info is below the break.

With just a Neopixel strip, an Arduino Nano, and a small handful of common parts, it should be easy enough to whip up your own copy of this surprisingly engaging game. But if the 2D-version is still more your speed, maybe you should check out the story of its inventor, [Ted Dabney]. Or, perhaps building a clock that plays Pong with itself to idle the days away is more your speed.

Continue reading “Linear Pong Loses A Dimension But Remains Challenging”

Smart Power Delivery For Long LED Strips

Addressable LED strips, most commonly using the WS2812B, have revolutionized the pursuit of the glowiest and flashiest of builds. No longer does a maker have to compromise on full RGB color or number of LEDs due to the limitations of their chosen microcontroller, or fuss around with multiplexing schemes. However, the long strips of bright LEDs do have an issue with voltage drop on long runs, leading to dimming and color irregularities. Thankfully, [Jan Mrázek] has come up with a useful solution in the form of the Neopixel Booster.

The device consists of a small PCB which packs a 5 volt regulator capable of putting out up to 4 amps. It’s designed with pads that match typical Neopixel strips, such that it can be neatly soldered in every 50cm or every 60 LEDs or so. Each booster PCB is fed with a set of fat power wires, at between 6-18 volts. This allows electricity to be fed to the full length of the strip at higher voltage, and thus lower current, greatly reducing resistive power losses. By having several regulators along the length of the strip, it helps guarantee that the whole length of a long run is receiving plenty of voltage and current and can light up the correct color as desired.

It’s a well thought out solution to a frustrating problem, and [Jan’s] efforts on the design front mean that a 5 meter long waterproof strip can be converted in around about an hour. We can imagine this could be manufactured into strips in future, too. If you’re wondering what to do with all those LEDs, consider making yourself a custom display.