Bringing An ADM-3A Back To Life

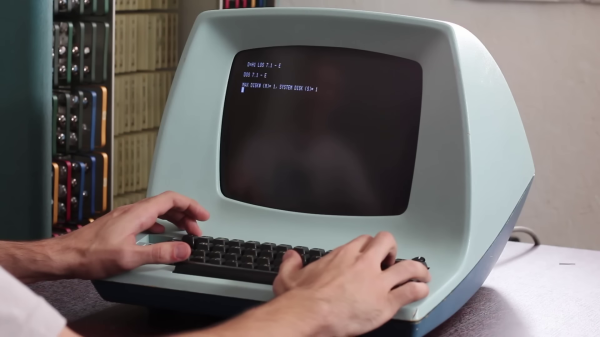
[David] at Usagi Electric ended up with an old Lear Siegler ADM-3A terminal in a trade a couple of years ago. But the CRT face was plagued with so-called cataracts, and the condition of the insides was unknown. The video ( below the break ) shows the restoration process, which went quite smoothly. [David] was relieved that the CRT repair in particular was easy, a fact he attributes to the Texas weather —

ADM-3A Under the Hood

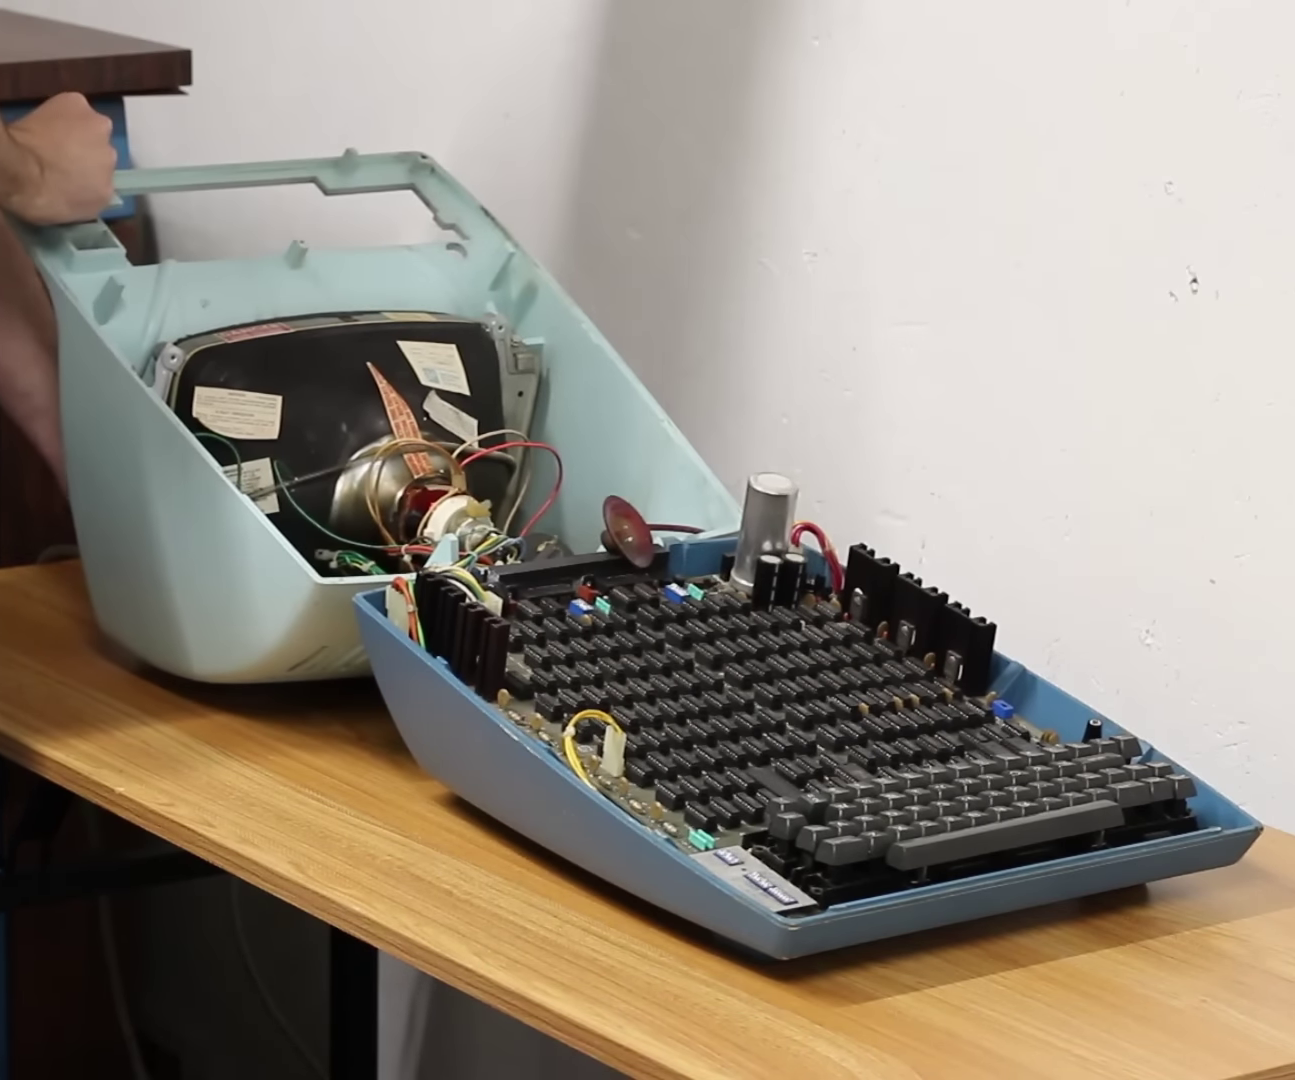
The temperature was 110 F / 43 C when he set the CRT outside to bake in the sun for a few hours. Afterwards, removing the “integral implosion protection” plastic screen went better than expected. Everything cleaned up nicely and the screen reinstalled. Introduced in 1976, the main electronics board is chock full of TTL chips with nary a microprocessor in sight. Fortunately the board was substantially intact, and a single missing chip was found hidden underneath the board. [David] gets the terminal up and running in short order, and is confronted with an annoyance familiar to gray-haired programmers who grew up in this era. Most terminals had different sets of commands to control features such as cursor control and clearing parts or all of the screen. Programs often assumed a certain type of terminal. Some terminals could be configured to behave in different ways, and some programs offered the user a choice of terminals. Today your terminal emulator probably still has a few choices of which kind of terminal to emulate, VT-100 being the most common. And eventually some operating systems provided a terminal abstraction, like Unix’s termcap for example.

If you were around in the era where terminals like the ADM-3A were scattered everywhere, what was your favorite terminal and/or terminal feature? And today, do you have any favorite terminal emulator to recommend? Let us know in the comments below.

Continue reading “Bringing An ADM-3A Back To Life”

The Dipole Antenna Isn’t As Simple As It Appears

Dipole antennas are easy, right? Just follow the formula, cut two pieces of wire, attach your feedline, and you’re on the air.  But then again, maybe not. You’re always advised to cut the legs a little long so you can trim to the right length, but why? Shouldn’t the math just be right? And what difference does wire choice make on the antenna’s characteristics? The simple dipole isn’t really that simple at all.

If you’ve got antenna questions, check out [FesZ]’s new video on resonant dipoles, which is a deep dive into some of the mysteries of the humble dipole. In true [FesZ] fashion, he starts with simulations of various dipole configurations ranging from the ideal case — a lossless conductor in free space with as close to zero diameter conductors as the MMANA antenna simulator can support — and gradually build up to more practical designs. Continue reading “The Dipole Antenna Isn’t As Simple As It Appears”

A Nifty Tool For Counting Neopixels

Picture it. You’ve got a big roll of NeoPixels, but you have no idea how many are actually on the tape. Or you need to count how many WS2812B LEDs are in a display to properly plan your animations. Fear not, for [Gustavo Laureano] has built the perfect tool for counting the addressable LEDs.

The tool is based on a Raspberry Pi Pico, so it’s easy to replicate at home. The LED strip is simply connected to the microcontroller via a set of jumper wires going to the 5V and GND pins, while one of the Pico’s ADC pins is then connected to the strip’s GND pin after the jumper. A further GPIO pin is used to send data to the strip.

Essentially, this uses the jumper wire as a rudimentary current shunt. The code steps through the string of LEDs, turning each one on and then off in turn, comparing the value read by the ADC pin at each state. When the Pico detects no difference in current draw between the on and off states, that suggests it’s trying to turn on an LED beyond the end of the string, and thus the count is concluded.

You don’t need to understand any of that to put this device to good use, however. You can easily whip it up on a breadboard with a Pi Pico and parts you have lying around in the shop. Video after the break.

Continue reading “A Nifty Tool For Counting Neopixels”

New Motherboard Improves Old CRT Television

While browsing AliExpress from his digital basement, [Adrian Black] stumbled upon what seemed like a brand-new mainboard for a CRT television set. He decided to take a gamble and ordered one. It finally arrived, and was indeed a brand new product from 2023.

DIGITAL MAIN BOARD OF TV, Work ath [sic] HONGXUN products with the care and precision of a sculptor in each step, wonderful have no limits

CRT Mainboard Transplant in Progress

Dubious marketing descriptions like “High Definition Digital Color TV Driver Board” aside, this turned out to be a fairly well-designed analog TV board. [Adrian] pulls a 20-year-old Magnavox ( Philips ) color television set from storage and begins the transplant operation. One interesting observation is the Magnavox board has almost the same layout as the new board, except for the orientation of the sections. The new CRT neck board had a different connector than the Magnavox set, but was designed to accept multiple sized sockets. [Adrian] just removed the new socket and replaced it with one from the old set. The mechanical issues were a bit more complicated, but nothing that a Dremel tool and a bit of hot glue can’t fix. The 220 VAC power supply was eventually modified to accept 110 VAC, which also enabled him to reconnect the degaussing coil.

[Adrian] has collected some relevant documentation in this GitHub repository, including schematics. Why bother with this at all? Well, until now, he didn’t have any way to test / view PAL RF signals in his lab. He was gambling on the new mainboard having a PAL tuner. It does, but as an unadvertised bonus, it supports NTSC and SECAM as well — but still not “HD digital color TV”, as far as we know. If you want a multi-standard TV in your lab, this solution may be worth considering. It appears there is still a market somewhere for new CRT televisions. If you have any background on this, please let us know down below in the comments.

Continue reading “New Motherboard Improves Old CRT Television”

A DeLorean sitting on patchy snow next to a driveway. It's angled away from the viewer to the left showing off the open engine compartment with bright orange high voltage lines coming out of a square metallic charger box.

A DeLorean With An Electrifying Secret

There are few production cars with as much geek cred as the DMC DeLorean. If you want to kick the nerdiness up a notch without doing a full Back to the Future prop-mod, then the next best thing is to make it an EV.

[Bill Carlson] took a 1981 DeLorean and transplanted the drivetrain from a Chevy Bolt to electrify this ride. With the DeLorean being a rear wheel drive vehicle and the Bolt front wheel, there was some amount of component reshuffling to do. The motor is now in the rear of the car along with the main contactor, charger, and motor controller while the batteries are split between a pack in the original engine compartment and another up front under the hood.

The electric power steering and brake booster from the Bolt now also live under the hood, and the accelerator and steering column from the EV were transplanted into the cockpit. [Carlson] still needs to tidy up the interior of the car which is currently a nest of low voltage cables as well as add the cooling system which will bring this stainless monster up to a hefty 3200 lbs (~1450 kg) versus the original 2850 lbs (~1300 kg). We suspect the total bill came in a bit lower than getting an electric DeLorean Alpha5.

This isn’t the first electric DeLorean we’ve covered here, and if that isn’t cool enough, how about this DeLorean-inspired hovercraft?

Continue reading “A DeLorean With An Electrifying Secret”

Ask Hackaday: Why Retrocomputing?

I recently dropped in on one of the Vintage Computer Festival events, and it made me think about why people — including myself — are fascinated with old computer technology. In my case, I lived through a lot of it, and many of the people milling around at VCF did too, so it could just be nostalgia. But there were also young people there.

Out of curiosity, I asked people about the appeal of the old computers on display there. Overwhelmingly, the answer was: you can understand the whole system readily. Imagine how long it would take you to learn all the hardware and software details of your current desktop computer CPU. Then add your GPU, the mass storage controllers, and your network interface. I don’t mean knowing the part numbers, specs, and other trivialities. I mean being able to program, repair, and even enhance it.

Continue reading “Ask Hackaday: Why Retrocomputing?”

Building A DIY Cloud Chamber

[RCLifeOn] happened to come into possession of some radioactive uranium ore. He thus decided to build a cloud chamber to visualize the products of radioactive decay in a pleasing visual manner.

The construction is fairly straightforward stuff. A 3D-printer build plate was used to heat isopropyl alcohol to a vapor, while a bank of thermoelectric coolers then cool the alcohol down to -30 C to create a dense fog. The build uses a glass chamber with a bank of powerful LEDs to illuminate the fog, making it easier to see the trails from radioactive particles passing through. [RCLifeOn] later used a variety of radioactive sources to deliver a bunch of particles into the chamber for more action, too. He also experimented with blocking particles with a variety of materials.

It’s one of the bigger cloud chambers we’ve seen, and seems to work great. You can build a simple version pretty easily, or you could travel to a local museum or science center if you’re too busy to tackle it at home. Video after the break.

Continue reading “Building A DIY Cloud Chamber”