Weather Note Tells You What You Need To Know, And No More

Smartphones are portals to an overwhelming torrent of information. Yes, they’re a great way to find out the time, your bus schedule, and the weather, but they’re also full of buzzers and bells going off every three minutes to remind you that your uncle has reposted a photo of the fish he caught ten years ago. Sometimes, it’s better to display just the essentials, and that’s what Weather Note does.

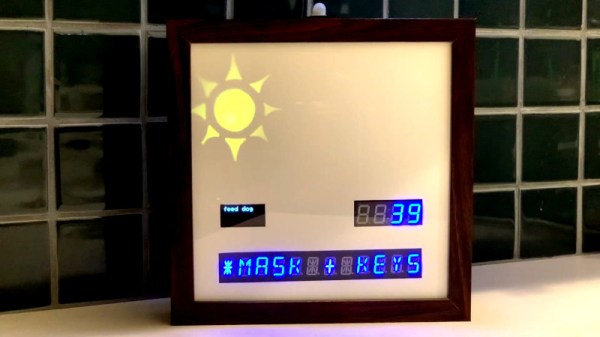
It’s built around the Adafruit Feather Huzzah, a devboard built around the venerable ESP8266. It’s a great base for an Internet of Things project like this one, with WiFi built-in and ready to go. The Weather Note talks to a variety of online platforms to scrape weather data and helpful reminders, with the assistance of If This Then That, or IFTTT. Reminders to walk the dog or get some milk are displayed on a small OLED screen, while there’s also a bunch of alphanumeric displays for other information. WS2812 LEDs are used behind a shadowbox to display weather conditions, with cute cloud, rain, and sun icons. It’s all wrapped up in a tidy frame perfect for the mantlepiece or breakfast table.

It’s a great build to learn about programming for the Internet of Things, and with those bright LED displays, it’s probably a viable nightlight too. It’s a rare project that can both tell you about the weather and keep you from stubbing your toe in the kitchen, after all. Those desiring a stealthier build should consider going down the smart mirror route instead. Video after the break.

Continue reading “Weather Note Tells You What You Need To Know, And No More”

Electronic Connect Four Has No Pieces To Lose

Recreating classic games in software is a great way to get better at coding or learn to code in the first place. If you do it in hardware though, you’ll gain a lot more than coding skills. Just ask [Kelly] and [Jack] did, when they built this Arduino-based electronic Connect Four for a school project.

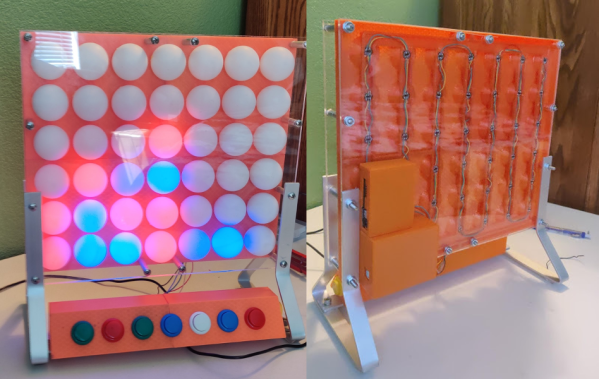
We love that their interpretation manages to simplify game play and make it more fun than the original version. All the players have to do is turn it on and start pushing the arcade buttons along the bottom to choose the column where they want to make a play. The LEDs animate from top to bottom to imitate the plastic disc dropping down through the board. If a win is detected — four in a row of the same color going any direction — the board fills up with the winning color and the game starts over.

The state machine doesn’t currently do anything about tie situations, so there’s a reset button hidden on the side. As [Kelly] and [Jack] explain in their walk-through video after the break, that is something they would like to address in the future, along with making it possible to choose whatever battle color you want. We think a reset animation that mimics the look of the discs spilling out the bottom would be cool, too.

If you’ve never implemented a game on hardware before, something like this might be a bit daunting. May we suggest a game of 4×4 Tic Tac Toe instead?

Continue reading “Electronic Connect Four Has No Pieces To Lose”

The Three Shell Mystery Finally Solved!

While we certainly acknowledge the valuable contributions of the open hardware community that help to mitigate the coronavirus crisis, we are also looking forward to the days when people start going back to building other things than 3D-printed face shields, pandemic trackers, and automatic soap dispensers. However, this handwash timer by [Agis Wichert] is a very creative version that also tries to solve the long outstanding mystery of how to use the three seashells. Unfortunately, in contrast to those in the original movie, these three seashells do not replace toilet paper which many people are seemingly so desperate in need of at the moment.

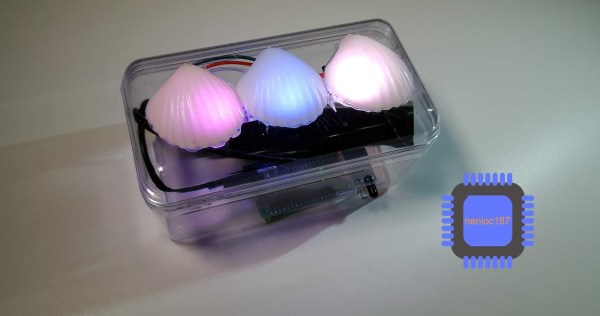
The build is quite simple and requires only a few off-the-shelf components including a Neopixel strip, IR proximity sensor, and an Arduino Nano. The plastic seashells were taken from the classic German “Schleckmuschel” candy, thereby giving the project an extra retro twist. As shown in the video embedded below, the timer works by consecutively dimming the LEDs located under each seashell until the recommended duration of 20 seconds has elapsed which is indicated by shortly flashing all LEDs.

Handwash timer projects do not always have to be visual as this one playing your favorite Spotify tunes proves. What we really would like to see though is someone building a toilet paper dispenser that is triggered by swearwords.

Continue reading “The Three Shell Mystery Finally Solved!”

Lighting Up Your Spectrespecs

In the ever-popular world of Harry Potter, a pair of Spectrespecs are useful if you’re hunting for wrackspurts and nargles. While we’ve never spotted either of these creatures ourselves, if you’d like to go out on a hunt, [Laveréna]’s build might be for you.

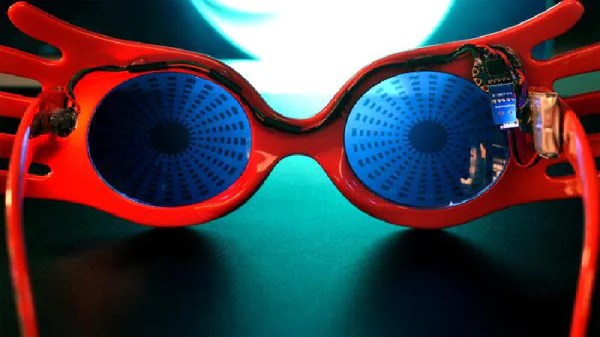
To start with, you’ll need the frames for the Spectrespecs. [Laveréna] elected to source hers commercially, but you can 3D print them or even craft them by hand if you so desire. Then, a TinyLily microcontroller board is installed, with its small size allowing it to be tucked neatly out of sight in the top of the sunglasses. Two NeoPixels are then installed, with the TinyLily programmed to flash the LEDs in the requisite blue and red colors for easy identification of supernatural creatures.

Tools such as cheap microcontrollers designed for wearables and low-cost addressable LEDs are making advanced cosplay designs easier than ever. Whipping up custom blinkables no longer requires knowledge of advanced multiplexing techniques and how to properly drive high-power LEDs. Of course, LED wearables do still get properly advanced – like this skin-based 7-segment display. If you’ve got a glowable project of your own that you’re dying to share, be sure to let us know!

LED Flame Illuminates The Beauty Of Noise

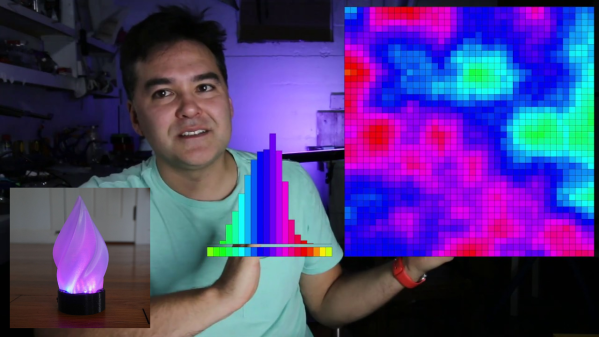
Have you ever wrapped up a nice blinky project only to be disappointed by the predictability of the light or the color patterns? When it came to lighting this LED candle, so was [fungus amungus]. But there’s a better way, and it involves noise.

Perlin noise was created in the early 80s by Ken Perlin while he was working on the movie Tron. Frustrated by the current state of computer graphics and too limited on space to use images, he devised an algorithm for generating natural-looking textures. Basically, you generate a bunch of numbers between 0 and 1, then assign values to those numbers, such as a range of greyscale values from black (0) to white (1), or the values from the color wheel. The result is much prettier than random numbers because the neighboring values for any given number aren’t radically different. You get nice randomness with hardly any overhead.

[fungus amungus] is using the FastLED’s noise function to generate the numbers, but there’s a whole lot more going on here. As he explains in the excellent video after the break, if you want to animate these values, you just add another dimension of them. Although [fungus amungus] is using a Trinket Pro and a NeoPixel ring, we think a simplified version could be done with a Circuit Playground Express using the built-in LEDs.

If you want to do it the hard way, start by making your own NeoPixel ring.

Continue reading “LED Flame Illuminates The Beauty Of Noise”

Don’t Hang Christmas Lights, Embed Them

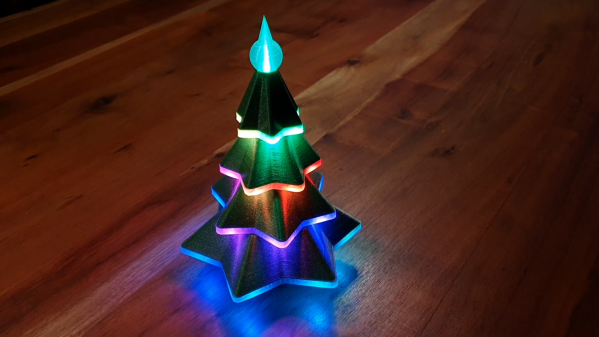
Finding it hard to get into the holiday spirit this year? Maybe you just need a timely project to light up the evenings until Santa (or Krampus) pays your house a visit. Whoever visits this season, delight or distract them with a 3D printed tree featuring embedded RGB LEDs.

[MakeTVee] printed this tree in four stages to make it a little bit easier to wire everything up. Each stage has six LEDs embedded in a 5mm transparent layer at the bottom. The top stage has a second color change to make a tree topper that holds a single LED. The color change feature in PrusaSlicer 2.0 made it easy to pause the print, insert the wired-up LEDs, and resume seamlessly in green filament. There’s a hidden base of what appears to be appropriately delicious cinnamon filament that holds the Trinket M0 and the power switch.

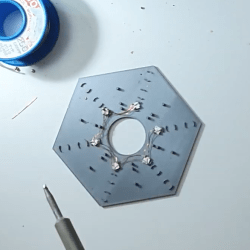
This lil’ tree looks great, especially considering how fiddly and nerve-wracking the wiring and assembly must have been. [MakeTVee] made it easier on himself with a printed wiring stencil that holds the LEDs in their star formation while he solders them up with magnet wire (a solid choice in our book). He thoughtfully included that stencil in the files which are up on the Prusa site. Dim the lights, grab a hot beverage, and check out [MakeTVee]’s build video after the break.

If you want a holiday hack that people can play with, invite them to paint your addressable tree.

Continue reading “Don’t Hang Christmas Lights, Embed Them”

RGB Lamp With Micro:Bit Powered Gesture Control

The Micro:bit is a very neat piece of hardware that, frankly, we don’t see enough of. Which made us all the more interested when [Manoj Nathwani] wrote in to tell us about the gorgeous 3D printed RGB LED lamp he created that uses the BBC-endorsed microcontroller to perform basic gesture detection. Purists will likely point out that an Arduino Pro Mini is tagging along to handle interfacing with the LEDs, but it’s still a good example of how quick you can get a project up and running with MicroPython on the Micro:bit.

[Manoj] used eight NeoPixel Sticks, a NeoPixel Ring, and a few scraps of perfboard to construct a three dimensional “bulb” to fill the void inside the printed diffuser. They’re chained together so all the elements appear as a single addressable strip, which made the rest of the project a bit easier to implement. It might not be pretty, but it gets the job done and it’s not like you’ll ever see it again once installed in the lamp anyway.

The Micro:bit and Arduino co-pilot live in the base of the lamp, and the single USB cable to provide power (and the ability to update the device’s firmware) is run out the bottom to give the whole thing a clean and professional look. For those wondering why the Arduino has tagged along, [Manoj] says he couldn’t get the NeoPixel libraries to play nicely with the Micro:bit so he’s using the Arduino essentially as a mediator.

Right now the only gesture that’s detected on the Micro:bit is a simple shake, which tells the Arduino to toggle the light show on and off. But in the future, [Manoj] plans to implement more complex gestures which will trigger different animations. As he explains in the blog post, gesture recognition with the Micro:bit is incredibly simple, so it should be easy to come up with a bunch of unique ways to interface with the lamp.

Color changing LED lamps are a favorite project of hackers, and we’ve seen examples built with everything from glass and copper to laser-cut pieces of wood and veneer. While you might prefer to skip the gesture control for an ESP8266 and UDP, we think this project is another strong entry into this popular genre.