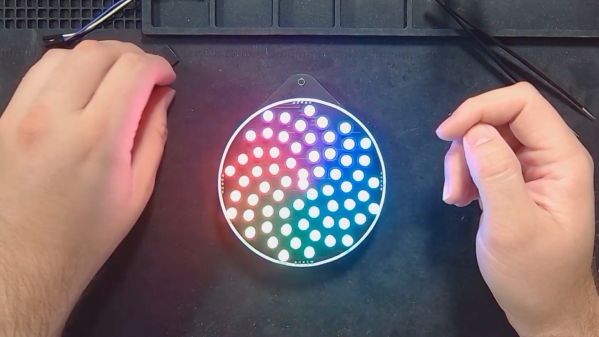
A black work mat holds a circular badge with 64 addressable LEDs in a spiraling shape akin to the center of a sunflower. The LEDs have a rotating rainbow spiraling around the circle with red touching violet on one end. The colors extend in bands from the center to the rim of the circle.

Math You Can Wear: Fibonacci Spiral LED Badge

Fibonacci numbers are seen in the natural structures of various plants, such as the florets in sunflower heads, areoles on cacti stems, and scales in pine cones. [HackerBox] has developed a Fibonacci Spiral LED Badge to bring this natural phenomenon to your electronics.

To position each of the 64 addressable LEDs within the PCB layout, [HackerBox] computed the polar (r,θ) coordinates in a spreadsheet according to the Vogel model and then converted them to rectangular (x,y) coordinates. A little more math translates the points “off origin” into the center of the PCB space and scale them out to keep the first two 5 mm LEDs from overlapping. Finally, the LED coordinates were pasted into the KiCad PCB design file.

An RP2040 microcontroller controls the show, and a switch on the badge selects power between USB and three AA batteries and a DC/DC boost converter. The PCB also features two capacitive touch pads. [HackerBox] has published the KiCad files for the badge, and the CircuitPython firmware is shared with the project. If C/C++ is more your preference, the RP2040 MCU can also be programmed using the Arduino IDE.

For more details on beautiful RGB lights, we’ve previously presented Everything You Might Have Missed About Addressable LEDs, and for more details on why they can be so fun to wear, check out our Hackaday Badgelife Documentary.

(Editor’s note: HackerBox makes and sells kits, is run by Hackaday Contributor [Joseph Long] IRL.)

Continue reading “Math You Can Wear: Fibonacci Spiral LED Badge”

Organic Fibonacci Clock Is All About The Spiral

Whether you’re a fan of compelling Tool songs, or merely appreciate mathematical beauty, you might be into the spirals defined by the Fibonacci sequence. [RuddK5] used the Fibonacci curve as the inspiration for this fun clock build.

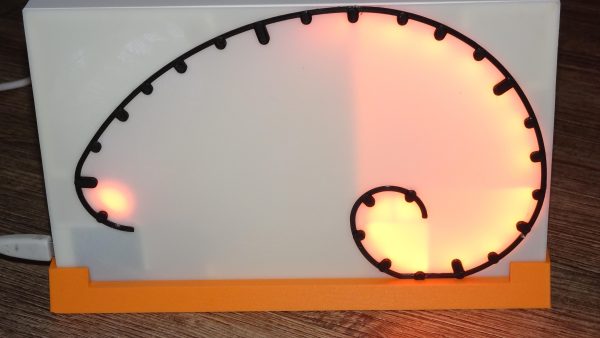
The intention of the clock is not to display the exact time, but to give a more organic feel of time, via a rough representation of minutes and hours. A strip of addressable LEDs is charged with display duty. The description is vague, but it appears that the 24 LEDs light up over time to show the amount of the day that has already passed by. The LEDs are wound up in the shape of a Fibonacci spiral with the help of a 3D printed case, and is run via a Wemos D1 microcontroller board.

It’s a fun build, and one that we can imagine would scale beautifully into a larger wall-hanging clock design if so desired. It at once could display the time, without making it immediately obvious, gradually shifting the lighting display as the day goes on.

We’ve seen other clocks rely on the mathematics of Fibonacci before, too. If you’ve cooked up your own fun clock build, don’t hesitate to let us know!

A Turing-Complete CPU From RAM

Building a general-purpose computer means that you’ll have to take a lot of use cases into consideration, and while the end product might be useful for a lot of situations, it will inherently contain a lot of inefficiencies. On the other hand, if you want your computer to do one thing and do it very well, you can optimize to extremes and still get results. This computer, built from RAM, is just such an example.

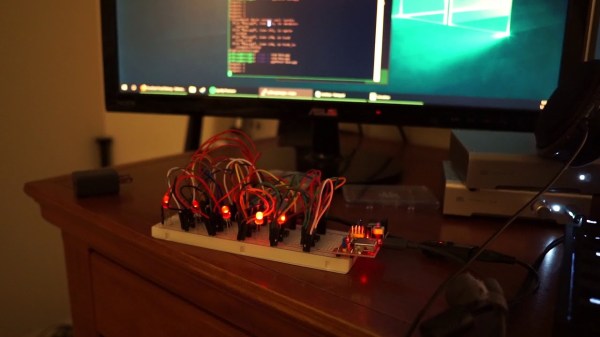
The single task in this case was to build a computer that can compute the Fibonacci sequence.  Since it only does one thing, another part of the computer that can be simplified (besides the parts list) is the instruction set. In this case, the computer uses a single instruction: byte-byte-jump. Essentially all this computer does is copy one byte to another, and then perform an unconditional jump. Doing this single task properly is enough to build every other operation from, so this was chosen for simplicity even though the science behind why this works is a little less intuitive.

Of course, a single instruction set requires a lot of clock cycles to work (around 200 for a single operation). The hardware used in this build is also interesting and although it uses a Raspberry Pi to handle some of the minutiae, it’s still mostly done entirely in RAM chips, only cost around $15, and is a fascinating illustration of some of the more interesting fundamentals of computer science. If you’re interested, you can build similar computers out of 74-series chips as well.

Fibonacci Clock Is Hard To Read, Looks Good

Artists have been incorporating the golden ratio in their work for many hundreds of years, and it is thought that when proportions are in line with this ratio, it tends to be more aesthetically pleasing. With that in mind, the clock that [Philippe] created must mathematically be the best looking clock we’ve ever featured, even if it is somewhat difficult to tell time from it.

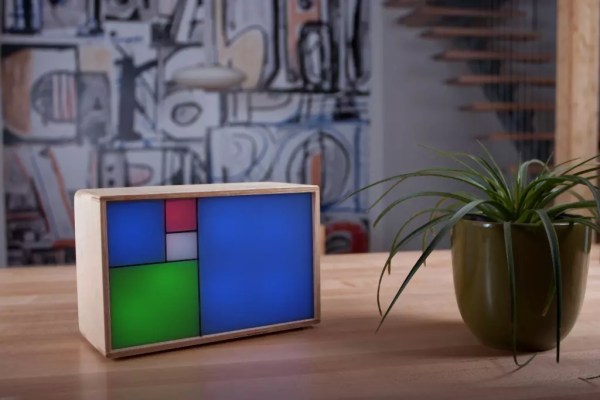
The clock is made up of squares which represent the first five numbers of the Fibonacci sequence. The squares are backlit with LEDs, which will illuminate red for the hour, green for the minute, and blue representing the overlap of hours and minutes. Simply add up the red and blue squares to get the hour, and add the green and blue squares to get the minutes. The minutes are displayed in 5 minute increments since there aren’t enough blocks though, so you’ll also have to multiply. Confused yet? If not, it turns out that there are several ways to display certain times using this method, any of which can be randomly selected by the clock. [Philippe] reports that there are 16 different ways to represent 6:30, for example.

The clock is driven by an ATmega328P and is housed in a wooden case. There are schematics and code available on [Philippe]’s site if you want to build your own, there are detailed descriptions of how to tell time with this clock. You’ll probably need those. If you like getting confused by clocks, you might also like this one as well.

Continue reading “Fibonacci Clock Is Hard To Read, Looks Good”

Setting It Straight About Science Fair Solar Energy Breakthrough

There’s been a lot of stories about arranging solar panels to mimic leaves on a tree, thereby boosting their efficiency. But before reading that story you might want to check out this blog post correcting some flaws in that breakthrough (page is down, here’s a cached version).

Before we go any further, we’d like to point out that the original work was done by a seventh grader. He looked at leaves on trees and postulated that the Fibonacci sequence can be found in the layout of leaves, and that by laying out solar cells in the same way you can capture more sunlight. Comments can get negative fast around here, so remember that trashing his work may discourage other kids from participating in science fair events.

Anyway, long story short: there were some issues with original assumptions, and about what was actually being measured during testing. The article linked at the top covers the fact that the cells were not measured under load, and that simple calculations can show why the tree-mimicking-cell-placement can be proven sub-optimal to 45 degree, south-facing solar farms.

[Thanks Jeffery and Steve for the original article and Brian for the follow-up article and cached link]