Single-chip Digital Audio Player

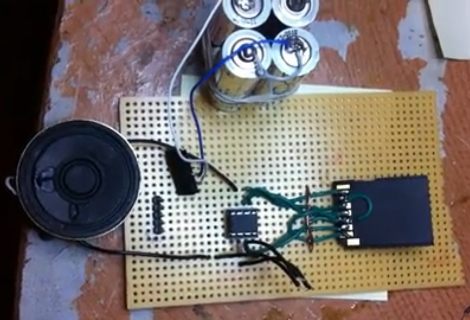
[Dmitry Gr.] built a simple circuit to playback digital audio. At the center you can see an 8-pin PIC 12F1840 microcontroller. It’s pulling audio data from a microSD card which is read through a full-sized SD card adapter to which he soldered jumper wires for all of the necessary connections. There is one additional semiconductor, a FET which is used to drive the speaker seen to the left. Unregulated power is provided by a pair of AA batteries (four are seen in the picture above but only two are actually connected to the circuit). He’s planning to post his code package soon, but for now you’ll have to be satisfied with a couple of demo videos and a schematic. Both videos are embedded after the break, and we’ve also included a screenshot of the schematic which is shown in the second video.

This is very similar to the 1-Bit Symphony CD we saw almost a year ago in a links post. That one used a jewel case instead of the protoboard seen here, and had a headphone jack instead of the speaker.

Continue reading “Single-chip Digital Audio Player”

Build A Spinning POV In A Day

We love spinning POV displays but have yet to build one to call our very own. This project might be the one that we end up building. It’s looks good and it’s the only persistence of vision display that comes to mind which can be built in twelve hours.

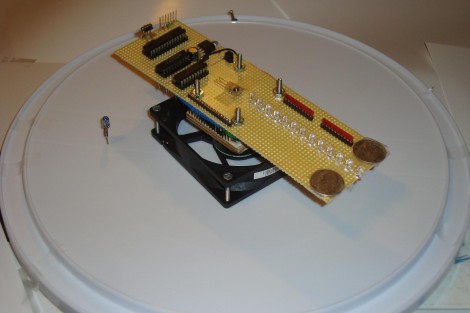
The spinning is taken care of by a PC fan. This actually helps with some of the calculations as this fan spins at a know RPM. That information, along with a bit of geometry, can be used to calculate the timer interrupts for syncing the display. A reference point for this device is provided by an IR receiver/emitter pair which is easy to wire up since you already need a voltage source for the fan itself. The rest of the hardware is pretty common: a battery holder is centered on the axis for proper weight distribution and protoboard houses the components such as a PIC 18F252, 74LS373 data latches, and the LEDs themselves. The circuit is wire-wrapped, and works like a charm as evidenced in the clip after the break.

Continue reading “Build A Spinning POV In A Day”

Laser Tripwire Alarm System Uses Mirrors To Increase Coverage

laser_tripwire_alarm

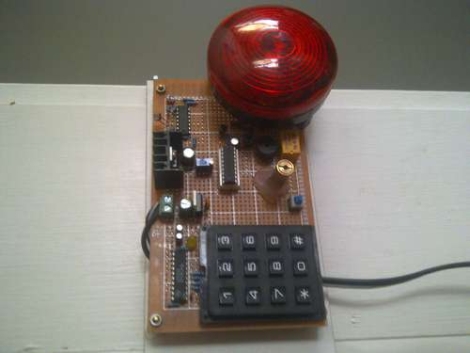
Instructables user [EngineeringShock] has been hard at work building a laser trip wire security system, complete with a combination lock. The security system works just like you see in the movies, employing an array of mirrors to bounce the laser across an opening several times in order to secure the space.

A PIC18F1220 micro controller sits at the center of the alarm and handles the majority of its functions. It takes input from the laser detection circuit, triggers the buzzer, as well as arms and disarms the entire alarm system. An LS7222 digital lock handles the passcode verification side of things, taking input from a 16-button matrix keypad, and telling the PIC when the proper code has been entered.

As you can see in the video below, the alarm system works and the buzzer is quite loud. There is one small problem however – the alarm only arms itself after the proper code has been entered and the lights have been turned off. The light sensing circuit he uses is too sensitive and can only operate in darkness, though he discusses the ability to add a more accurate sensing solution.

If you are interested in reading more about laser tripwire security systems, check out this similar passcode-based system, this alarm system built into a toy, and this Arduino-based alarm system.

Continue reading “Laser Tripwire Alarm System Uses Mirrors To Increase Coverage”

HsNet: Node Communications For Feature-limited Microcontrollers

[Diego Spinola] wrote in to tell us about a node communication system he’s been working on called HsNet. The aim is to build a system of nodes that can be made up of small and inexpensive microcontrollers. The problem is that the least expensive controllers often don’t have a hardware UART. HsNet implements the RS485 protocol using a software UART along with a slim and sleek addressing scheme.

The first module developed, seen in the image above and video after the break, is a single channel pulse-width-modulation node using a PIC 12F683. It can be sent commands in the payload of the HsNet packet format. The PWM modules accept three different commands; one is a desired PWM value, another is a delay between steps for the PWM, and the last toggles a blink function.

He has also developed an analog sensor module and an Arduino-based TCP/IC gateway module. Now that the packet communications have been established, it will be rather simple to add nodes based on that groundwork. [Diego] brought these components together to build an interactive wall which can also be seen after the break.

Continue reading “HsNet: Node Communications For Feature-limited Microcontrollers”

Full-featured Battery Tester Puts Them Through Their Paces

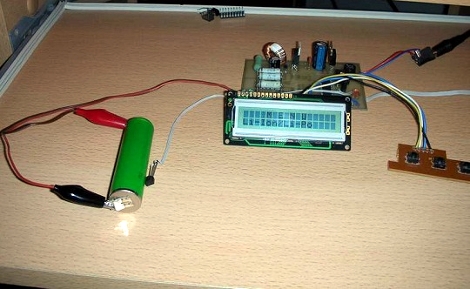
When working on battery-dependent projects you want accurate performance information where a datasheet may not be available. [E. Lelic] set out to build a device that would meter internal battery resistance but ended up with a bench tool that can do much more than that.

A PIC 16F88 microcontroller takes center stage on the meter, taking voltage level readings, monitoring a DS1820 temperature sensor, and controlling an LM2575 step-down regulator. The components provide functionality for measuring Lithium Ion, Lithium Polymer, Nickel Cadmium, Nickel Metal Hydride, and Alkaline batteries. It is capable of fully discharging and fully charging the batteries, measuring time and power consumption during this cycle, and monitoring temperature changes for the NiMH and NiCad versions.

Look for the little red ‘Download’ icon at the bottom of the post linked above. That archive includes a schematic (which we’ve also embedded after the break), board layout in .LAY format, and a HEX firmware file.

If you enjoyed this build you might want to look at this other battery capacity tester.

Continue reading “Full-featured Battery Tester Puts Them Through Their Paces”

Temperature Sensing Mug Means Never Burning Your Mouth Again

temp_sensing_mug

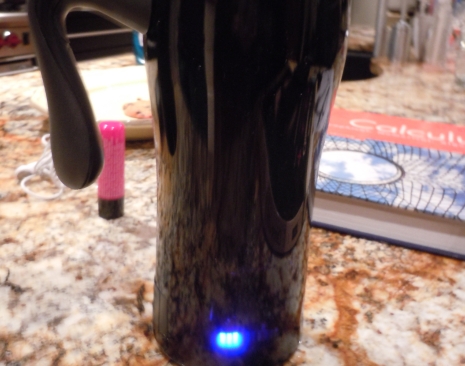
Some people tend to get awfully attached to their favorite mug. Like an old friend, the mug holds a special place in their hearts, and there’s a weird sadness when it finally gives up the ghost. Through the winter months [Ben’s] girlfriend is never without hers, and when it broke, he decided to give her a new one with some added functionality.

He built her a temperature sensing mug that uses a rather novel way of determining how hot or cold the contents are. Instead of using a thermistor to determine the drink’s temperature, he opted to use a simple diode since it is well known that a diode’s forward voltage varies with temperature. After determining the diode’s voltage range using hot and cold beverages, he hooked it up to the ADC of a PIC12F615 micro controller. The temperature is displayed via 10 LEDs, which are driven through a pair of 8-bit shift registers and buffers since his PIC did not have enough pins to control them on its own.

He had some PCBs made, and after a handful of setbacks got everything put together. He says the mug works pretty well, though the display changes a bit more slowly than he would like. He also mentions that if he builds a second version, he will be sure to select a different PIC that has enough I/O pins to do the job, as well as use a thermistor instead of a simple diode for sensing the temperature.

Continue reading to see a brief demo video [Ben] put together.

Continue reading “Temperature Sensing Mug Means Never Burning Your Mouth Again”

PIC-based Temperature Logger With Onboard Storage

pic_temp_logger

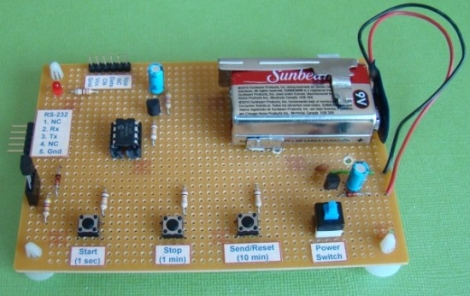
Last summer, [Rajendra Bhatt] built himself a simple PIC-based temperature monitor with data logging abilities and recently got around to sharing it on his site. The sensor is based on a PIC12F683 micro controller and measures the ambient temperature on a set interval, storing the values on the MCU’s internal EEPROM.

He used a Maxim DS18B20 temperature sensor, which communicates with the PIC over a 1-wire bus. The sensor is read based upon the interval chosen by the user, and can be configured to measure the temperature every second, every minute, or every 10 minutes. The data is stored on the aforementioned EEPROM and can be uploaded to a computer via a serial connection. The PIC has the ability to store 254 readings before the data must be cleared from the device.

It’s a great beginner project, and has plenty of room for improvement. As [Rajendra] points out, an external EEPROM could be added to expand the recording capacity, and it would be nice to have a real-time clock on hand for accurate time stamping. If we were to build one ourselves, a means of wireless data transfer would be first on our list of potential enhancements.