Radio Packets…from Spaaaace!

space_radio

[Bill Meara] was watching the International Space Station and the Shuttle Discovery pass overhead a few weeks ago, which rekindled an interest he gave up long ago – sending and receiving radio packets from space.

Years ago, he used to send APRS packets into space with a small rig powered by a 286 computer and HandiTalkie. These packets would drift off into space most of the time, but occasionally they would bounce back to Earth whenever the space station or PC Sat would fly by. The packets were often captured by other ham operators across the globe, who happened to be tuned to 145.825 MHz.

His interest renewed, he dug out his old HandieTalkie and Kantronics Terminal Node, aiming them towards the sky via an antenna situated in his back yard. When he returned 10 hours later, he found that he had collected all sorts of “space packets” from across the globe.

While not exactly a hack, it is definitely a neat exercise in ham radio operation. We can imagine slinging data packets off the space station would be an exciting experience for any budding operator (and OMs as well!)

A Keygen For The Real World

key_generator

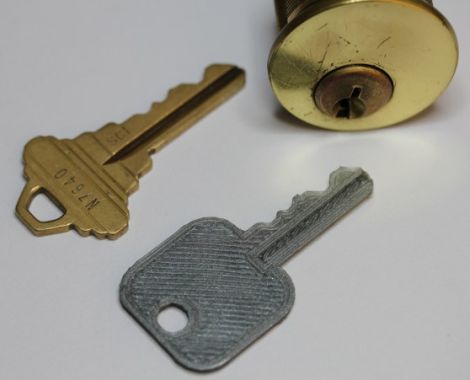
[Nirav] found that he rarely printed anything useful with his RepRap, so to shake things up, he decided he needed to work on a project that didn’t involve printing yet more RepRap parts.

The goal of his project was to create working replicas of house keys by simply using the code imprinted at the factory. He purchased a handful of used lock sets from eBay, then carefully measured the keys with a ruler and calipers to get the blank dimensions just right. After that was done, he looked around online and was eventually able to create an OpenSCAD model using a chart of pin depth specifications he located. By changing the last line in the model’s code he can print any coded key. For keys lacking a code, he can manually measure the height of each bit and print replicas that way as well. Once printed, he says that they keys are strong enough to turn most locks he has come across, including deadbolts.

This is undoubtedly a neat project in its own right, though we would be interested to see if someone could get it paired with a program like SNEAKEY to generate bit measurements by sight alone.

Electronic Bird House Monitoring Goes A Few Steps Further

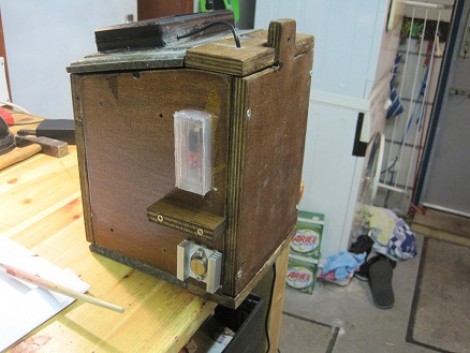
[Stephen Albers] offers his avian friends a lot of extras with this electronically monitored bird house. This will not only give you a look at what’s going on inside, but provide a source for several other bits of data as well.

First off, a camera has been mounted to the underside of the roof. This looks down on the nesting area and features night vision so that you can peek in any time day or night. He used a WiFi webcam that operates separately from the other electronics.

With the remainder of the setup he is able to harvest temperature and humidity data inside, temperature outside, force on the bottom of the house (although this turned out to be less useful than anticipated), and a in-and-out count for the doorway provided by an IR transmitter/receiver pair.

This offers quite a bit more than the last bird house project we saw. That one also left a lot to be desired as far as protecting the electronics. [Stephen] didn’t skip on that kind of protection. Most of the electronics are housed in an acrylic chamber in the base of the house. The sensors find themselves nestled in plastic enclosures, although some work needs to be done to ensure that the temperature and humidity sensors will still function correctly with this setup.

Modular Synthesizer Is Rack-mounted And Reconfigurable

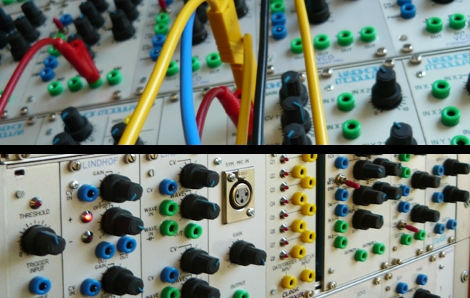
[Dirk] let us know about this fantastic music synthesis experimentation setup (translated). Turn your computer speakers off (to avoid the auto-playing music when every page loads) and dig into the wealth of information in this repository. Literally dozens of modules have been built and superbly mounted on a rack system. Each can be connected with other modules into an incredible number of different setups using patch wires that terminate with banana plugs.

The module enclosures themselves are made to fit in a standard 19″ rack. The front bezels were designed in CAD, with the rest of the housing made mostly of aluminum. Since each module tends to be quite small several are ganged into one rack skeleton to save space. You can see in the images above that there are as many as eight modules per rack slice.

You’ll enjoy reading about the many different sound chips that are in use here. But it doesn’t have to end there. If this has whet your appetite for your own rack-mounted system you’re in luck. The download area has schematics, board artwork, and build information for most of the modules.

easytransfer_serial_arduino_communications_library

Library Makes Arduino To Arduino Serial Communications Dead Simple

When [Bill Porter] works on a project, he says that he typically writes his own NMEA standard communications protocols to fit the job at hand. While it makes things easy to troubleshoot, he admits that his custom protocols are wasteful of both processor time and bandwidth. Binary communications on the other hand are more efficient, but a bit trickier to manage.

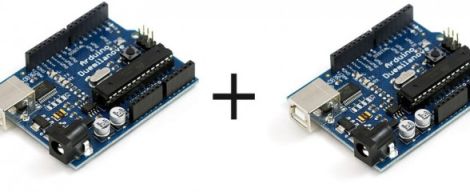
To make things easy for the common user, he wrote a library called EasyTransfer which abstracts packetized serial communications between two Arduino boards. The process is pretty simple – all one has to do is define a data structure on both Arduino boards so that they know what sort of data is coming over the wire, and EasyTransfer handles the rest. This allows users to worry less about communications protocols or transmission errors, and focus on their projects instead.

If you’re working on a project and searching for an easy way to get a pair of Arduinos talking, swing by his site and grab the library. It doesn’t get much easier.

Run Kindle 3 Firmware On Kindle 2 Hardware

After about six weeks of testing [Yifanlu] has released a stable version of the Kindle 3 firmware for use with Kindle 2 hardware. Everything seems to be working just fine with the patched firmware. We immediately jumped to the conclusion that the upgrade must run pretty slow on the older hardware. [Yifanlu] addresses that assumption in his post. The Kindle 2 hardware is not as fast as the Kindle 3, but it sounds like the upgraded firmware is no slower than the stock firmware was on the older units.

Since the firmware is proprietary, the upgrade method requires that you own both Kindle 2 and Kindle 3. Three scripts will pull the firmware image from the older hardware, copy it over to the new hardware and patch it at the same time, then copy the fully patched package back to the old hardware for use.

After the break you can see a video of a Kindle DX running 3.1 firmware. There’s also a link to the Reddit post where commenters have linked to pre-compiled versions of the patched package.

Continue reading “Run Kindle 3 Firmware On Kindle 2 Hardware”

Laser-powered DSLR Auto Focus Assist Light

laser_af_assist

[Adrian] uses his Canon 40D quite often in dark or low-light situations, and found the onboard auto focus assist functionality to be a bit frustrating. In certain focus modes, the auto focus assist light is programmed to turn off once focus has been achieved. He noticed that if his subject moves or the focus point changes before he snaps the picture, the AF light does not come back on to assist in refocusing the image.

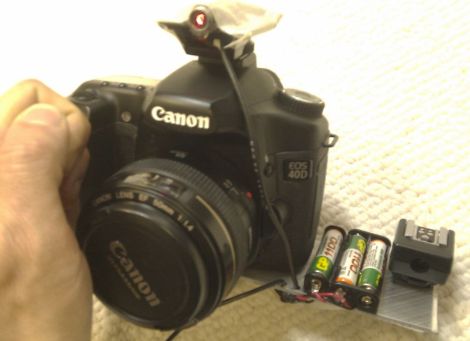
To work around this problem, he decided to build a supplemental auto focus assist light that could be triggered at will. He purchased a cheap laser pointer with an adjustable lens, then cut it open to get at the good parts. He mounted it on top of his camera and tweaked the lens to produce an unfocused beam of light that measures about 6” x 12” at five feet.

The laser pointer did the trick – his images are coming out much nicer now that he can easily recompose his shots in low light. While it works great, he’s not completely satisfied with the build, especially with the fact that he has to manually trigger the laser pointer.

Version 2 is in the works however, which employs an old hot shoe to trigger the laser whenever he pushes the shutter release halfway down. According to his blog he is having some timing issues, causing him to capture the laser in most of the pictures he takes. [Adrian] is working hard to correct the problem, and we’re sure he’d appreciate any tips you might have.