Micro Audio Player Can Hide Behind A Postage Stamp

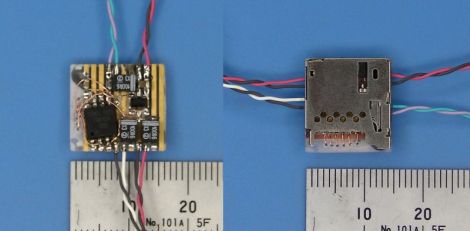
The original iPod shuffle was a pretty small device, there’s no doubt about that. However, in the world of miniature audio players, [Chan] is no slouch either.

A few years ago, he set out to construct a micro audio player that used little more than a small microcontroller and a microSD memory card. He chose an ATinyX5 series microcontroller to run the show, utilizing its pair of PWM output pins to directly drive the speakers. Since there is no built-in amplifier, the audio volume is not loud, but it does sound reasonable if you use a set of high efficiency desktop speakers. He does mention that the sound can easily be amplified after passing the signal through a filter, so there is hope for those of you who like your music turned up to 11.

The only downside we can see is that the audio player can only process Wave files, but it’s hard to expect more from a DIY audio player smaller than a postage stamp. It would be great to see what sort of micro-handiwork [Chan] could perform if he were to update his design and build a full-functioning MP3 player based upon this project.

Open Source 5-axis CNC Router

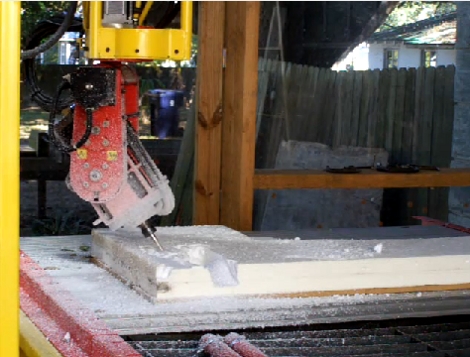
This 5-axis CNC router could soon be an open source tool. [Mike Calvino] built it for the School of Architecture at the University of Arkansas. It can be used as a router or as a plasma cutter/welder. Now he’s trying to raise some money that will underwrite his time and effort to develop and release instructions, design files, and specifications to make it an open source hardware project.

It is extremely large, and in addition to the X, Y, and Z axes that you’d expect to find on CNC machinery, it can tilt and rotate the cutting tool. This is not something you’re likely to build at home. But the availability of plans would be a huge contribution toward making machine tools accessible at a relatively small price tag. It’s not hard to image universities building this as a class project. We also think it would be a perfect group project for you and your buddies over at the local Hackerspace to undertake. Check out some milling action in the clip after the break.

Continue reading “Open Source 5-axis CNC Router”

Audio Two-fer – Sneaker Speakers And DIY Mid-Fi Woofers

speakers

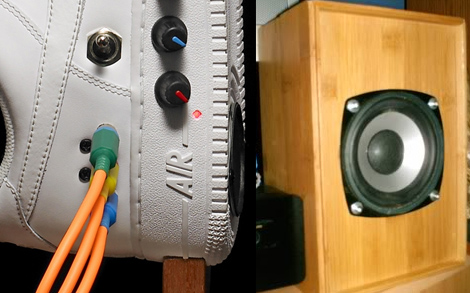
Nike Air Force 1 shoes are probably some of the most well-recognized sneakers around the world, aside from the always timeless Chuck Taylor All Stars. So when [Alex Nash] was asked to create some art using something ordinary with a goal of turning it into something special,  he immediately grabbed a pair and got to work.

His vision was to build a set of PC speakers by embedding a small amplifier and speakers into a pair of Air Force 1s. As you can see from the pictures on his site, they look awesome. He doesn’t say how good they sound, but we’re betting they perform better than that old pair that came with your last computer.

When [Stacy] was in college, she didn’t have a ton of room or money for a nice audio setup, so she decided to build a pair of speakers rather than buying them. She admits that these “Mid-Fi” woofers won’t be the centerpiece of your Hi-Fi setup, but they still sound pretty darn good for $50 DIY speakers. She compares them to units you would find in the store for $300+, and they sound so good she continues to use them as a compliment to the rest of her Hi-Fi setup now that she has a place of her own.

Recover Acer Aspire One From “failed To Initialize HAL” Error

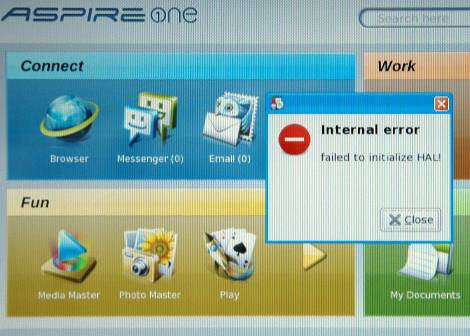
The Acer Aspire One is a netbook that often ships with a Linux OS preinstalled. This is great for fans of open source as market share is calculated based on units shipped, not what users install after they buy the hardware. Unfortunately there is a pretty major flaw that can cause a “failed to initialize HAL” error as seen above. [Michael Crummy] came up with a set of steps you can use to recover from this error.

So what is this error? HAL stands for Hardware Abstraction Layer and it’s what allows one user interface to communicate with many different types of hardware. If you’re the proud owner of an Aspire One and are struck with this error you will suddenly find that you can no longer use the USB ports, card readers, wired or wireless network connectors, or the sound card. So you can’t connect to the Internet, and you can’t get any files on or off of the device using the currently installed operating system. For an OS that [Neal Stephenson] once described as “like the M1 tanks of the U.S. Army, made of space-age materials and jammed with sophisticated technology” this is a very big problem.

We know what you’re thinking… boot into a live session on a thumb drive and get what you need from the hard disk. Well that’s all fine and dandy, but you shouldn’t ever be forced to clean install Linux to fix a problem. So check out [Michael’s] method and make sure you turn off the Acer live update server which was mostly likely the cause of the problem in the first place.

LED Backlight Conversion Using Recycled CCFL Inverter Parts

inverter_repair

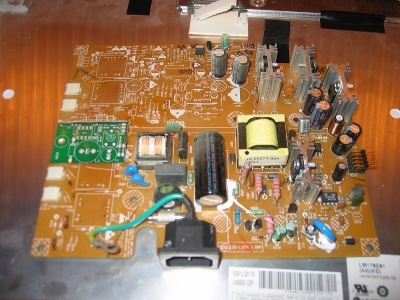
[Ammon] repairs busted LCD monitors as a side hobby, so replacing burned out CCFLs and inverter circuits is something he can do in his sleep. One Dell monitor he received had him so perplexed, that he simply gave up on trying to repair the inverter circuit. He still wanted to get it working, so he had some narrow PCBs made and started working on his LED replacement backlight.

He built a driver board for the LEDs, populated with left over components that he stripped from the LCD panel’s inverter circuit. He needed space to insert his driver board, so he simply cut out a chunk of the inverter board and slipped his replacement driver board in its place. As you can see in the picture above, his board (in green) takes up far less space than the original inverter circuit it replaces.

He provides a schematic for his circuit as well as a PCB layout file, so it should be fairly easy to replicate his work. He has not posted schematics or layout information for his LED strips, but we’re betting he will if someone asks nicely.

Check out this pair of posts if you are interested in reading more about replacing your burned out CCFL with LEDs.

Real-time Arduino Interpreter Ditches The PC

computerless_arduino

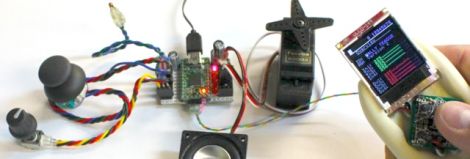
When prototyping a project using an Arduino, there are a few things that are pretty much required equipment. A computer for generating sketches is typically one of those things, but [Adam] over at Teague Labs is looking to change all that with his current project, the Computerless Arduino.

Instead of using a computer to alter the code running on the Arduino, they have implemented a real-time code interpreter using a Teensy 2.0. The microcontroller is connected to a 5-button LCD display where the user can view the status of any port, view the current running code, as well as alter that code on the fly.

The real-time instruction set is somewhat limited, making it a breeze for newcomers to begin using the Arduino. While that may turn some people off, it still has enough functionality baked in to handle moderately sized projects as well.

Be sure to check out the video we have posted below to see the interpreter in action.

Continue reading “Real-time Arduino Interpreter Ditches The PC”

Analog Robot Navigates Around The Workshop With Ease

556_wall_following_robot

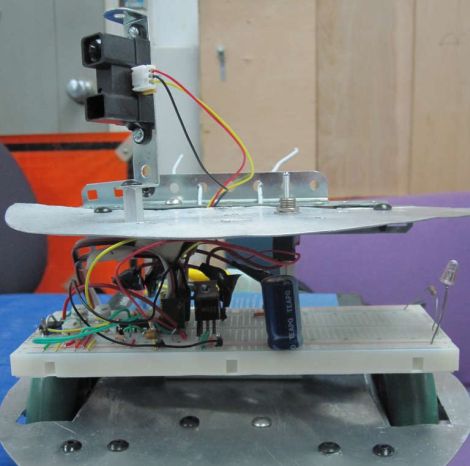
Many of the robots we feature here are driven by some sort of microcontroller, whether it be an Arduino, Launchpad, Picaxe, etc. Rarely do we see a robot however, using analog circuits to perform higher-level functions typically relegated to those more complex controllers. Instructables user [hasn0life] built such a robot recently, which he entered into a contest at his college. After hearing about the 555 design contest from a friend, he tweaked his project and created a wall-following robot using a 556 timer.

The robot is fairly simple when you take a close look, though that does not take away from the elegance of his design. A single IR sensor is used to detect objects in the robot’s periphery, guiding the robot along. When the robot gets too close to a wall, one wheel reverses, pulling the robot away. Once the robot has moved a sufficient distance, the other wheel is reversed in order to straighten out the robot. Then, both wheels work in concert to get the robot moving forward.

Take a look at the video below to watch the robot navigate its way around his workshop, and if you are interested in learning more about analog robotics, check out this post from a few days back.

Continue reading “Analog Robot Navigates Around The Workshop With Ease”