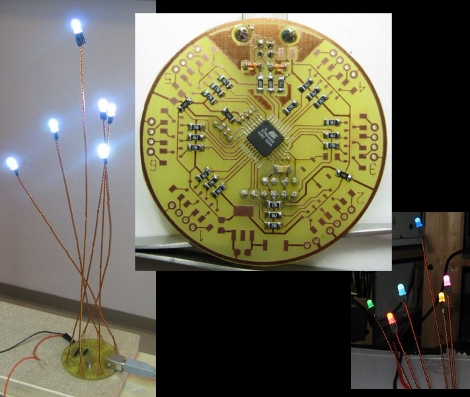
[Johannes Agricola] recently held a workshop at the Peace Mission in Goettingen, Germany where he shared his RGB LED flowers. The small round PCB hosts an ATmega88 microcontroller which is running the V-USB stack so that the unit can be controlled by a computer. Each flower blossom is an RGB LED connected with four enameled wires which, when twisted together, make up the stem of the flower. [Johannes] took tons of pictures during the assembly while offering soldering advice along side the illustrations. The PCB is single-sided helping make this a great project for someone trying out surface mount component soldering for the first time. Or if you want something a little more free-formed try out this lemon-juice powered LED flower.
Month: January 2011
Hackaday Links: January 2, 2011
DIY driving controller
It looks like this steering wheel, shifter, and foot pedal were all made from string and garbage. That being said, you can see it works quite well. The setup just pushed keys on the keyboard, which reminds us of the junky plastic add-ons for the Wii remote. [Thanks Toumal]
Taping PCI express
[Pseudolobster’s] company was putting together point-of-sale machines for a retailer. They had surplus computers which really brought the price down but ran into a snag when adding the second monitor. The boxes wouldn’t play nicely with PCIe 16x. His solution was to scotch tape pins 19-82 on the cards, effectively turning them into PCIe 1x… and it worked! No link here but we wanted to share the trick anyway.
USB character display
[Simon Inns] shows how to add a character display to a PC case. We’ve seen him work with these PIC 18F2550 controllers several times before but we like how nicely this piggy-backs the display board seen in green.
Would You Entrust Your DSLR To This Diy Underwater Enclosure?
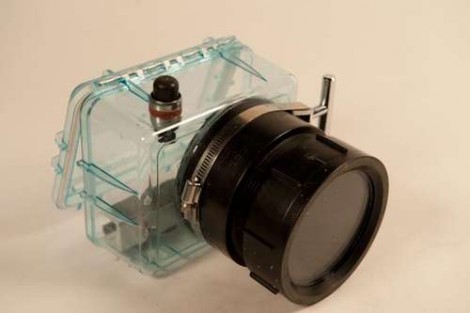
Next time you head off on that underwater adventure take your camera along with you. [Jkcobabe] shows us how to build a waterproof camera enclosure using just a few components. The box is meant to be used to keep your stuff dry while camping, and the lens housing is made using plumbing fittings from the a home building center. There is a rail system that allows you to mount the camera securely inside, with a flexible button on the outside to actuate the shutter. If anything this is well designed and built, but we might still stick to using disposable cameras under water. Then again, the pros build their own enclosures so we’ll keep our fingers crossed for that $2500 camera as you try to capture that perfect shot.
[Thanks Troy]
Classic Game Emulation On The Dockstar
[Hunter Davis] is playing games like Contra, Monkey Island, and Quake 3 by running them on a Seagate Dockstar. We were shocked after seeing how well these run in the video after the break. [Hunter], who used the ZipIt for game emulation in the past, added a couple of hardware peripherals to get everything running. For sound he picked up an inexpensive USB sound card which was no problem to get up and running. Next he picked up a USB to DVI adapter and fired up the Linux USB DisplayLink driver. With the peripherals running he loaded up Fluxbox and the rest was history. Not bad for a small network storage adapter. Continue reading “Classic Game Emulation On The Dockstar”
Reverse Geocaching Christmas Gift Box
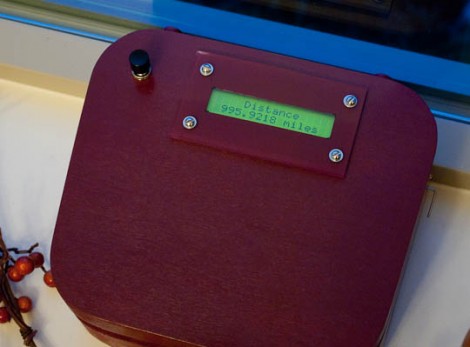
This is the reverse geocache box that [William Dillon] built as a Christmas gift this year. He started with an interestingly shaped wooden box from the craft store. The clasp to keep it shut uses a servo motor on the lid with a wooden arm that grasps a screw on the base. As with the original geocache box, the Frustratomatic, and the smaller geocache, the box is designed to open only when in the correct geographic location thanks to the GPS module inside. That was a problem for [William] when a bug in his firmware locked the box during development while the key location was 1000 miles away. Luckily the box uses hinges that are attached from the outside with screws. We wonder how feasible it would be to use the mounting screws from the LCD screen to implement a coded emergency entry, using one as ground and the others as paths to microcontroller pins.
512 LED Cube
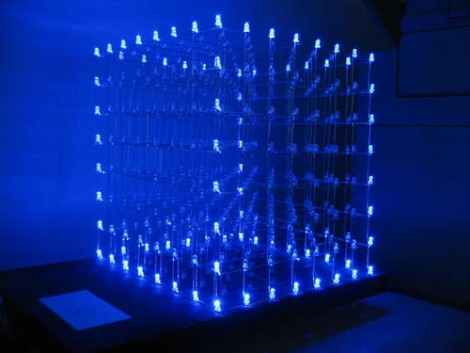
Get out the soldering iron and clear your schedule, it’s going to take you a while to assemble this 8x8x8 LED matrix which contains a total of 512 LEDs. We’ve looked in on a 3x3x3 cube, and [Chr], who is responsible for this one, has assembled a 4x4x4 cube before, but this one is quite a leap in complexity. It isn’t just physical assembly problems that increase with scale, you’ll need to consider a power supply too since one layer of a 3x3x3 cube would need at 90 mA, but a single layer of the cube above requires 640 mA to light all of the diodes. Multiplexing is handled per-layer, controlled by ICs which share 8 data lines and are latched by a shift register. This means the display only requires 11 microcontroller pins for addressing. It is striking how well [Chr] explains the design process, and how cleanly he builds the driver circuits on protoboard. There’s a lot to look at and a lot to learn, not to mention the stunning results which can be seen in the video after the break.
Beer Shooting Dorm Fridge
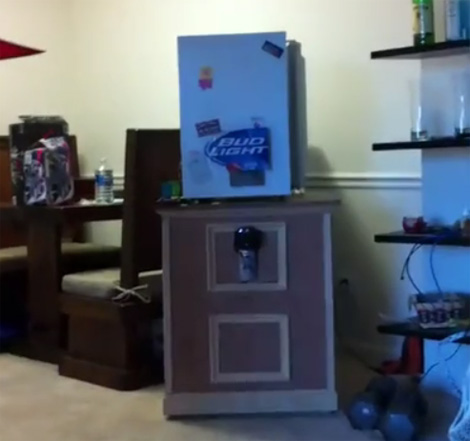
When we first heard the parts list for this project, we weren’t too impressed. It has an iPhone connecting to an IObridge etc… But then we heard the next, and most important part, an air cannon and an assortment of beer. We were sold. As you can see in the video after the break, a fancy iPhone interface lets you select your beer, then dispense it into the cannon for delivery. The next step is to aim using a web cam mounted at the cannon and let ‘er rip! The beer is fired across the room and into your hands. We suspect that the amount of cranial injury, holes in the drywall, and shattered glass will greatly increase in frequency as the night goes on. Awesome.