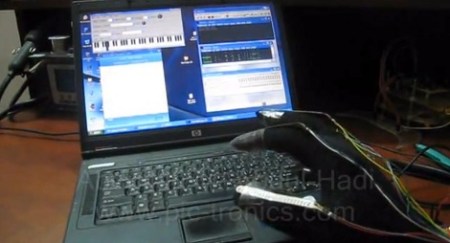
Wireless MIDI Piano Glove

Sometimes you just don’t have space for a baby grand. [Abdullah] got around this problem and built a virtual wireless MIDI piano. Unlike it’s inspiration, it’s not bad but we still love it.

[Abdullah] got his hands on some flex sensors and attached them to a glove. These resistive sensors are put through a voltage divider and sent to a microcontroller (a PIC16F778, we believe) and corresponding MIDI notes are chosen. These MIDI notes are sent to a computer and played over a speaker.

Right now, only a single arpeggio is coded into the microcontroller. Depending on which finger is bent shifts this arpeggio up and down the keyboard. That being said, the firmware can be easily modified to recognize standard piano fingering so chords can be played. The only issue is moving the hand up and down the keyboard.

[Abdullah] is planning on making his glove completely wireless with a microcontroller and battery sewn into the glove. Here’s to hoping he’ll keep us posted.

Check out [Abdullah]’s demo after the break.

Continue reading “Wireless MIDI Piano Glove”

magic-wand

Hacking A “magic Wand” To Remotely Control Light Displays

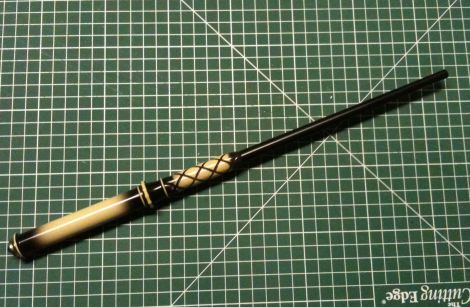
Hackaday reader [Kieran] volunteers at an outdoor haunted house attraction called the “Disenchanted Forest”. Attendees are lead through the haunted forest by a volunteer, who helps keep everyone on the predetermined trail. The trail is usually lit by small LED fixtures that the group constructed, but the organizers wanted to make the lights more interactive this time around.

A fellow organizer gave [Kieran] a [Harry Potter] Magic Candle, which allows him to light the toy with the wave of his IR-enabled wand. He was told to “make it do something cool”, so he took a closer look at it to determine how everything worked.

Using an Arduino clone and some borrowed IR code he was able to get the wand to work with the forest’s trail lighting, but there was a lot of lag between waving the wand and triggering the light. Taking a second stab at it, [Kieran] was able to replicate the IR protocol used by the toy, speeding things up and increasing the wand’s range considerably. Now, the tour guides can light and extinguish the trail lighting with a simple flick of the wrist.

Take a look at the video below to see how things worked out for [Kieran], and be sure to swing by his site for more details if you have the urge to modify your Magic Candle.

Continue reading “Hacking A “magic Wand” To Remotely Control Light Displays”

Canon FD Lenses On An EOS Mount

Camera lenses are expensive and if you’re like us, you can easily find really cheap lenses that your camera can’t use. [Sam] has a Canon EOS and a bunch of old-school FD lenses at his disposal. There’s one problem though: using these old lenses with an adapter means focusing at infinity is out of the question. Thankfully, he put up a few videos (part 1, part 2, and part 3) walking through the process of modifying an FD lens for his new camera.

To do the modification for the FD lens, all that’s needed is some epoxy, a screw driver, and an M42 to EF adapter. After disassembling the back of the FD lens, [Sam] mounted the M42 adapter on his camera and held the lens up to check the minimum focusing distance. A bit of grinding or a few metal shims ensure that the lens is in the right position.

The next step is making sure the aperture can still be controlled. [Sam] goes through this in part two of his video. A little bit of dremeling takes care of all the hard work. The lens is finally attached to the M42 adapter with a tiny bit of epoxy, and the conversion is complete.

While [Sam] could have put up a few close up pics of his build, he goes through every step of the process very well. Check out the embedded videos after the break.

Continue reading “Canon FD Lenses On An EOS Mount”

DIY Spot Welder Can Join Anything Together, Even Copper

copper-spot-welder

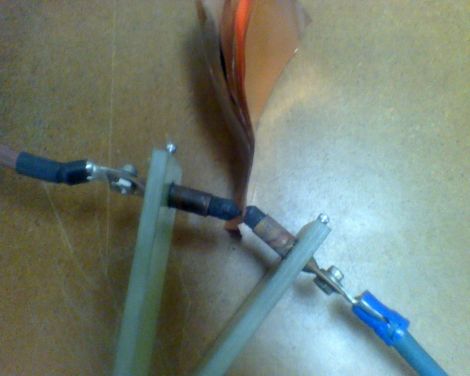
Hackaday reader [David] was looking for a cheap and easy way to spot weld copper tabs together. As he notes in his writeup, the properties of copper which are most enticing, such as high thermal capacity, make welding it all that more difficult. His home-brew method of spot welding is admittedly quick and dirty, but it does get the job done quite well.

He started off with an array of four 2.5V @ 2600 Farad ultra capacitors, which provide the high current required to do copper spot welding properly. They are wired in series and connected to his electrodes using heavy gauge wire. The graphite-tipped electrodes were an interesting DIY job themselves, cleverly constructed using copper tubing and a graphite block. The most simple/dangerous/clever part of the whole rig is his trigger mechanism, which consists of a pair of copper blocks that he bangs together manually to complete the circuit.

[David] is well aware that the setup is just a touch rough, but according to him it makes great welds, and it’s only a proof of concept at this point. He has a hefty list of improvements to make for the final version, including a different switching method among a few other safety precautions.

4Track Robot Gets Around With Ease

4track-robot

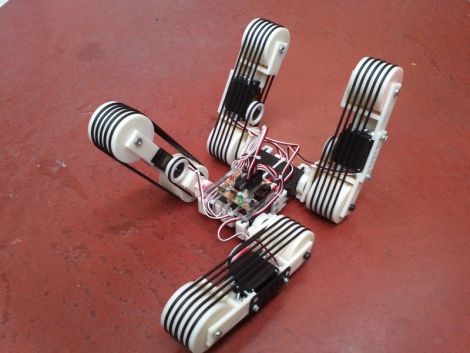
[Jon] has been developing a slick little RC robot in bits and pieces over the last year or so, which can constructed by anyone with access to a 3D printer. Servos and electronics aside, the entire thing can be put together in short order using the plans he posted on Thingiverse.

The robot makes use of four “caterpillar” type bots, which are all connected via a central frame. Once [Jon] had the general design for a single caterpillar bot down, he moved forward to create the robot you see above. His friend [Julián] lent a hand in the form of electronics and code, which allows the robot to be driven using a standard USB gamepad.

As you can see in the video below, the robot gets around nicely, climbing over obstacles with relative ease. While it is a bit loud, [Jon] says that’s due to the undersized servos they happen to be using at the moment. We think it looks great so far, but [Jon] already has plans to beef up the motors and add wireless control in the near future – we can’t wait to see it then!

Continue reading “4Track Robot Gets Around With Ease”

Hackaday Links: November 6th, 2011

Build details for Raspberry Pi prototype

With the launch of Raspberry Pi approaching the development team released the details about the prototypes from about five years ago. The board was originally based on an ATmega644 and built on some perfboard.

‘Zero Energy Device’ challenge

We call BS on the title of this one, but the goal of finding devices that don’t use disposable energy sources is a good thing in our book. For instance, can we get more stuff that uses long-life capacitors instead of batteries?

Command adhesive for mounting bulletin boards, etc.

This seems like a no-brainer, but we’ve been using nails to mount bulletin boards and white boards for year. The problem is, when you stick a push-pin in one side, the other side pops off of the nail. [Zhanx] is using adhesive from 3M Command Hooks to keep his stuck to the wall.

Servo-driven gripping hand

[Navic] has been hard at work on this robot hand. There’s few details but he shows it can grip objects under one pound and he’s been taking amperage measurement during testing.

Emergency cellphone charging

It might not have been an emergency this time, but [Chris] did figure out a way to charge his cellphone after the snow storm in New England knocked out his power. He connected to lantern batteries to a 7805 regulator, then patched that into a USB hub to get his phone connected. Not bad in a pinch!

CadSoft’s EAGLE 6 Hits Beta And Packs Goodies

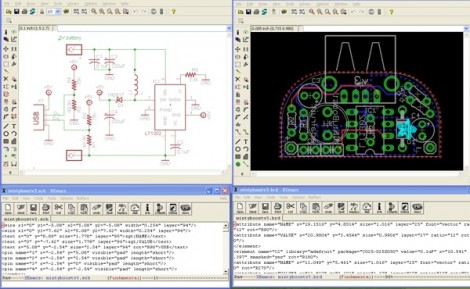
Version 6 of the popular schematic and PCB layout software EAGLE is now in beta testing. The most notable change is the migration to XML file formats that we looked at last month.

[PT] didn’t waste any time getting his hands on the software and giving it a thorough test drive. The image seen above shows the files of a MintyBoost. It’s impossible to make out at this resolution, but it is indeed spitting out human-readable (well maybe) XML in the windows below instead of the ‘no trespassing’ binaries they used to use.

Earlier today when working on a feature we had to jump on a different computer that had EAGLE installed in order to look at a .SCH file. We wonder if someone will put out a rendering package that can parse the new format and spit out a quick PNG? At the very least, we expect to see some useful hacks for part replacement or pin swapping. It shouldn’t be too hard to poke around and figure out what happens when changing some of the stored values. Got anything in mind that you can do by editing these by hand?

Oh, we almost forgot! The biggest benefit you get from this is the increased version control compatiblity since programs like git will be able to perform diff functions on the files.