Reading Sega Carts Off A Breadboard

Golden Axe is great, and the Sonic 3/Sonic and Knuckles combo is one of the highest works of art from the 16-bit era, but for those of us without a working Genesis or Megadrive, we’ve had to make due with the ROMs others provide. [Lee] figured out an easy way to read the data off these old Sega cartridges using easily scavenged parts and an Arduino Mega, paving the way for an Arduino-based ROM dumper.

The connector on the bottom of a Sega Genesis cartridge has a 2×32 pinout, normally requiring 64 connections to actually read the card. These connectors aren’t readily available, but [Lee] did manage to find a few 2×31 pin connectors lying around in the form of old ISA sockets. The outer pins of a Genesis cart are used for grounds and a ‘cartridge insert’ slot, and after filing away the end of an old ISA connector, [Lee] found he could actually read the data on these old game cartridges.

There are 49 data and address pins on these old Sega carts, so an Arduino Mega needed to be brought into the mix to actually read some of the data on the ROM chip. As of now, [Lee] can read data from the cart but has only gotten so far as to read the licensing data stored at 0x80. Still, very cool and the first step towards an Arduinofied Sega cart dumper.


Raspberry Pi Case Roundup

raspberry-pi-case-roundup

If you haven’t heard of it yet, the [Raspberry Pi] is all the rage on [HAD] these days, so why not a round up of some of the excellent cases available?

[Nhslzt] wrote in to tell us about his laser cut Bramble Pi finger jointed case.  These are available for only 12 Euros, or roughly $14.95 in the US. Sure, the exchange rate may not be in America’s favor these days, but it’s cheaper than a trip to Dresden, Germany where some of the profits from this are to go towards setting up a makerspace there!

If you’re feeling more into the additive 3D printing DIY process, why not just download one and make it on your printer? [Thingiverse] has an excellent selection of cases many featuring, as you may have guessed, a picture of a Raspberry on the top!  (Here’s the printed case pictured).

Finally for something more colorful (see the pic after the break), you can’t get much better than the [Pibow]. If you’re looking for something colorful, and very solid (as described) this may be the case for you! You can order one here or use the unique design to inspire your own case (Thx Brian!).

As for stuff that we’ve already written about at HAD, this case looks quite slick made out of black acrylic, as does this one, combining the use of a laser cutter and 3D printer. Of course, if you’re going for the strictly utilitarian model, you can always go with one held together with rubber bands and tape!

Continue reading “Raspberry Pi Case Roundup”

Motorized Camera Rig Makes Panoramic Shooting Simple

diy-panorama-rig

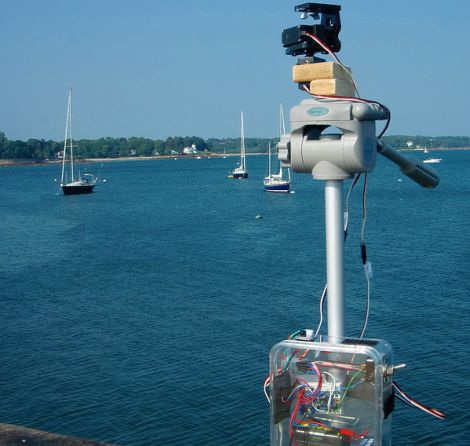
Where some people might see a pile of junk, Hackaday reader and budget-conscious photo nut [FantomFotographer] sees inspiration. He was in search of a rig that would help him take better panoramic photos and found all that he needed to build one right around him.

He had an old tripod kicking around, which serves as the base for rig. At the top sits a pair of servos [FantomFotographer] attached to the tripod with some scrap wood, screws, and glue. The servos are driven by an Arduino Nano, which sits comfortably in a plastic enclosure he scavenged from trash heap. He uses an IR receiver to control the whole thing, which allows him to not only change shooting angles, but camera settings as well.

While it might sound like all is well with his upcycled camera rig, [FantomFotographer] says that like every project, there is some room for improvement. He’s keeping the source code under wraps at the moment, but once he gets everything working to his liking, he says that he’ll release it.

In the meantime, be sure to check out the cool panoramas he has put together.

Create A Laminar Flow Jet Without Pesky Fiber Optics.

[ApexLogic] had some PMMA core acrylic rod rod left over from a project and decided to use it as the lighting element in a laminar flow water jet.

The typical water jet consists of a bunch of sponges and drinking straws sandwiched together to slow a rough water stream and then a finely cut nozzle to provide a smooth ripple-free strand of clear water. If light is applied to this stream of water it tends to act similarly to fiber optics. [ApexLogic], however, uses a combination of shaved PVC filings, Brillo, and what appears to be most of the plumbing aisle of a local hardware store to get the same laminar flow. To top it off the polished acrylic rod is much less fragile than its glass-fiber counterpart and can have a high power light glued to the end for a nice water tight seal.

The system currently runs off of garden hose pressure, and would probably need some kind of a boost before it went into that front yard mega fountain that [Caleb] is still waiting for somebody to make.  If you still need some clarity on laminar water jets check out these videos on a few