Motorized Camera Slider Rides On Carbon

While not every camera mount needs to have six degrees of freedom, one or two can be extremely helpful in the photographic world. In order to make time-lapse shots with some motion or shots that incorporate some parallax, a moving camera mount or dolly is needed, and this small one builds upon a pre-existing, although non-motorized, camera slider.

The slider is an inexpensive model from everyone’s favorite online warehouse, with rails that are at least coated in carbon, if not made out of it entirely, to ensure smooth camera motion. To add the motorization to automatically move the camera, a stepper motor with a belt drive is used which is controlled by an Arduino. A few limit switches are added, letting the dolly perform different movement patterns automatically, and a pair of potentiometers for fine and coarse speed control are included as well, letting the camera take both time-lapse and video while using this mount at various controllable speeds.

With everything tucked into a relatively small box at one end of the dolly, the build is both accessible and functional. The code for the microcontroller is also available on the project’s GitHub page for anyone looking to replicate or build upon the project. And, for those looking to add more degrees of freedom to their camera setups, take a look at this DIY pan and tilt mount.

Continue reading “Motorized Camera Slider Rides On Carbon”

A Ride-On Picnic Table For Those Idylic Summer Evenings

For most outsiders the Netherlands is a country of picturesque cities, windmills, tulips, and maybe those famous coffee shops. Head away from the coast though and you enter the country’s rural hinterland, farming country with lush green fields, dairy cattle, and farm lads doing what they do best, which is hacking old machinery to do crazy things under those wide skies. [Plodno] are based on a farm somewhere in the eastern Netherlands, and the latest of these lads’ creations is a motorised picnic table (Dutch language, you’ll need YouTube translated subtitles).

This is farm hacking at its best, with a scrap FIAT hatchback donating its running gear to a welded tubular frame, with a chain drive to a small single-cylinder engine. There’s no suspension save for the air in the tyres, the steering column is vertical, and the brake is a single inboard disk on the rear axle. Perhaps it’s fortunate that the intended beating heart, a Kawasaki motorycle engine, was misfiring, as it would have been truly lethal with that much power. We’re not too convinced at the legality of taking such a contraption on the public road in the Netherlands, but they seem to get away with it. Take a look at the build in the video below the break.

Here at Hackaday we like a good hacky farm build, even though sometimes they’re not so well-assembled.

Continue reading “A Ride-On Picnic Table For Those Idylic Summer Evenings”

Gaze Upon The Swimming Mechanical Stingray, Made With LEGO

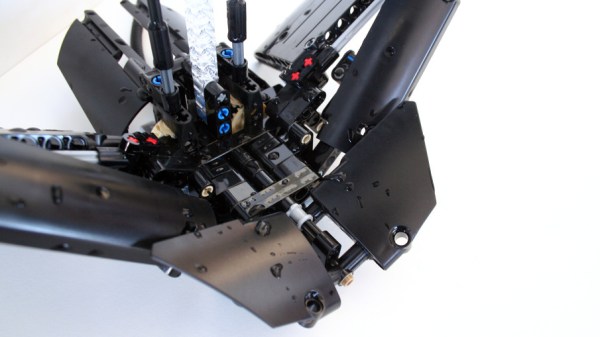
Stingrays have an elegant, undulating swimming motion that can be hypnotic. [Vimal Patel] re-created this harmony with his fantastic mechanical mechanical stingray using LEGO pieces and a LEGO Technics Power Functions motor. The motor is set in a clever arrangement that drives the motion remotely, so that it and electrical elements can stay dry.

The mechanical stingray sits at the end of a sort of rigid umbilical shaft. This shaft connects the moving parts to the electrical elements, which float safely on the surface. This leaves only the stingray itself with its complex linkages free to move in the water, while everything else stays above the waterline.

We’ve seen some impressive LEGO creations before, like this race car simulator and pneumatic engine, and the mechanical action in this stingray is no exception. Interested in making your own? The part list and build directions are available online, and you can see it in action in the video embedded below.

Continue reading “Gaze Upon The Swimming Mechanical Stingray, Made With LEGO”

A Muppet On A Tricycle

[Donald Bell] wanted to recreate the magic of seeing Kermit on a tricycle from a 2018 NY Maker Faire he attended, so he created his own take of a Muppet on a Radio Flyer kids tricycle bike.

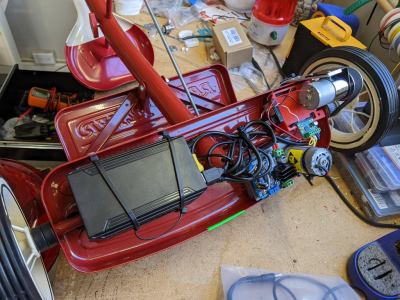
The underside of the back axle of a red radio flyer tricycle with electronics for, two motors and a battery pack

He started by attaching a ready made puppet to a classic Radio Flyer dual deck toddler tricycle using zip ties and split pipe insulation to give the limbs stiffness. [Donald] then put all the electronics, including the 12 V 50 RPM DC motor, 24 V 22.4 Ah Li-Ion battery pack, TB67H420FTG motor driver, and the Arduino Uno microcontroller under the back axle.

The motor transfers power to one of the back wheels via pulleys and timing belts with an additional ASMC-04B 24 V servo used to steer the tricycle via a steel pushrod. The RC communication is done with a FlySky FS-GT2 2.4 GHz 2-channel system. [Donald] gives a detailed list of parts that he uses in a Google doc for anyone wanting to know more.

[Donald] goes into great length about the limitations of the build, including the low clearance of the electronics underneath, the finicky nature of the timing belts and the “uncanny valley” that the size of the puppet induces to a casual observer. Regardless, the build is exceptional and paves the way for a variety of improvements for anyone wanting to extend the idea either further into the creepy or cute domain.

Retrofitting vehicles with motorized control are a crowd favorite, as seen with some projects like a stroller controller from Maker Faires of the past.

Continue reading “A Muppet On A Tricycle”

Automate Your Desk With The Upsy Desky

It might be surprising for some, but humans actually evolved to be long-distance runners. We aren’t very fast comparatively, but no other animal can run for as long or as far as a human can. Sitting at a desk, on the other hand, is definitely not something that we’re adapted to do, so it’s important to take some measures to avoid many of the problems that arise for those that sit at a desk or computer most of the day. This build takes it to the extreme, not only implementing a standing desk but also a ton of automation for that desk as well.

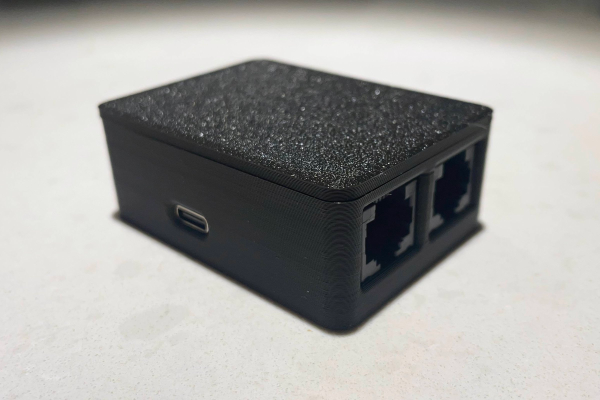
This project is an improvement on a prior build by [TJ Horner] called the WiFi Standing Desk Controller. This new version has a catchier name, and uses an ESP32 to run the show. The enclosure is 3D printed and the control board includes USB-C and a hardware UART to interface with the controller. The real perks of this device are the automation, though. The desk can automatically lift if the user has been sitting too long, and could also automatically lift if it detects no one is home (to help keep a cat off of the desk, for example). It also includes presets for different users, and can export data to other software to help analyze sitting and standing patterns.

The controller design is open source and could be adapted to work on a wide-array of powered desks. As we’ve seen in the past, with the addition of a motor, even hand-crank standing desks can be upgraded. If you haven’t gotten into the standing desk trend yet, we hope that you are at least occasionally going for a run.

Up Your Desk Toy Game With This 3D Printed Escalator

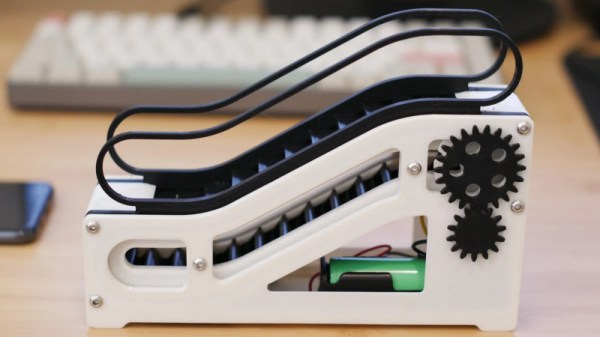
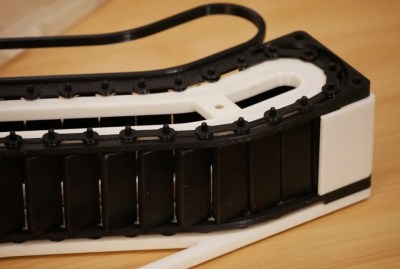
Let’s be real, nobody needs a tiny motorized escalator for their desk. But now that you’ve seen it, can you really say you don’t want one of your own? The design comes our way from [AlexY], and is actually the logical evolution of a manually-operated version released previously. But for our money (and 3D printing time), we’d definitely go with this new motorized variant.

While the core mechanism is largely the same, the powered unit uses a N20 geared motor and an 18650 cell. There’s no fancy motor controller here — just flip the switch and you’ve got 30 RPMs worth of stair-steppin’ action. When you’ve run the cell down, and you will, there’s an onboard TP4056 charging module to keep the good times rolling.

[AlexY] hasn’t had a chance to document the build process for the motorized version of the escalator, but as most of the parts are compatible with the manual version, you should be able to figure it out by referencing the earlier assembly guide.

Hot squirted plastic not your thing? We’ve previously seen a wooden escalator designed to keep a Slinky in motion for as long as it takes for you to realize you could be using your skills for something more constructive.

Continue reading “Up Your Desk Toy Game With This 3D Printed Escalator”

Put A New Spin On Your 3D Printed Parts

Once you get tired of printing keychains and earbud holders with your 3D printer, you’ll want to design things a bit more sophisticated. How about things that rotate? [3DSage] has a good how-to about how to integrate a simple motor and controller into a few different size boxes. Combined with some 3D printed linkages, these boxes can turn your project — printed or otherwise — into something that spins.

To demonstrate, he created a few cat toys, played with an idea for a magic trick, and refit a selfie light into… something. We have no doubt you can find something to do with these little motor modules. The boxes vary mostly in how big the battery packs are. There are also several interesting side pieces like a 3D holder for rechargeable button cells and their charger.

In addition, he also demonstrates how to use the motor as a (rather poor) generator. Attaching a water wheel wasn’t a success until he used compressed air to run the wheel. You would have thought water would have done the trick.

The video stresses that you should solder connections, but you don’t have to. Honestly, we think if you are building moving stuff with a 3D printer, you should probably just go ahead and learn to solder. It isn’t that hard and there are plenty of reasons to learn.

Of course, you could 3D print the motor itself. Adapting motor modules for different uses isn’t a new idea, of course, but it is always great to see more ways to apply basic components.

Continue reading “Put A New Spin On Your 3D Printed Parts”