Making A HP Frequency Counter More Accurate

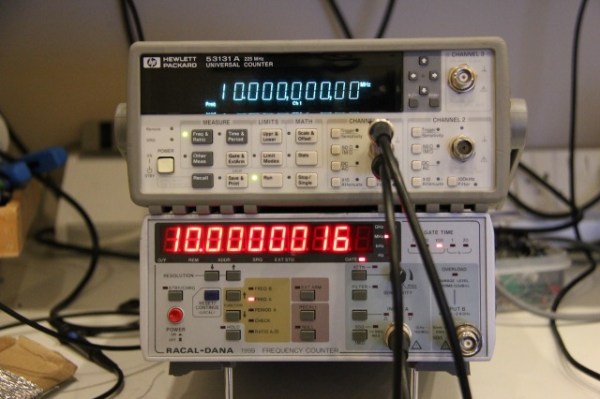
[Gerry] built his own high stability timebase add-on for his HP 53131 frequency counter. This project started out after [Gerry] built a rubidium 10 MHz standard for his lab. Upon connecting the standard to the frequency counter for calibration, he found that the HP 53131 had an awful internal oscillator. The official high stability timebase add-on from HP cost about $1000, and he was determined to do better.

Using a second hand OCXO as the oscillator, he designed his own add-on module. OCXO modules pack a crystal oscillator in a thermal chamber. Since temperature fluctuation causes drift in crystal oscillators, an OCXO controls the temperature to keep the frequency constant. They can be bought second hand on eBay for under $30.

The PCB design for the module can accommodate a variety of OCXO modules. It uses a high speed comparator and a high stability 5 volt reference to provide the clock signal to the counter. A DAC is used to calibrate the oscillator. By keeping the same DAC as the original counter, the add-on board can be calibrated using the front panel of the device.

The project is a drop in replacement for HP’s $1000 module for a fraction of the cost. [Gerry]’s write up has all the details you’ll need to build your own.

Continue reading “Making A HP Frequency Counter More Accurate”

Sony SmartWatch Hack Lets It Tell Time With A Teapot Animation

sony-smartwatch-wireframe

This hack turns the Sony SmartWatch into a wristwatch. Functionally it’s not all that impressive. But the journey to get to this point represents quite a bit more. This example features an animated tea pot using a 3D rendering engine ported over to the device.

[Federico] started work on the project soon after hearing that Sony had released details about developing for the hardware. He dug into the documentation but soon found it lacked the depth he needed to get a handle on bare metal work. He shelved the project for a while until coming across the Astrosmash project we featured in June. That used a wrapper that allows Arduino sketches to run on the watch. After studying how that’s done he had enough background to port this code.

We’re still waiting to see a really innovative hack for the watch. But we’re glad to see progress with each new proof of concept like this one!

Continue reading “Sony SmartWatch Hack Lets It Tell Time With A Teapot Animation”

Making S’mores With 50,000 Volts

[Skyy] sent us a video of him cooking s’mores with an electric arc. He’s using a flyback transformer with a zero voltage switching (ZVS) driver. This produces about 50 kV, which is more than enough to toast the marshmallow.

ZVS is a technique that triggers the semiconductor switches when they have zero voltage across them. This ensures that there’s minimal heat created by the switches, since they are not interrupting any current at the time they are toggled. ZVS is also used in lighting dimmers to switch off power without creating interference.

If you’re interested in the details, there’s a great tutorial on building the driver. If you’re interested in learning how it works, check out this simulation video.

[Skyy] admits that his setup isn’t terribly safe since it uses a breadboard, which isn’t rated for the high voltages and currents. Keep in mind that these circuits could kill you. After the break, watch a marshmallow fry in a 50 kV arc.

Continue reading “Making S’mores With 50,000 Volts”

Building An Ethernet Connected RFID Reader

For the last few years, [Lt_Lemming] was the president of Brisbane’s hackerspace. Until several months ago, access to the local was done using 125KHz RFID tags and an Arduino board with a prototyping shield. As the hackerspace gained members and moved to bigger facilities, [Lt_Lemming] decided to build himself a more compact and advanced platform.

His Simple NetworkAble RFID Controller (SNARC) is a platform which can be connected to an Ethernet network and different RFID readers in order to implement smart access control functionalities. Through hole components were selected so even solder apprentices may assemble it. The PCB was designed using Fritzing, and development can even be done inside the Arduino IDE as ISP and serial headers are available on the board. Finally, an N-channel mosfet controls the door locking mechanism.

The project is open hardware and software, and all the sources can be downloaded from [Lt_Lemming]’s github repo.

[Update] Vladimir’s Robot Guitar

vladGuitar2013

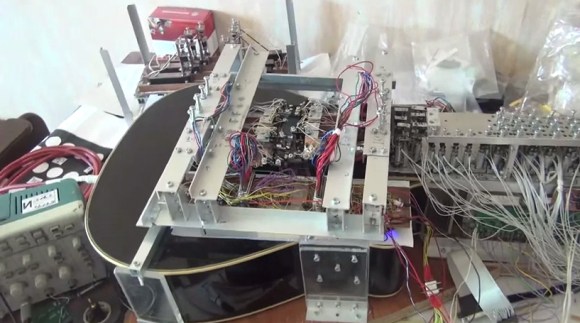
[Vladimir Demin] is somewhat of a legend for us; in his spare time he’s been mastering the automation of musical instruments. This time he’s back with upgrades to his build and four new videos. [Vladimir’s] top priority was to rework the strumming mechanism that earlier ran on solenoids. He’s improved the sound quality and reduced the clicks by swapped to stepper motors and overhauling the software.

Compared to his earlier setup, this one sounds more soulful and less automated, but [Vladimir] admits that it’s still not good enough and that he’s working on a new, brilliant implementation. Until then, take a few minutes and check out the rest of the videos below, then join us in scratching our heads in amazement: everything is built with simple hand tools.

[Vladimir] has come a long way, and it started with this Bayan (button accordion). Last year’s guitar build is also worth a look, as well as an in-depth interview.

Continue reading “[Update] Vladimir’s Robot Guitar”

Logging Two Multimeters At (nearly) The Same Time

log-two-multimeters-at-one-time

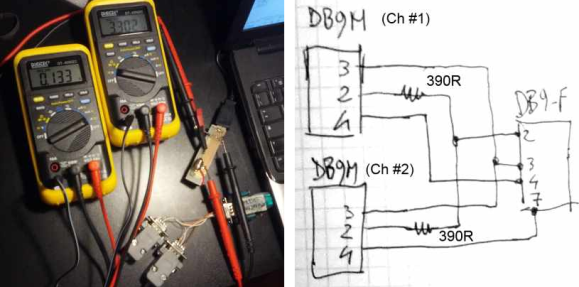
It’s pretty common to have at least a couple of meters around to measure different values of a circuit at the same time. Where [Emilio P.G. Ficara] ran into a problem was logging the data from both at once. These Fluke meters have a serial-out, but his computer only has a single serial-in port. He cracked open one of the meters and figured out how to log data from both at the same time.

A lot of folks would look to a microcontroller to solve this problem. You use the chip to pull from each meter simultaneously and report back to a computer (or just dump the values onto an SD card). But this solution is a simple mechanical connector and a bit of creative programming. The way the serial output is set up on these meters they won’t interfere with each other as long as they’re read one at a time. [Emilio] wired them up as seen above, using his own software to manage the pins of the serial port. The example output he posted shows readings from the meters taken within about a tenth of second from each other. That should be good enough for most applications.

Reaction Time Challenge

reactionChallenge

We’re not sure where [Bill Porter] finds all of his free time, but we’re glad he’s put it to such good use by building an exhibit piece for the local science museum: Reaction Time Challenge. It’s likely that we were all inspired to love science as kids in a museum like this, and [Bill’s] contribution is already fascinating its young audience. The challenge lets two participants test how fast they can smack a big red button after a randomly-generated countdown. The time taken for the players to react is translated into the RGB LED strips, measuring how fast they managed to hit the button.

Builds like this one need to clearly communicate how they should be used; you don’t want confused children bamming around on your cabinet. First, [Bill] guts the dim LEDs inside the big plastic buttons and replaces them with some brighter ones. To keep the connections clean, he takes the cannibalized ends of an Ethernet cable and hooks the speaker and buttons to an Ethernet jack. The jack sits snugly in a project box where it connects to an Arduino. Two RGB LED strips run from the opposite end of the box, daisy-chaining from the bottom of the cabinet to the top, then back down again. See it all come together in the video after the break.

[Bill’s] museum must be pretty lucky; he resurrected the “Freeze Frame” exhibit for them just over a year ago and has done a bunch of other projects for them over the years.

Continue reading “Reaction Time Challenge”