Tearing An Old Laptop Apart To Build A Ground Control Station

Being tired of assembling and disassembling parts/cables every time he went outside to fly his plane, [Elad] figured that he’d be better off building his own ground control station.

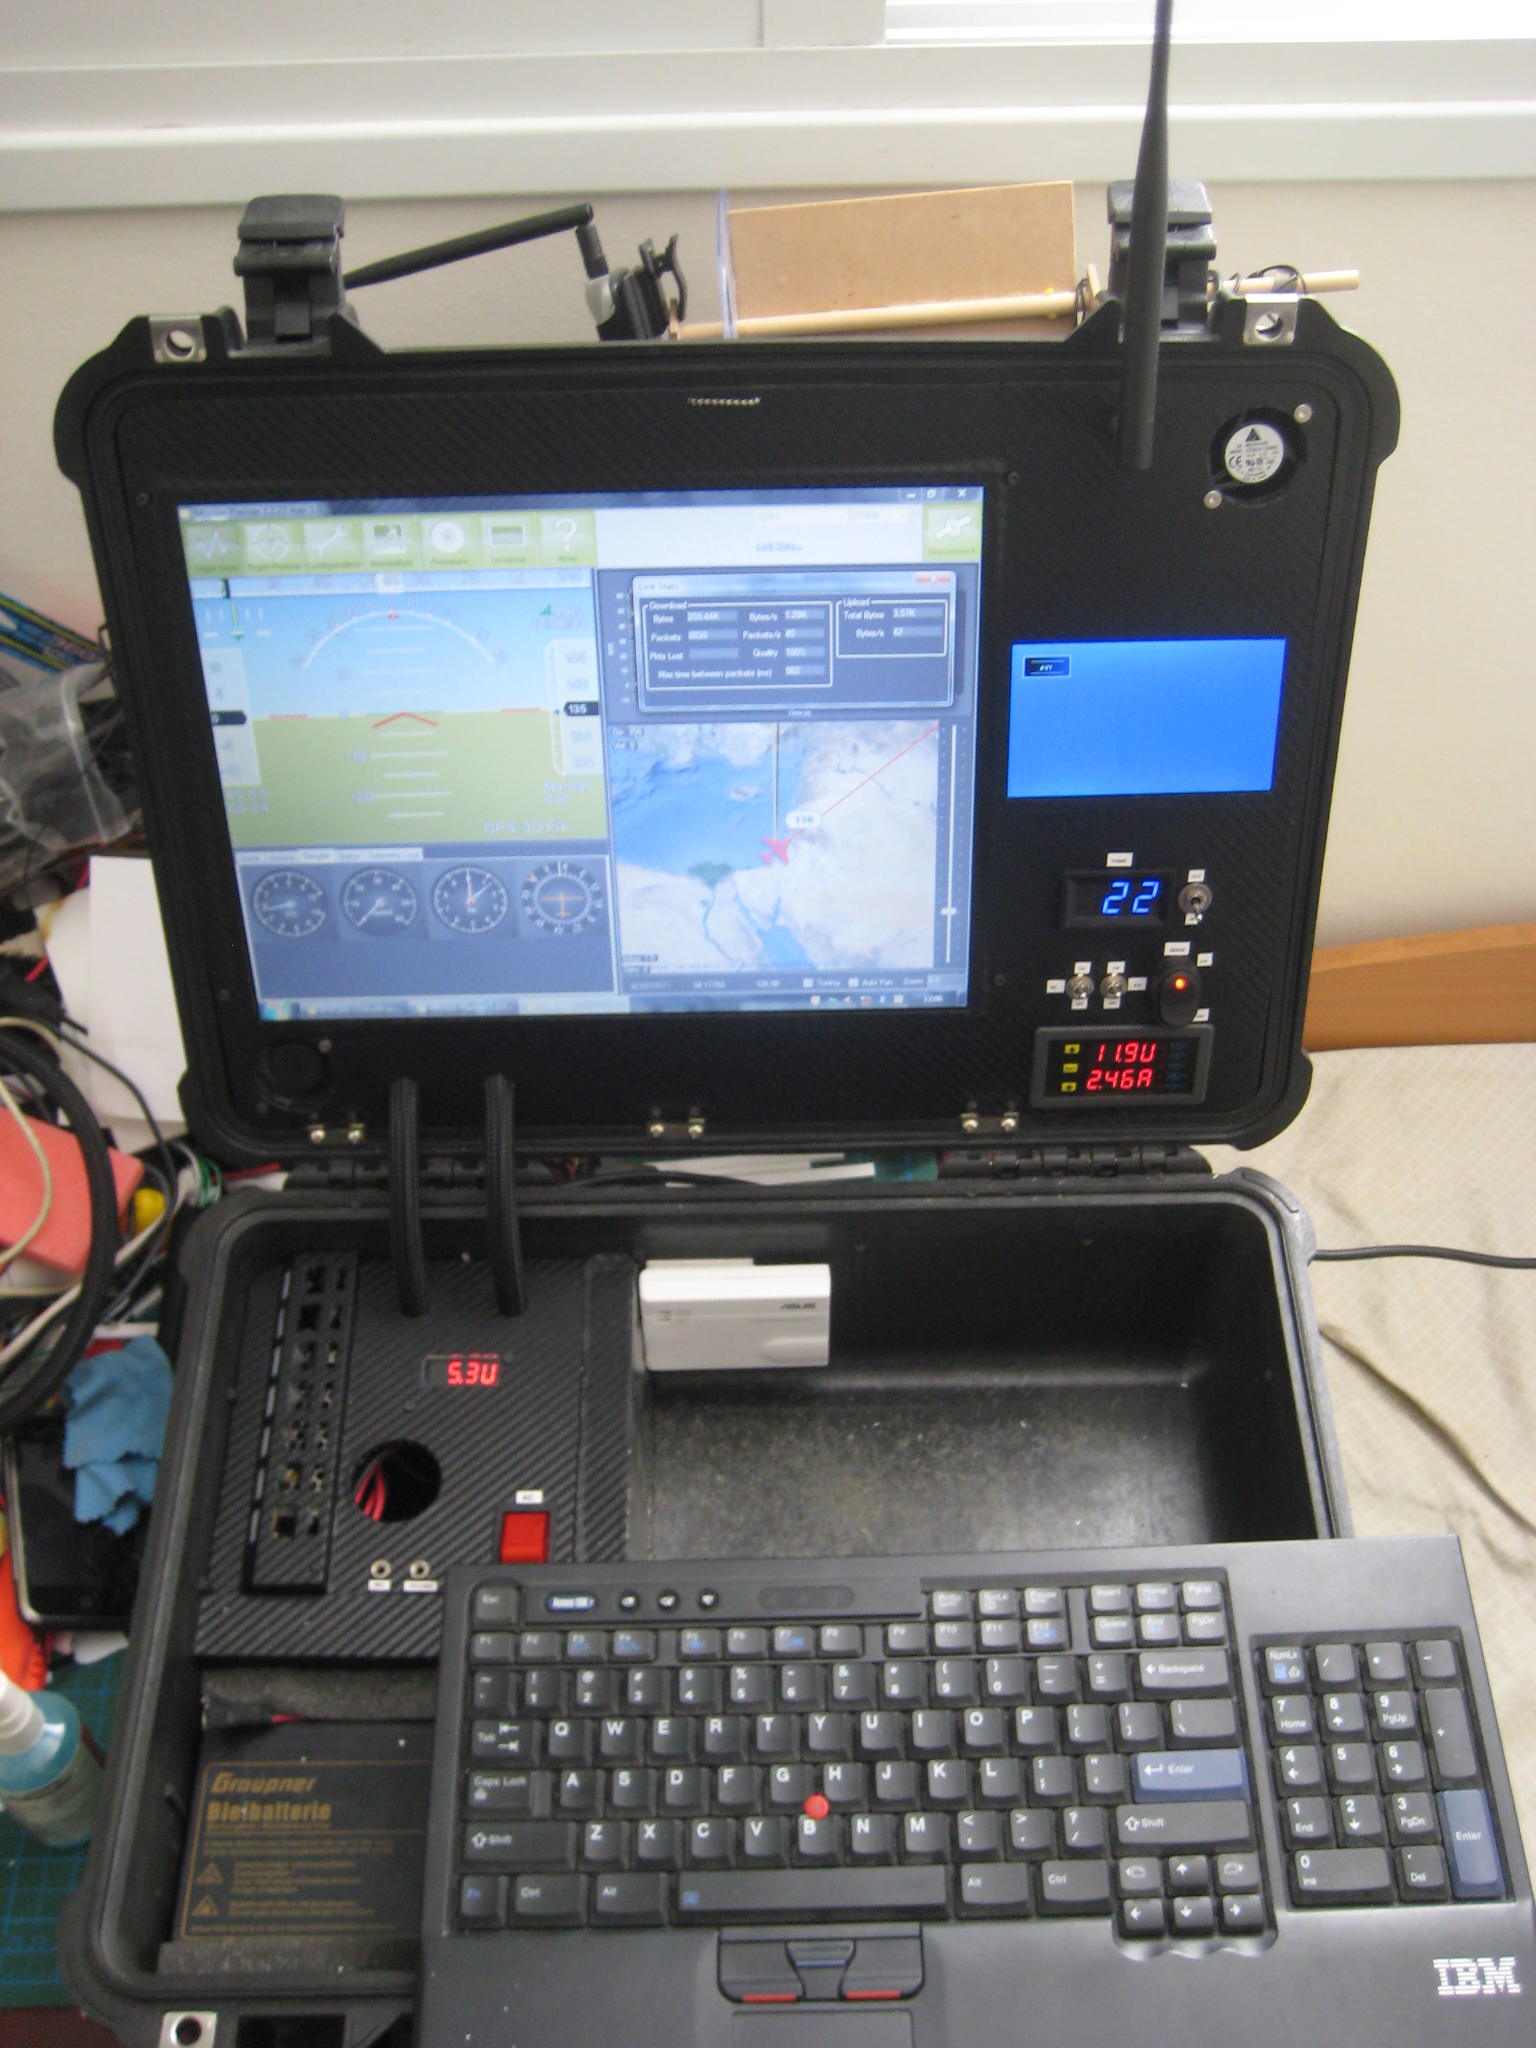
The core of the station is based on an old laptop with a broken screen he had laying around and (luckily) an older laptop screen he had found. As the latter only accepted LVDS, an adapter that could generate theses signals from the standard laptop’s VGA output was needed. [Elad] therefore disassembled his laptop and fit all the parts in a Pelican case he bought, as well as a lead-acid battery, a 12V to 19V stepup converter (to power the laptop), temperature/voltage/current sensors with their displays, 40mm fans, an AC/DC converter to charge the battery and finally a pico-UPS to allow uninterrupted use of the station when switching between power sources.

Because [Elad] didn’t have access to any machinery, PVC foam was used to maintain all the parts in place. Autonomy of his station is around 2.5hours on a single 12V 7Ah battery.

A Think-tank Solution For Monitoring Radioactive Water Storge Tanks

SONY DSC

When we hear reports of radioactive water leaking into the ocean from the [Fukushima Dai-Ichi] plant in Japan we literally have to keep ourselves from grinding our teeth. Surly the world contains enough brain power to overcome these hazards. Instead of letting it gnaw at him, [Akiba] is directing his skills at one solution that could help with the issue. There are a number of storage tanks on site which hold radioactive water and are prone to leaking. After hearing that they are checked manually each day, with no automated level monitoring, he got to work. Above is the wireless non-contact tank level sensor rig he built to test out his idea.

A couple of things made this a quick project for him. First off, he just happened to have a MaxSonar MB7389 waterproof sonar sensor on hand. Think of this as a really fancy PING sensor that is water tight and can measure distance up to five meters. [Akiba’s] assumption is that the tanks have a hatch at the top into which this sensor would be positioned. The box next to it contains a Freakduino of his own design which includes hardware for wireless communications at 900 MHz. This is the same hardware he used for that wireless toilet monitor.

We really like seeing hacker solutions to environmental problems. A prime example is some of the cleanup hacks we saw around the time of the BP Gulf of Mexico oil spill.


Radar Detector Integrated With Dashboard Display Screens And Steering Wheel Controls

CAN Bus hacking is all the rage right now. This particular project uses an early development version of an Arduino compatible CAN bus tool to integrate radar detector control into a Mazda dashboard. This image shows the output as the Whistler Pro-3600 radar detector boots up. The self test demonstrates what you would see on the dashboard display if your speed is checked using any of a handful of technologies. But it’s not just the dash display that’s working. The steering wheel controls are also capable of affecting the radar detector so that it can always be hidden from sight.

With auto manufacturers adding more numerous and larger displays to our vehicles it’s refreshing to see someone come up with a hack that makes pushing our own info to those screens possible. The CANBus Triple is an Arduino compatible board which patches into the data bus found in all modern vehicles. To integrate the Whistler for this hack [TheDukeZip] prototyped the interface on a regular Arduino board, then moved it over to the CANBus Triple once he had it working. Check out the video after the break to see the setup in action.

Continue reading “Radar Detector Integrated With Dashboard Display Screens And Steering Wheel Controls”

Yet Another Self-Balancing Unicycle

No one has time to hone their balancing skills these days, and if building your own Segway doesn’t generate enough head-turning for you, then the self-balancing unicycle from the guys at [Scitech] should. Their build is chain-driven, using easy-to-find salvaged Razor scooter parts. Throw in a motor controller, 5DOF IMU and some batteries and it’s almost ready to burn up the sidewalks in hipster-tech style.

Some of the previous unicycle builds we’ve seen are a little on the bulky side, but the [Scitech] cycle aims for simplicity with its square tube steel framing and footrests. As always, unicycle builds like these take some effort on behalf of the rider: shifting your weight controls steering and throttle. The [Scitech] gang also discovered that it’s usually best when you don’t accidentally wire the motors up to the controller backwards. We recommend that you find a helmet and watch the video after the break.

Too-cool-for-unicycle hackers can build a dangerously fast e-skateboard instead.

Continue reading “Yet Another Self-Balancing Unicycle”

Learn JTAG By Writing A Bit-banging Programmer

j-tag-flow-chart

[Pesco] won one of Dangerous Prototypes’ PCB giveaways a few months ago. He opted for a CPLD breakout board. He just needed to put in a parts order and populate the components himself. But then what? He needed a JTAG programmer to work with the chip. Like any good autodidact he choose to make his own rather than buying one. He absorbed the JTAG specification and coded a bit banging programmer using an Arduino.

We’ve used JTAG many times to program ARM chips. But until now we never took the time to figure out how the specification works. If you’ve got an IEEE subscription you can download the whitepaper, but [Pesco] was also able to find one floating around on the interwebs. The flow chart on the left is the cheat sheet he put together based on his readings. From there he wrote the Arduino sketch which implements the programming standard, allowing him to interact with a chip through a minicom terminal window.

[via Dangerous Prototypes]