Connected Thermostat

Raspberry PiPhone Thermostat Monitors Your Entire House — Or At Least That’s The Plan

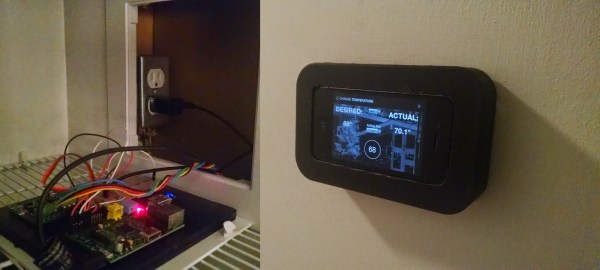
[Jeff McGehee] or how he likes to be known, [The Nooganeer] just finished his first big tech project after finishing grad school. It’s a connected thermostat that makes use of his old iPhone 4, and a Raspberry Pi.

Ever since [The Nooganeer] bought his first home with his wife back in the spring of 2014, he’s had ever consuming dream of adding home automation to every appliance. As he puts it…

Home automation has always been a fascination of mine.  How much time and irritation would I save if I didn’t have to worry about turning things on and off, or wonder in which state they were left?  How much more efficient would my home be?  Wouldn’t it be cool to always know the state of every power consumer in my home, and then be able to record and analyze that data as well?

His first challenge was making a smart thermostat — after all, heating and cooling your house typically takes the most energy. Having used a Raspberry Pi before he figured it would be the best brain for his system. After researching a bit about HVAC wiring, [The Nooganeer] settled on a Makeatronics Solid State Relay board to control the HVAC. This allows him to use the GPIO’s on the Raspberry Pi in order to control the furnace and AC unit.  Continue reading “Raspberry PiPhone Thermostat Monitors Your Entire House — Or At Least That’s The Plan”

Scanning On The Cheap

[Will] recently stumbled across the MakerBot Digitizer, a device that’s basically a webcam and a turntable that will turn a small object into a point cloud that can then be printed off on a MakerBotⓇ 3D printer. Or any other 3D printer, for that matter. The MakerBot Digitizer costs $800, and [Will] wondered if he could construct a cheaper 3D scanner with stuff sitting around his house. It turns out, he can get pretty close using only a computer, a webcam, and a Black and Decker line laser/level.

The build started off with a webcam mounted right next to the laser line level. Software consisted of Python using OpenCV, numpy, and matplotlib to grab images from the webcam. The software looks at each frame of video for the path of the laser shining against the object to be scanned. This line is then extracted into a 3D point cloud and reconstructed in MeshLab to produce a 3D object that might or might not be 3D printable.

This is only [Will]’s first attempt at creating a scanner. He’s not even using a turntable with this project – merely manually rotating the object one degree for 360 individual frames. It’s extremely tedious, and he’ll be working on incorporating a stepper motor in a future version.

This is only attempt number 1, but already [Will] has a passable scanned object created from a real-world thing.

Bicycle Generator with Cordless Drill

Cordless Drill Turned Into Bicycle-Powered Generator

The bicycle is a great invention. It is an extremely efficient method of transportation, even more so than walking. So why not harness that efficiency for other things? [Tony] had that same thought so he ordered a bike generator but after waiting too long for the company to send it, he decided to make his own.

[Tony] is an bicycle enthusiast so he had an old bike and an old training stand he could use for the project. Generating electricity from pedaling the bike requires some sort of generator. Lucky for him, [Tony] happened to have a cordless drill that stopped going in reverse. Since he had since upgraded, this was the perfect candidate for the generator. The drill was mounted to the training stand so that a pulley inserted in the chuck pressed against the rear wheel. Wires were added to connect the drill’s battery connectors to a 12vdc to 120vac inverter. As the bike is pedaled, the rear wheel spins the drill, which spins the drill motor creating DC voltage. That DC voltage is then converted to AC by the inverter. With a multimeter connected to the output from the drill, it is easy to adjust the pedaling speed to keep the output in the 11-14v range which is required by the inverter.

In the photo above, you can see a light bulb being powered by the bike. However, the bike powered generator could not power the larger load of a computer. The remedy for this was to purchase a solar charge controller and a 12 volt battery. The bike charges the battery and the battery can power the computer through the inverter.

Chaos Computer Club (and Hackaday) Blocked By British Porn Filters

The Chaos Computer Club, Europe’s largest association of hackers and hackerspaces, has been blocked by several UK ISPs as part of a government filter to block adult content.

Since July, 2013, large UK ISPs have been tasked with implementing what has been dubbed the Great Firewall of Britain, a filter that blocks adult content, content related to alcohol, drugs, and smoking, and opinions deemed ‘extremist’ by the government. This is an opt-out filter; while it does filter out content deemed ‘unacceptable’, Internet subscribers are able to opt out of the filter by contacting their ISP.

Originally envisioned as a porn filter, and recently updated with list of banned sexual acts including spanking, aggressive whipping, role-playing as non-adults, and humiliation, the British Internet filter has seen more esoteric content blocked from British shores. Objectionable material such as, “anorexia and eating disorder websites,” “web forums,” “web blocking circumvention tools”, and the oddly categorized, “esoteric material” are also included in the filter.

A site built by the Open Rights Group is currently tracking which ISPs blocking which domains. http://ccc.de is currently blocked by ISPs Three and Vodafone. Interestingly, this site – Hackaday – is blocked by the ‘Moderate’ British Telecom filter. The ‘Light’ BT filter – and all other British ISPs – still somehow let Hackaday through, despite posts about building shotguns cropping up from time to time.

UPDATE: Upon reflection, it comes to my attention that Brits have a choice of ISP.

extending an ebike

Extending The Range Of An Electric Bike

Cruising around town on your electric bike is surely a good time…. unless your bike runs out of juice and you end up pedaling a heavy bike, battery, and motor back to your house. This unfortunate event happened to Troy just one too many times. The solution: to extend the range of his electric bike without making permanent modifications.

Troy admits his electric bike is on the lower side of the quality scale. On a good day he could get about 15 miles out of the bike before it required a recharge. He looked into getting more stock battery packs that he could charge and swap out mid-trip but the cost of these was prohibitive. To get the extra mileage, Troy decided on adding a couple of lead-acid batteries to the system.

The Curry-brand bike used a 24vdc battery. Troy happened to have two 12v batteries kicking around, which wired up in series would get him to his 24v goal. The new batteries are mounted on the bike’s cargo rack by way of some hardware store bracketry. The entire new ‘battery pack’ can be removed quickly by way of a few wing nuts.

Connecting the new batteries to the stock system go a little tricky and the stock battery pack did have to be modified slightly. The case was opened and leads were run from the positive and negative terminals to two new banana plugs mounted in the battery pack’s case. The leads from the new batteries plug right into the banana plugs on the stock battery pack. The new and old batteries are wired in parallel to keep the voltage at 24.

Troy found that he’s getting about twice the distance out of his new setup. Not to bad for a couple on-hand batteries and a few dollars in odds and ends.

InfoFuse

This Message Will Self Destruct… As You Read It?

A group of Harvard chemists have come up with a novel use for fire. Through experimentation, they have been able to build what they call an InfoFuse. As the name implies, it’s essentially a burning fuse that can “transmit” information.

The fuse is made from flash paper, which is paper made from nitrocellulose. Flash paper burns at a relatively constant speed and leaves no smoke or ash, making it ideal for this type of project. The chemists developed a method of conveying information by changing the color of the flame on the paper. You might remember from high school chemistry class that you can change the color of fire by burning different metal salts. For example, burning copper can result in a blue flame. This is the key to the system.

The researchers dotted the flash paper with small bits of metal salts. As the flame reaches these spots, it briefly changes colors. They had to invent an algorithm to convert different color patterns to letters and numbers. It’s sort of like an ASCII table for fire. Their system uses only three colors. The three colors represent eight possible combinations of color at any given time. Just two quick pulses allow the researchers to convey all 26 letters of the English alphabet as well as ten digits and four symbols. In one test, the researchers were able to transmit a 20 character message in less than 4 seconds.

[Ben Krasnow] found the Harvard project and just had to try it out for himself. Rather than use colors to convey information, he took a more simple approach. He started with a basic strip of flash paper, but left large tabs periodically along its length. As the paper burns from end to end, it periodically hits one of these tabs and the flame gets bigger momentarily.

[Ben] uses an optical sensor and an oscilloscope to detect the quantity of light. The scope clearly shows the timing of each pulse of light, making it possible to very slowly convey information via fire. Ben goes further to speculate that it might be possible to build a “fire computer” using a similar method. Perhaps using multiple strips of paper, one can do some basic computational functions and represent the result in fire pulses. He’s looking for ideas, so if you have any be sure to send them his way! Also, be sure to check out Ben’s demonstration video below. Continue reading “This Message Will Self Destruct… As You Read It?”

Delta 3 Space 3D Printer

Prints In Space (Said In “Pigs In Space” Voice)

3D Printing on Earth is soooo last year. Recently, NASA has sent a 3D Printer to the International Space Station in order to test printing capability in space. The agency’s ultimate goal is to have a means to make parts and tools for astronauts that are far away from earth.

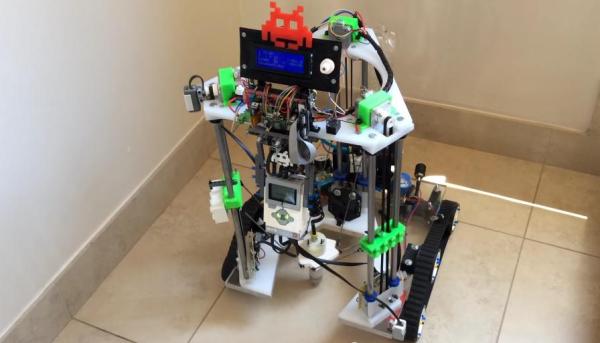
So, why should NASA have all of the extra-terrestrial printing fun? Three 15 year-olds thought that same thing and decided to build their own space printer. It’s goal, however, is a bit different from the one on the ISS. This printer is made to print on other celestial bodies such as the moon or Mars, not in a space station. The students call their project the DELTA 3 and as its name implies, is a delta-style printer and that’s where all similarities with conventional printers end. This printer has tank tracks so that it can maneuver itself around the planet. There is no print bed. The printer prints directly to the surface of which it is resting on. The frame is open at the front of the printer so that it can back up leaving a free-standing print in its wake. It certainly beats the hot-glue versions seen before and we think this is the Automated Build Platform of the future, today!

The DELTA 3’s electronic controls are also quite different from the norm. There is a Lego EV3 controller that is responsible for navigating the printer around obstacles to find a suitable print area. Once a location has been picked out, the EV3 triggers the standard Arduino Mega/RAMPS combo to coordinate the printing.

The young creators brought their DELTA 3 to the World Robot Olympiad just last month. They came in 4th in their division.

[via 3Dprint.com]