Analog Shield And PCB Quadcopter

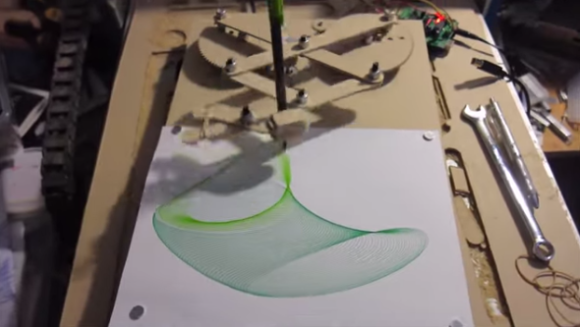
[youtube=https://www.youtube.com/watch?v=gXW76ESIv6k&w=580]


We spent a little bit of time at the TI booth at Maker Faire to film a pair of interviews. The first is with [Bill Esposito] who is grinding away on his PhD. at Stanford. He’s showing off an Analog Shield for Arduino. He describes it as “an attempt to bring the analog bench to an Arduino shield”. We think this is a fantastic idea as most who are learning digital electronics through Arduino have little or no experience with analog circuitry. This is a nice gateway drug for the concepts.

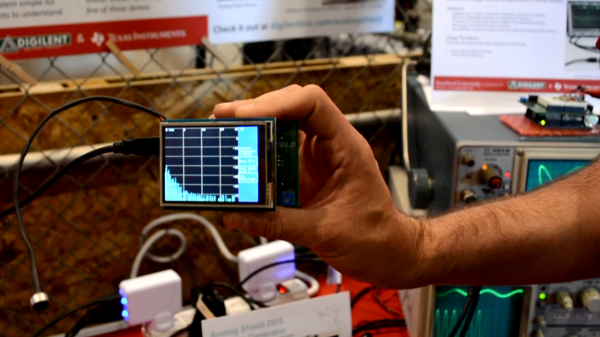
The analog shield has a supply good for +/- 7.5 volts, 4-channel ADC, 4-channel DAC, and gets 100k samples at 16-bits. He showed us a spectrum analyzer using Fast Fourier Transform on the incoming signal from a microphone. He also built a function generator around the shield. And finally a synthesizer which plays MIDI files.

In the second half of the video we take a look at [Trey German’s] work on a PCB-based quadcopter. His goal is to reduce the power consumption which will equate to longer flying times. To this end he chose the DRV8312 and a Piccolo to control each sensorless, brushless DC motor. The result should be 10% lower power consumption that his previous version.


Bare Bones Arduino IR Receiver

TV Remote

Old infrared remote controls can be a great way to interface with your projects. One of [AnalysIR’s] latest blog posts goes over the simplest way to create an Arduino based IR receiver, making it easier than ever to put that old remote to good use.

Due to the popularity of their first IR receiver post, the silver bullet IR receiver, [AnalysIR] decided to write a quick post about using IR on the Arduino. The part list consists of one Arduino, two resistors, and one IR emitter. That’s right, an emitter. When an LED (IR or otherwise) is reverse biased it can act as a light sensor. The main difference when using this method is that the IR signal is not inverted as it would normally be when using a more common modulated IR receiver module. All of the Arduino code you need to get up and running is also provided. The main limitation when using this configuration, is that the remote control needs to be very close to the IR emitter in order for it to receive the signal.

What will you control with your old TV remote? It would be interesting to see this circuit hooked up so that a single IR emitter can act both as a transmitter and a receiver. Go ahead and give it a try, then let us know how it went!

Using Pulleys And Weights To Explain Binary Logic Gates

pulley computer

To demonstrate how computers work, [Alex Gorischek] has made a physical example of how binary logic gates work using pulleys and weights.

For anyone who doesn’t know much about logic gates (Wikipedia), it’s a great lesson in one of the fundamentals of circuitry. Using an old chessboard, eyelets, rings, weights, and string, [Alex] has designed a system that can show off all of the logic gates. This includes: NOT, BUFFER, NAND, AND, OR, NOR, XOR, XNOR. He’s also included a gallery of all his examples here.

The neat thing about this demonstration is it is shown in a way that anyone can understand, heck, it’s also something anyone can play with in order to learn! Stick around after the break and see for yourself.

Continue reading “Using Pulleys And Weights To Explain Binary Logic Gates”

Robot-Army IRL Plus A Massive Build Log

We went to “the dark room” at Maker Faire once more for an interview with [Sarah] of Robot-Army. She and [Mark], who handles software development for the project, were showing off 30 delta robots who know how to dance. Specifically they’re dancing in unison to the movements of another faire-goer. A Kinect sensor monitors those movements and translates them to matching motions from the deltabots.

You should remember seeing this project back in November. Now that the standards for this model have been worked out it was just a matter of sinking about three-weeks into assembling the army. We’re happy to see that the Kickstarter made it to 250% of the goal at the beginning of March, and with that there are even bigger plans. [Sarah] says the goal remains to fill a room with the robots and a we may even see a much larger version some day.

The interview is a bit short since the Robot-Army booth was right next to Arc Attack (hence the noise-cancelling headphones) and we had to try to get in and out between their ear-drum-shattering interruptions. But you can see a ton more about the project in this huge build log post over on Hackaday.io. Also check out the Robot-Army webpage. There’s a nice illustration of their adventures at MFBA and the foam Jolly Wrencher made it into the piece!

The I2C Programmable NFC Tag

NFC
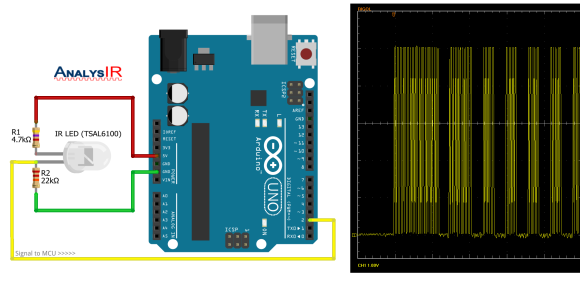
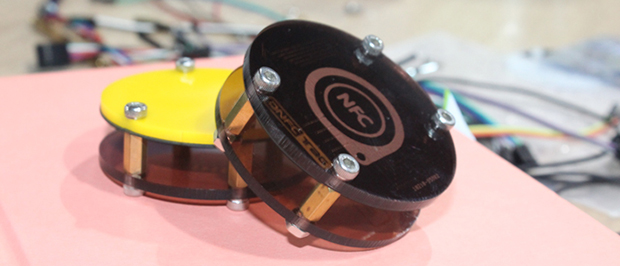
NFC tags are cool, but programming them to do your bidding – whether unlocking your computer, making an Arduino vending machine, or a smart home application – requires using an NFC device to program the tag over the air. An NFC tag programmable with any ‘ol microcontroller would certainly have some interesting applications, and Elecfreaks’ DNFC tag is just the thing to test out these ideas.

While NFC tags are reprogrammable, reprogramming them requires an NFC controller, be that through a dedicated hardware, a phone, or an Arduino shield. The DNFC tag is reprogrammable with a microcontroller with an I2C interface thanks to TI’s RF430CL330H dynamic NFC transponder IC. It still does everything you would expect from a NFC tag – MIFARE compatible. NDEF reading and writing, and everything else – but you can program it through an Arduino, Pi, or any other board with an I2C interface.

TI has an app note on using the chip inside the DNFC for automatic Bluetooth pairing, and Elecfreaks themselves have a few use cases in mind that include putting WiFi credentials on an Arduino board without putting the SSID in code and other Internet of Things™ applications. We’re thinking this is one of those devices that is eminently useful, but for something we just can’t think of off the top of your head. If you’ve got an idea for how to use an I2C programmable NFC tag, drop a note in the comments.

Elecfreaks is doing an Indiegogo campaign for the DNFC, $13 for one. I picked one up, but it’s flexible funding, so buy it or don’t. I don’t care.

Art-O-Matic Is Spirograph’s Young Hip Offspring

Art-O-Matic automatic spirograph

Some of our more senior experienced readers may remember a toy called the Spirograph. In case you don’t, it’s a geometric shape drawing toy. The way it works is a plastic disc with gear teeth around the perimeter and various holes on its face is spun around a plastic ring with gear teeth on the inside. A pencil is inserted in one of the holes in the disc and, when spun around the inside of the ring, draws different complex shapes called hypotrochoids.

 Art-O-Matic automatic Spirograph

This was fun enough to keep a kid entertained for a few minutes. It took a while to make a complete shape and sometimes it was easy to mess up (especially if the hole chosen for the pencil was near the outside of the disc). [Darcy] thought it would be neat to combine the Spirograph’s drawing style with modern technology. The result is called the Art-O-Matic and it draws some pretty wild art, you guessed it, automatically.

Click past the break for more!

Continue reading “Art-O-Matic Is Spirograph’s Young Hip Offspring”

Homemade Alarm System Doesn’t Lack Features

alarm system

To many of us, our garage (or workshop) is probably one of the most important parts of the house. If a burglar broke in, we’d likely be more worried about our tools! [Ron Czapala] decided he needed an alarm system in his garage to keep his stuff safe, so he decided to build one from scratch.

The system makes use of a Parallax 4×4 keypad membrane, a MCP23008 port expander, a Parallax Propeller, a LCD screen, and a few switches to represent future magnetic reed switches located in the door and window.

Using circular buffers, the propeller has several states for monitoring the garage.

  • Not armed — ignore all sensors
  • Armed — system will react to changes in the sensors
  • Exit delay — system has been armed, 45 second countdown has begun to allow you to exit the garage
  • Window trigger — if the window is opened, the alarm will go off immediately (siren and strobe light)
  • Door trigger — alarm will go off in 60 seconds if correct code has not been entered on the keypad

For a complete demonstration, check out the following video where [Ron] explains it all!

Continue reading “Homemade Alarm System Doesn’t Lack Features”