There are as almost as many kinds of coffee as there are of coffee drinkers, with each method for preparing the beverage appealing to a different kind of palate: moka pots, filter coffee, pour-over coffee, French presses, cold brews, espresso, and more produce their own unique flavours by extracting different compounds from the grounds to different degrees. Now, a new method has joined the throng: ultrasonic-assisted extraction, which can produce even an espresso at room temperature.
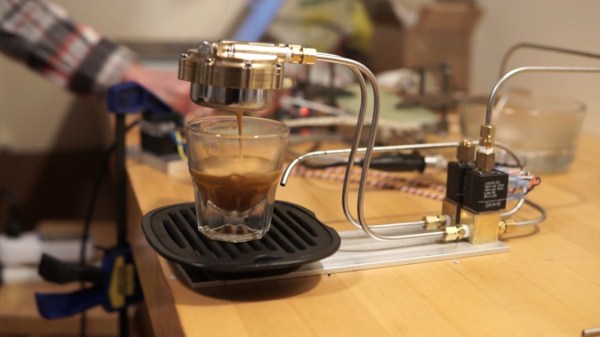
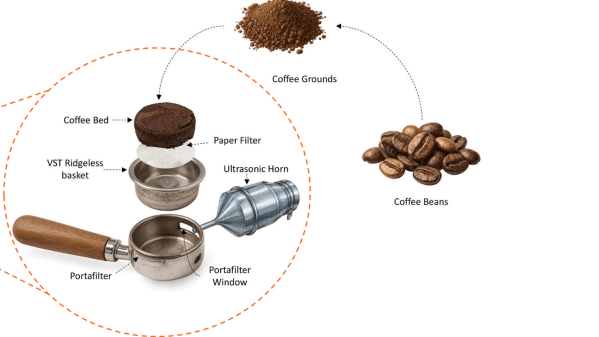
Espresso is normally made by forcing hot water through tightly-packed, finely-ground coffee beans, quickly producing a concentrated extraction. Its one of the hardest kinds of coffee to consistently make well, since the outcome is influenced by everything from grind size and packing density to temperature, pressure, and more. Ultrasonic agitation helps here by creating cavitation bubbles, which form shock waves as they collapse, breaking open the bean structure and producing small, strong jets of water. The experimental apparatus was built into a modified espresso machine. An ultrasonic transducer delivers vibrations to the basket containing the room-temperature slurry of coffee grounds for two or three minutes.
To quantify the results, the researchers analysed total dissolved solids, extraction yield, pH, colour, volatile components, and caffeine and chlorogenic acid contents. By varying ultrasonic power and grind size, the extraction yield and dissolved solids could be adjusted to closely match traditional espresso or cold-brew coffee. The other metrics had no significant differences, and a survey of 100 coffee drinkers found no preference between this and traditional espresso. When the drinkers tried the cold-brew coffees, they preferred the version made with ultrasonic assistance. The experiment succeeded in its goal of reducing energy consumption: the ultrasonic-assisted coffee took about a quarter as much energy to make.
If you still prefer a more traditional approach, we’ve covered some beautiful espresso machines before, including one made out of motorcycle engine parts.