Game Boy Camera mounted to Canon Lens using EF Mount

A Canon Lens Adapter For The Game Boy Camera

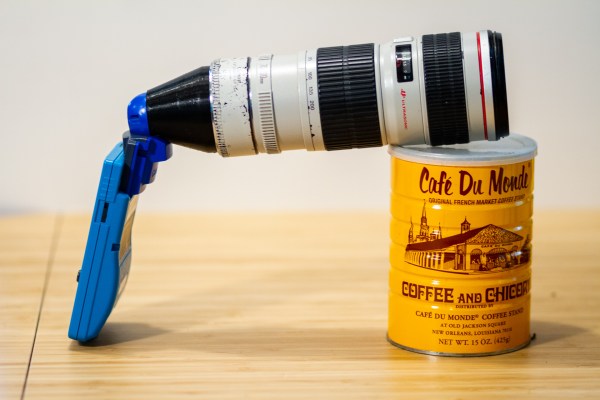
Released in 1998, the Game Boy camera was a bit ahead of its time. This specialized Game Boy cartridge featured a 128×128 pixel CMOS sensor and took 4-color greyscale photos. The camera even rotated, allowing for selfies years before that word existed.

The fixed lens on this camera meant no zoom was possible. [Bastiaan] decided to address this shortcoming by building a Canon EF Lens Mount. The resulting build looks hilarious, but actually takes some interesting photos.

[Bastiaan] designed the mount using Rhino 3D, and printed it out on a Monoprice 3D printer. After some light disassembly, the mount can be screwed onto the Game Boy Camera. With the massiveĀ 70-200 f4 lens and 1.4x extender shown here, the camera gets a max focal distance of just over 3000 mm.

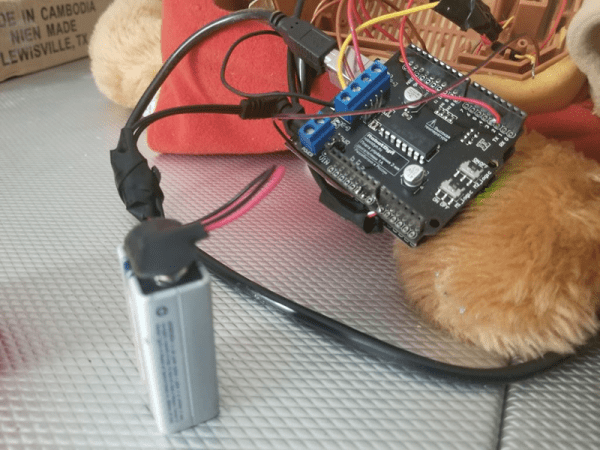
One issue with the Game Boy Camera was the limited options for doing anything with the photos. They could be transferred to other Game Boy Camera cartridges, or printed using the Game Boy Printer. Fortunately, [Brian Khuu] has a modern day solution that emulates the Game Boy Printer using an Arduino. This lets you get PNG files out of the device.

A 100th Birthday Celebration For The Flip Flop

It’s easy to get caught up in the excitement of creation as we’re building our latest widget. By the same token, it’s sometimes difficult to fully appreciate just how old some of the circuits we use are. Even the simplest of projects might make use of elements that were once a mess on some physicist’s or engineer’s lab bench, with components screwed to literal breadboards and power supplied by banks of wet-cell batteries.

One such circuit turns 100 years old in June, which is surprising because it literally is the building block of every computer. It’s the flip-flop, and while its inventors likely couldn’t have imagined what they were starting, their innovation became the basic storage system for the ones and zeros of the digital age.

Continue reading “A 100th Birthday Celebration For The Flip Flop”

Teddy Ruxpin: Navigate To 143 Main Street

In the United States, TV and radio stations have to give the opportunity of equal airtime to all candidates. In that spirit, we thought we should show you [Jayden17’s] hack that puts Google Assistant into a Teddy Ruxpin. You can see the hacked bear do its thing in the video below.

Teddy was the best-selling toy for 1985 and 1986, and is still available, so over 30 years there are a lot of these hanging around. If you never looked at how they work, the original ones were quite simple. A cassette player routed one stereo channel to a speaker and used the other channel to control servo motors to move the mouth and eyes. The cassette was eventually replaced with a digital cartridge, and newer versions of Teddy only use two motors instead of the three in the original.

Continue reading “Teddy Ruxpin: Navigate To 143 Main Street”

Deploying A Turnkey Raspberry Pi System

If you only do projects for yourself, you are spoiled. After all, you know your environment better than anyone. You know what power you’ll have, the temperature range, and how your network is configured. This last part is especially problematic if you are trying to deploy something that connects to a wireless LAN. How can you configure, say, a Raspberry Pi so that it can connect to an unknown user’s WiFi network? Fixing that problem is the goal of [schollz’s] Raspberry Pi Turnkey project.

The idea is simple. A Raspberry Pi image boots up for the first time and offers a WiFi hotspot itself called ConnectToConnect. The WiFi password is also ConnectToConnect. Once connected, you get configuration options that allow you to tailor the system to your network. Sure, you could have people log in and reconfigure via a serial terminal, wired ethernet (which isn’t always set up right, either), or a USB keyboard But that’s not a great out-of-the-box experience for most customers.

Continue reading “Deploying A Turnkey Raspberry Pi System”