Behind The Pin: How The Raspberry Pi Gets Its Audio

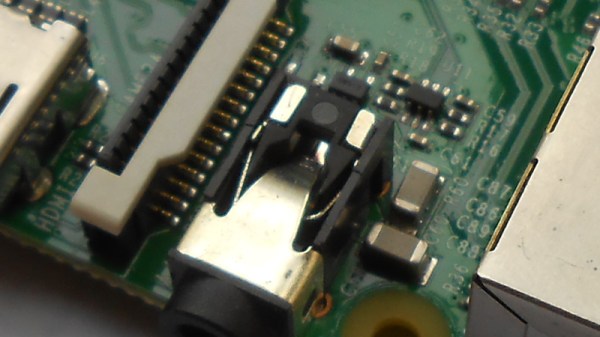
Single board computers have provided us with a revolution in the way we approach computing as hardware creators. We have grown accustomed to a world in which an entire microcomputer has become a component in its own right rather than a complex system, and we interface to them as amorphous entities through their exposed interfaces. But every pin or socket on a single board computer has something behind it, so following up on a recent news-inspired item in which we took a look at what lies behind the Ethernet jack on a Raspberry Pi, we’d like to continue that theme by looking behind more pins and interfaces. So today we’ll stay with the Raspberry Pi, and start with an easy target by taking a look down its audio jack.

All the main Raspberry Pi board releases since 2012 with the exception of the Pi Zero series, have featured a 3.5mm jack carrying line-level audio. The circuits are readily accessible via the Raspberry Pi website, and are easy enough to understand because of course all the really hard work is done within the silicon of the Broadcom system-on-chip. Looking at the audio circuitry, we’ll start by going back to the original Pi Model B from 2012 (PDF) because though more recent models have seen a few changes, this holds the essence of the circuitry.

Continue reading “Behind The Pin: How The Raspberry Pi Gets Its Audio”

Replace Your Calipers With A Microscope And Image Analysis

Getting a good measurement is a matter of using the right tool for the job. A tape measure and a caliper are both useful tools, but they’re hardly interchangeable for every task. Some jobs call for a hands-off, indirect way to measure small distances, which is where this image analysis measuring technique can come in handy.

Although it appears [Saulius Lukse] purpose-built this rig, which consists of a microscopic lens on a digital camera mounted to the Z-axis of a small CNC machine, we suspect that anything capable of accurately and smoothly transitioning a camera vertically could be used. The idea is simple: the height of the camera over the object to be measured is increased in fine increments, with an image acquired in OpenCV at each stop. A Laplace transformation is performed to assess the sharpness of each image, which when plotted against the frame number shows peaks where the image is most in focus. If you know the distance the lens traveled between peaks, you can estimate the height of the object. [Salius] measured a coin using this technique and it was spot on compared to a caliper. We could see this method being useful for getting an accurate vertical profile of a more complex object.

From home-brew lidar to detecting lightning in video, [Saulius] has an interesting skill set at the intersection of optics and electronics. We’re looking forward to what he comes up with next.

Give The Clapper A Hand

While “The Clapper” probably first conjures images of low-budget commercials, it was still a useful way to remotely switch lights and other things around the house. But if the lights you want to switch weren’t plugged into the wall, like a ceiling fan, for example, The Clapper was not going to help you. To add some functionality to this infamous device, [Robin] built one from scratch that has all the extra features built in that you could ever want.

First, the new Clapper attaches to the light switch directly, favoring mechanical action of the switch itself rather than an electromechanical relay which requires wiring. With this setup, it would be easy to install even if you rent an apartment and can’t do things like rewire outlets and it has the advantage of being able to switch any device, even if it doesn’t plug into the wall. There’s also a built-in microphone to listen for claps, but since it’s open-source you could program it to actuate the switch when it hears any sound. It also includes the ability to be wired in to a home automation system as well.

If the reason you’ve stayed out of the home automation game is that you live in a rental and can’t make the necessary modifications to your home, [Robin]’s Clapper might be just the thing you need to finally automate your living space. All the files are available on the project site, including the 3D printing plans and the project code. Once you get started in home automation, though, there’s a lot more you can do with it.

Continue reading “Give The Clapper A Hand”