For serious data collection with weather sensors, a solar shield is crucial. The shield protects temperature and humidity sensors from direct sunlight, as well as rain and other inclement weather, without interfering with their operation. [Mare] managed to create an economical and effective shield for under three euros in materials.
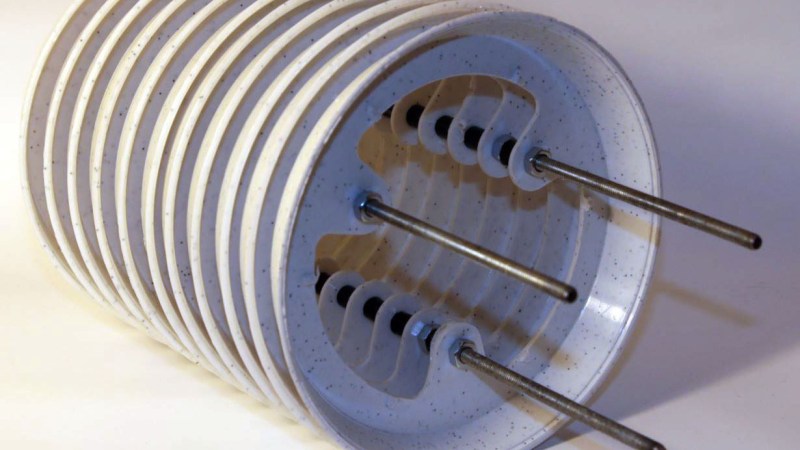
 It began with a stack of plastic saucers intended for the bottom of plant pots. Each of these is a lot like a small plate, but with high sides that made them perfect for this application. [Mare] cut the bottom of each saucer out with a small CNC machine, but the cut isn’t critical and a hand tool could also be used.
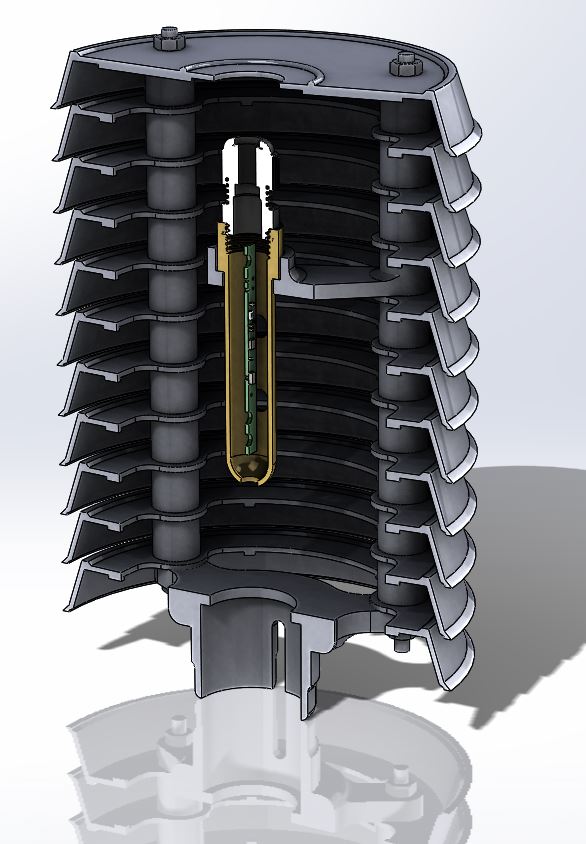
Three threaded rods, nuts, and some plastic spacers between each saucer yields the assembly you see here. When mounted correctly, the sensors on the inside are protected from direct exposure to the elements while still allowing airflow. As a result, the readings are more accurate and stable, and the sensors last longer.
The top of the shield is the perfect place to mount a UV and ambient light sensor board, and [Mare] has a low-cost DIY solution for that too. The sensor board is covered by a clear glass dish on top that protects the board without interfering with readings, and an o-ring seals the gap.
3D printing is fantastic for creating useful components, and has been instrumental in past weather station builds, but projects like these show not everything needs to be (nor should be) 3D printed.


This is rather neat an effective execution.
I would have likely done it with a template for marking out the centers for 4 holes.
Then drill out the three for the threaded rod using an adequately sized drill bit.
Then something bigger for the main compartment.
But if one has a CNC router, then everything might start to look like a job for it.
I thought the same thing: just run through the center of them with a drill bit to open up enough area for the sensor. But perhaps there’s an advantage to opening up as much internal volume as possible?
Yes, air flow.
Right, but I think the question is what is the performance difference between the center void being 60% opened up or 80%? In other words, do you need to cut this “flower petal” design in, or would it be enough to just put a big hole down through all of them.
In either event, it seems like it would be a massive improvement over the 3D printed box with some slots in it that a lot of people are using.
I did the same thing with some plastic bowls from WalMart. Used a drill to cut the bottoms out of all but 3 of them and to make holes for the threaded rods, painted the insides black and the outsides white.
Does this offer any advantages over commercial versions, or more customizable etc, or is it just to save a couple of dollars over things like this: https://www.aliexpress.com/item/32793243933.html
After a number of years, the humidity sensor on my commercial unit is constantly reading 1%.
Failure due to standing water?
I am curious if this is due to an observable defect in design or just premature sensor failure.
It happened to me on Davis Vantage Vue, I ordered SHT11 sensor from eBay and replaced it, now it works fine again.
Yes, many people do that. The SHT11 and SHT15 are interchangeable so either can be used to replace each other. (the difference between them is tolerance/accuracy)
I had a DHT-22 fail on me after a few months exposed to dew, but mine was stuck at 100%. The sensor was protected from direct sunlight and rain, but had no shield; now I’m going to use this idea to put a proper shield in place!
I just kept seeing the plastic as easy to source cheap Frisbee’s.