Active Signal Tracer Probe Has AGC

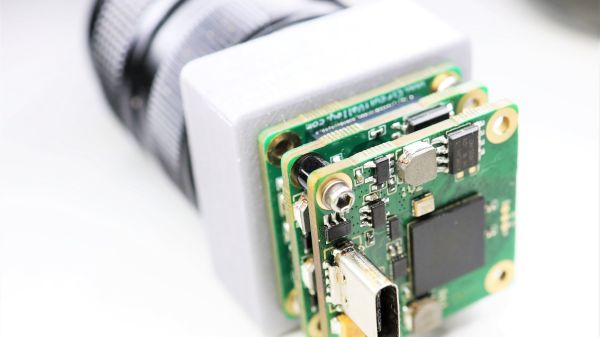
[Electronics Old and New] has a new version of one of his old projects. The original project was an active probe. He took what he learned building that probe and put it into a new probe design. He also added automatic gain control or AGC. You can see a video explanation of the design below. The probe is essentially a high-impedance input using a JFET that can amplify audio or demodulated RF signals, which is a handy device to have when troubleshooting radios.

The audio amplifier is a simple LM386 circuit. The real work is in the input stage and the new AGC circuit. Honestly, we’ve used the amplifier by itself for a similar function, although the raw input impedance of the chip is only about 50K and is less in many circuits that use a pot on the input. Having a JFET buffer and an RF demodulating diode is certainly handy. You’d think the AGC block would be in the audio stage. However, the design uses it ahead of the detector which is great as long as the amplifier can handle the RF frequency you are interested in. In this case, we think he’s mostly working on old tube AM radios, so the max signal is probably in the neighborhood of 1 MHz.

A similar device was a Radio Shack staple for many years

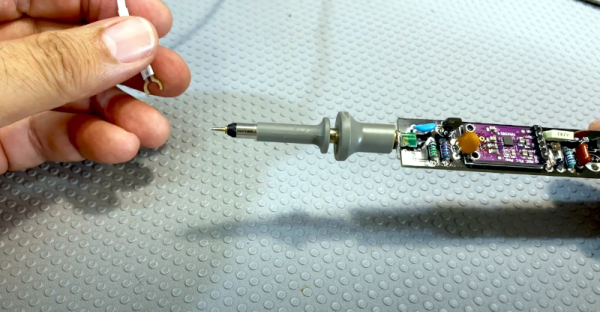
The module is made to amplify an electret microphone using a MAX9814 which has AGC. The module had a microphone that came off for this project. The datasheet doesn’t mention an upper frequency limit, but a similar Maxim part mentions its gain is greater than 5 at 600 kHz, so for the kind of signals this is probably used for, it should work well. We wondered if you could use the module and dispense with the JFET input. The chip probably has a pretty high input impedance, but the datasheet doesn’t give a great indication.

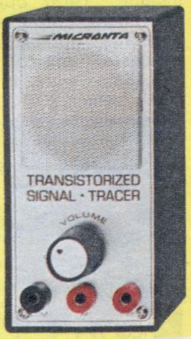
For years we used a signal tracer from Radio Shack which — if we could still find it — now has an LM386 inside of it after the original electronics failed decades ago. In those days, fixing an AM radio involved either using a device like this to find where you did and didn’t have a signal or injecting signals at different points in the radio. Two sides of the same coin. For example, if you could hear a signal at the volume control — that indicated the RF stages were good and you had a problem on the audio side. Conversely, if you injected a signal at the volume control, not hearing would mean the same thing. Once you knew if the problem was in the RF or AF side, you’d split that part roughly in half and repeat the operation until you were down to one bad stage. Of course, you could use signal generators and scopes, but in those days you weren’t as likely to have those.

Heathkit, of course, had their own version. It even had on of those amazing magic eye tubes.

Continue reading “Active Signal Tracer Probe Has AGC”

This Week In Security: IoT In The Hot Tub, App Double Fail, And FreeBSD BadBeacon

[Eaton Zveare] purchased a Jacuzzi hot tub, and splurged for the SmartTub add-on, which connects the whirlpool to the internet so you can control temperature, lights, etc from afar. He didn’t realize he was about to discover a nightmare of security problems. Because as we all know, in IoT, the S stands for security. In this case, the registration email came from smarttub.io, so it was natural to pull up that URL in a web browser to see what was there. The page presented a login prompt, so [Eaton] punched in the credentials he had just generated. “Unauthorized” Well that’s not surprising, but what was very odd was the flash of a dashboard that appeared just before the authorization complaint. Could that have been real data that was unintentionally sent? A screen recorder answered that question, revealing that there was indeed a table loaded up with valid-looking data.

Digging around in the page’s JavaScript comes up with the login flow. The page uses the Auth0 service to handle logins, and that service sends back an access token. The page sends that access token right back to the Auth0 service to get user privileges. If the logged in user isn’t an admin, the redirect happens. However, we already know that some real data gets loaded. It appears that the limitations to data is all implemented on the client side, and the backend only requires a valid access token for data requests. What would happen if the response from Auth0 were modified? There are a few approaches to accomplish this, but he opted to use Fiddler. Rewrite the response so the front-end believes you’re an admin, and you’re in.

This approach seems to gain admin access to all of the SmartTub admin controls, though [Eaton] didn’t try actually making changes to see if he had write access, too. This was enough to demonstrate the flaw, and making changes would be flirting with that dangerous line that separates research from computer crime. The real problem started when he tried to disclose the vulnerability. SmartTub didn’t have a security contact, but an email to their support email address did elicit a reply asking for details. And after details were supplied, complete radio silence. Exasperated, he finally turned to Auth0, asking them to intervene. Their solution was to pull the plug on one of the two URL endpoints. Finally, after six months of trying to inform Jacuzzi and SmartTub of their severe security issues, both admin portals were secured.

Continue reading “This Week In Security: IoT In The Hot Tub, App Double Fail, And FreeBSD BadBeacon”

What Do You Get When A Raspberry Pi Pico Flashes A Nintendo 64

The joke was when the Nintendo 64 first hit the streets around a quarter century ago, that the 64 in the name referred not to the technology on board, but to the excessive cost of the cartridges. Whatever the truth in that, it’s something now completely laid to rest by [Konrad Beckmann] with his Nintendo 64 flash cart powered by a Raspberry Pi Pico (Nitter Link).

The schematic is surprisingly simple, in that the Pico does everything required to both interface to the N64 and to an SD card to hold the software. The clever work is done by the RP2040 firmware, which can be found along with the hardware details in the “develop” branch of the project’s GitHub repository. And while the earliest version was a Raspberry Pi Pico with a host of jumper wires, the more polished version focuses on a custom PCB and bare RP2040 chip.

Perhaps the N64 hasn’t received the attention it should have over the years, overshadowed as it was by its competitors such as the original PlayStation, but it’s projects like this one which remind us that there’s still life in Nintendo’s ’90s flagship. Speaking of which, if you were on Team Sony back in the day but still want to put your Pi Pico to use, check out this DIY PlayStation Memory Card we covered recently.

Scratch-Built Industrial Camera’s Modular Design Really Stacks Up

The news here isn’t so much that [Guarav Singh] built this high-quality industrial digital camera from scratch, but it’s in the way it was accomplished. That plus the amount of information that’s packed into the write-up, of course. And the excellent photography.

Modularity was one of [Guarav]’s design goals, with the intention of being able to swap out the sensor as the technology changes. To that end, [Guarav] came up with a stack of three PCBs. The middle board of the stack contains a Lattice FPGA chip along with two 16-MB RAMs and the FPGA config flash. The sensor board lies on one side of the FBGA board, while the USB 3.0 board is on the other. Each six-layer board is a masterpiece of high-density design, and the engineering that went into interfacing them and getting everything squeezed into a 3D-printed case with an integrated aluminum C-mount ring is pretty impressive.

[Guarav]’s write-up goes into a great deal of detail on processing the sensor data on the FPGA. Also, there’s quite a bit of practical information on implementing MIPI (Mobile Industry Processor Interface) and the CSI (Camera Serial Interface) specification. We’ve delved into this world before, but this project is a great hands-on explanation that might really help move your MIPI project along.

Thanks for the tip, [STR-alorman].