Ever noticed that a rubber band gets warmer when it’s stretched? The bands also get cooler when allowed to snap back to relaxed length? [Ben Krasnow] noticed, and he built a rubber band cooled refrigerator to demonstrate the concept. The idea of stretching a rubber band to make it hotter, then releasing it to make it cooler seems a bit counter intuitive. Normally when things get smaller (like a gas being compressed) they get hotter. When pressure is released the gas gets cooler. Rubber bands do the exact opposite. Stretching a rubber band makes it hot. Releasing the stretched band causes it to get cooler.
No, the second law of thermodynamics isn’t in jeopardy. The secret is in the molecular structure of rubber bands. The bands are made of long polymer chains. A relaxed rubber band’s chains are a tangled mess. Stretching the band causes the chains to untangle and line up in an orderly fashion. By stretching the band you are decreasing its entropy. The energy of the molecules in the band don’t change, but entropy does. All the work one does to st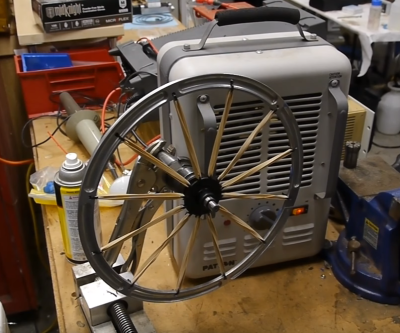 retch the band has to go somewhere, and that somewhere is heat. This is all an example of entropic force. For a physics model of what’s going on, check out ideal chains. If you’re confused, watch the video. [Ben] does a better job of explaining entropic force visually than we can with text.
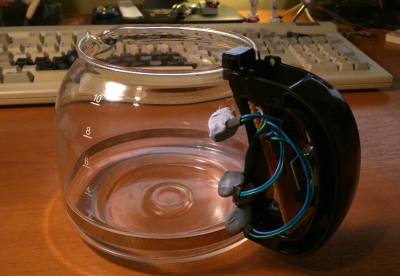
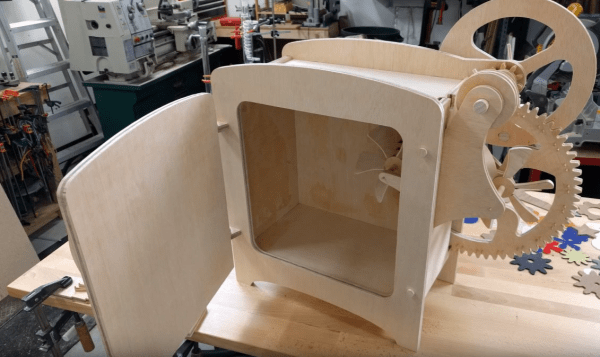
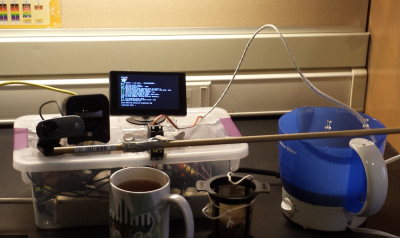
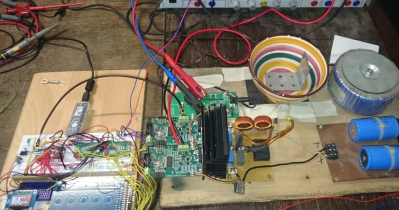
To test this phenomenon out, [Ben] first built a wheel with rubber bands as spokes. Placing the wheel in front of a heater caused it to slowly rotate. [Ben] then reversed the process by building a refrigerator. He modeled his parts in solidworks, then cut parts with his Shaper handheld CNC. The fridge itself consists of an offset wheel of rubber bands. The bands are stretched outside the fridge, and released inside. Two fans help transfer the thermal energy from the bands to the air. The whole thing is hand cranked, so this would make a perfect museum or educational demonstration. Cranking the fridge for 5 minutes did get the air inside a couple of degrees cooler. Rubber is never going to displace standard refrigerants, but this is a great demo of the principles of entropic force.
For more thermodynamic fun, check out [Al Williams] recent article about building a DIY heat pipe.
 [Rudeism] didn’t let that stop him.
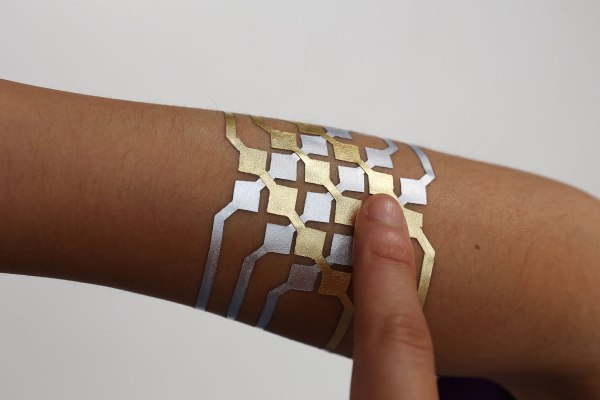
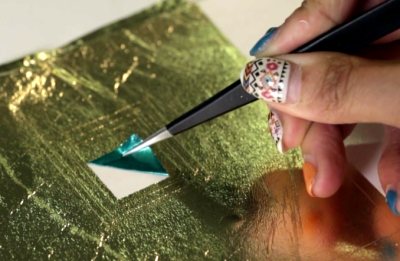 Generally speaking, gold leaf is incredibly fragile. In this process to yield the cleanest looking leaf the gold is not actually cut. Instead, the temporary tattoo film and backer are cut on a standard desktop vinyl cutter. The gold leaf is then applied to the entire film surface. The cut film/leaf can then be “weeded” — removing the unwanted portions of film which were isolated from the rest by the cutting process — to complete the temporary tattoo. The team tested this method and found that traces 4.5 mm or more thick were resilient enough to last the entire day on your skin.