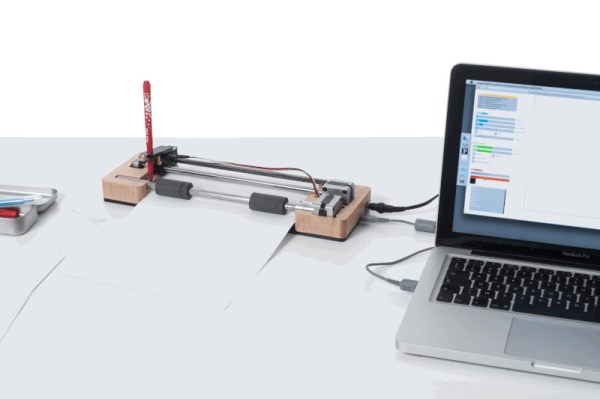
Like many of us, [Benjamin Poilve] was fascinated when he took apart a broken printer. He kept the parts, but unlike most of us, he did something with them, building a neat little plotter called the Liplo. Most pen plotters work by moving the pen on two axes, but [Benjamin] took a different approach, using the friction drive bars from the printer to move the paper on one axis, and a servo to move the pen on the other. He’s refined the design from its initial rough state to create a very refined final product that uses a combination of salvaged, 3D-printed, and CNC-milled parts.
Author: Richard Baguley244 Articles
3D Printed Microscope Stage Offers Precise Movement
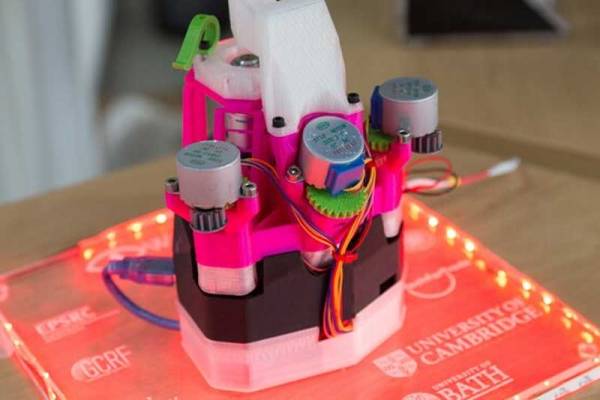
3D printing isn’t something you would usually associate with a high precision device, but this one shows that it can be used to create rather intricate things when needed. The Openflexure is a microscope stage that offers a mechanical stage that can be maneuvered precisely. The optics can be swapped out so it uses anything from a webcam to a very high-powered 100x magnification lens, but still move the stage smoothly and precisely. It can be driven by turning a knob or by three small motors. The plan is that the motors will eventually be driven by the software that is being written for the device.
Continue reading “3D Printed Microscope Stage Offers Precise Movement”
Running OpenCL On A Raspberry Pi GPU
This is an interesting development for media users and machine learning hackers: [doe300] has implemented OpenCL on the Raspberry Pi 3 Model B+called VCFCL That’s big news because the Pi 3+ has a Graphics Processing Unit (GPU) built into the processor that has been generally underutilized. The VideoCore IV GPU is built into the Broadcom BCM2837B0 and is surprisingly capable for a low-power chip. Although this GPU is well documented, it hasn’t been used that widely because you have to code specifically for this class of GPU. Adding in support for a high-level framework like OpenCL will make it much easier to run and adapt existing packages.
Building And Controlling 19 LEDs & Five Buttons From Five Outputs
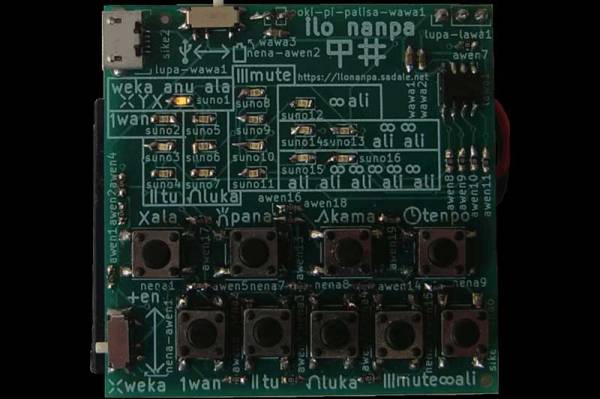
Numbers are hard enough in English, but [Sadale] decided to take things a step further by building a calculator that works in Toki Pona. The result is Ilo Nanpa, an awesome hardware calculator that works in this synthetic minimal language. This is a bit harder than you might think, because Toki Pona doesn’t have digits in the same way that Neo-Latin languages like English do. Instead, you combine smaller numbers to make bigger ones. One is Wan, Two is Tu, but three is Wan Tu (1+2). As you might expect, this makes dealing and representing larger numbers somewhat complicated.
Ilo Nanpa gets around this in a wonderfully elegant way, and with some impressive behind the scenes work. The calculator has 16 LEDs, nine buttons and a slider switch, but they are all controlled and read through just five IO pins on the STM8S001J3 controller that runs the device.
That’s because {Sadale] did some remarkable work with multiplexing and charlieplexing. Multiplexing is controlling more outputs than there are control inputs by using rows and columns: it is how the LED display you are probably reading this on can be controlled by just a few wires. By switching through these rows and columns at a higher speed than the eye can see, you create the illusion of a single, continuous display.
Charlieplexing takes this a step further by using multiple voltages on a single connection to further split the signal. With the clever use of voltage dividers the directional properties of LEDs and multiple voltage levels, the Ilo Nanpa runs all of the LEDs and senses all of the buttons and the slider from just five pins. That’s a remarkably neat piece of design, and it is worth spending some time looking over the excellent explanation of the process that [Sadale] wrote to see how it is done, and poring over the code for the device to see how he programmed this all into a single low powered chip. And, while you are reading, you might pick up a few words of Toki Pona. Tawa Pona!
Continue reading “Building And Controlling 19 LEDs & Five Buttons From Five Outputs”
Electrifying A Honda NC50 Express
[Quasse] bought a 1978 Honda NC50 Express moped with the intention of fixing it up and riding it, only to find that the engine was beyond repair. So, they did what any self-respecting hacker would do: tear out the motor and replace it with an electric one. It’s still a work in progress, but they have got it up and running by replacing the engine with a Turnigy SK3 6374 motor, a 192KV motor that [Quasse] calculated should be able to drive the moped at just over 30 miles per hour. Given that this was the top speed that the NC50 could manage on gas power, that’s plenty fast.
Make Your Cactus Bionic With Bionic Cactus
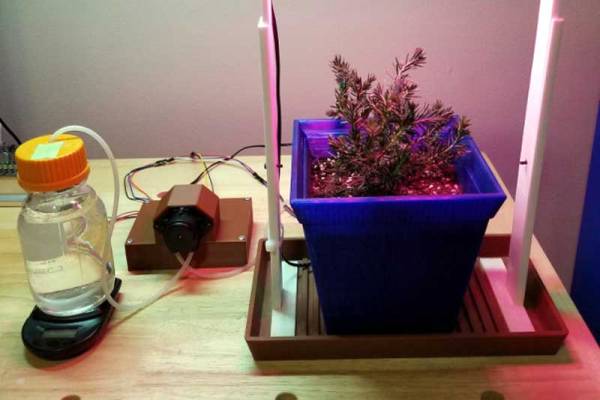
The closest some of us at Hackaday get to a green thumb comes when we are painting, so for us and other folks not gifted in the gardening department Bionic Cactus might help. It’s a neatly designed water and light control system, built around an ESP8266. You can control the system through a web interface, setting a schedule for water and light and seeing how much water is left in the reservoir. There is also a soil moisture sensor and it will even email you when it is running low on water. As creator [SamsonKing] notes, if you combine this with a 3D-printed plant pot and light holder, and you’ve got a complete system from growing herbs and spices in the middle of winter.
[SamsonKing] created the system using PlatformIO, a neat open source Internet of Things development platform that means you could probably switch the system over to run on other low-power platforms if you had them lying around. But with an ESP8266 typically costing no more than a few bucks, it’s a neat and low-cost way to keep your plants fed and watered.
Automated gardening has featured many times here at Hackaday, just one of many is this indoor hydroponic lettuce factory.
Visual Airplane Tracker Runs On Pi
As no doubt is the case with many readers, there is a Raspberry Pi running in the yard near where this is being written that tracks airplanes, listening into the ADS-B radio broadcasts that they send and uploading the data to a sharing service. This device lacks the blinky LEDs that hacking custom states it should have, though. This project from [xy72y5e] would be a great way to deal with that problem: they used a Unicorn hat to create a simple map of local airplanes. This shows the location and track of aircraft in the area on the 8 by 8 RGB LED matrix of the Unicorn Hat.
While the device here maps local planes from their radio fixes, the code that [xy72y5e] published works with the api of ADSBExchange, a site that shares flight data. This means that the map can be easily set to show air traffic at a different location to the device itself. And it wouldn’t be that difficult to alter this to show the locally detected planes, as [xy72y5e] has published the full Python code that creates the map. This would also go well with some of the other airplane tracking hacks that we’ve seen recently, such as the planespotter destination tracker or tracking airplanes by radar reflections…
[Via Reddit]

