DIY Bell For Your Trains Of Lionel

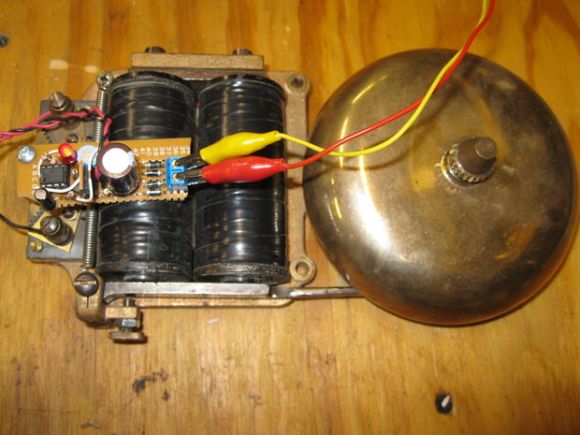
[Peter]’s dad recently rekindled his love for Lionel trains and wanted a bell to keep the crossings safe for O gauge drivers and pedestrians. Using parts he had lying around and a doorbell from the hardware store, [Peter] concocted this DIY train crossing bell at his dad’s request.

The idea was to make the bell chime about once per second. To achieve this, [Peter] used a non-repeating electro-mechanical doorbell that emits a single note on continuous press. You could also roll your own bell with a spring-loaded solenoid and something bell-like for it to strike.

[Peter]’s three-stage design uses a full-wave bridge rectifier to convert the AC from the train transformer to DC. He drops it to 5V and sends it through a 555 and some resistors to set the frequency and duty cycle. His output section translates the voltage back up to match the input desired by the doorbell.  [Peter] included a 1N4002 as a back EMF snubber to keep feedback from damaging the power MOSFET. Stick around for his demonstration video after the jump.

Continue reading “DIY Bell For Your Trains Of Lionel”

Retrotechtacular: Lighting The Way For Talkie Pictures With Optical Sound Recording

This week’s Retrotechtacular is a 1943 Encyclopædia Britannica film focusing on optical sound reproduction for motion pictures. Both the sound and the images are recorded on film, which is only affected by light. Therefore, the sound waves must be converted to changes in light.
This is done the way you might expect: the sound waves hit a microphone and the changes in current are amplified and used to control the intensity of light falling on the film. Three types of soundtracks are described and wonderfully demonstrated at the end of the film.

All three types are made from a series of thin bars of light, and the corresponding current value is represented by changes in either their length or their width. In the Unilateral Variable Area recording, the bars extend from the right side of the sound track. Bilateral Variable Area recorded bars emanate uniformly toward the edges from the center. In Variable Density recording, all of the bars extend from the left to right extremes, but their thickness varies.

Variable Density recording is done with a light valve, which contains a pair of delicate metallic ribbons in a magnetic field that move like shutters when the sound current flows through them. The light coming through to the film is varied by the slot created in the space between the ribbons. The light patterns are changed back to sound through a photoelectric cell, which converts the variations in light back to changing current. These changes are amplified and run through a loudspeaker. Be sure to watch to the end to catch a demonstration of the recording methods, set to what we’re pretty sure is Camille Saint-Saëns’ Danse Macabre.

Continue reading “Retrotechtacular: Lighting The Way For Talkie Pictures With Optical Sound Recording”

This Desktop Air Conditioner Is Really Cool!

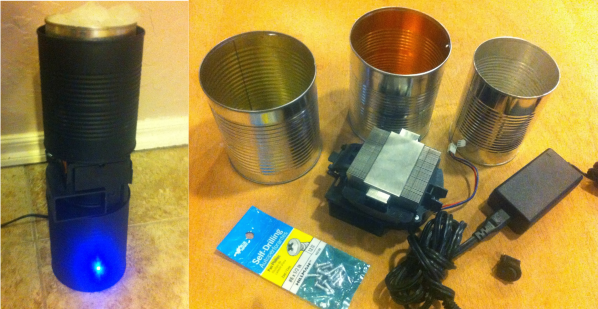
[Mike] works in a 50+ year old building with unreliable air conditioning. It often reaches 80°F inside during the summer, and he once measured it at 98°F. Rather than burn sick days, he became the envy of the office when he built this awesome desktop air conditioner.

The problem with knocking holes in the office walls and installing window units is that they must vent heat somewhere. [Mike] has overcome adversity and harnessed the power of the heatsink, only in reverse. His desktop a/c unit is made from two 28oz cans plus a 20oz can for the ice bucket. [Mike] used a side-vented CPU fan, which is vital to his design. He secured the heatsink to the base of one 28oz can with a self-tapping screw. This can is the upper chamber. [Mike] made a base from the other 28oz can, drilling holes for the CPU fan wires, the power cord, and a sweet light-up rocker switch. He used Gorilla Glue to affix the CPU fan to the base can.

Hot, stale office air is drawn through the ice in the 20oz can, which is nestled in aluminum foil to maximize heat transfer to the heatsink. The heat in the air gets absorbed by the heatsink, and the CPU fan kicks out cool air in 20-30 seconds.

Microcontroller Speech Synthesis Lets Your Project Be Heard

[Aditya] had a project that called for spoken output. He admits that he could have built a PC-based solution, but he found that adding speech by using a microcontroller was not only a cheap and portable alternative, it was also a fun and easy build.
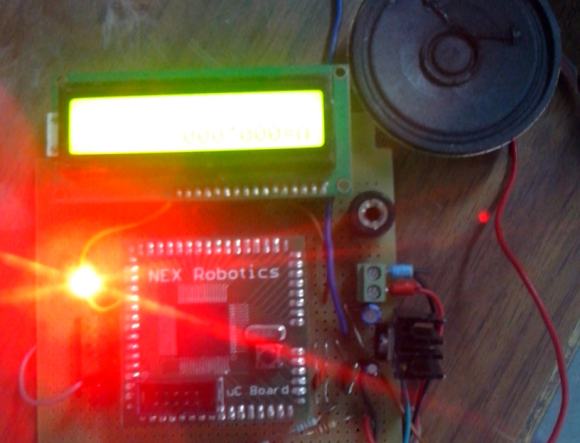
His design uses an ATMega128. Many microcontrollers would work, but his major requirements were PWM generation and plenty of memory to store the file(s). The output is cleaned up in a simple low pass filter before going to the 8Ω speaker.

[Aditya] lays his tracks in WAV format and then compresses it to 8-bit/8kHz. He found a C++ function that converts the track data into a huge arrays and then digitizes it. He uses two timers, one to generate the waveform and second one to time the square wave. [Aditya] has a zip of samples available on his site that will speak the digits 0-9.

Pocket Dart/Spitball Gun For Wet/Dry Combat

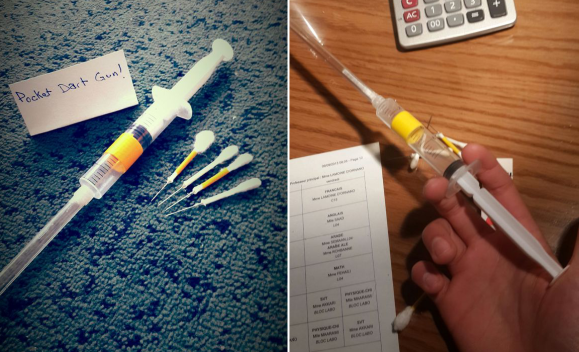
What can you do with needles, disposable syringes, superglue, cotton swabs, and scissors? If you answered ‘get hassled by TSA agents’, you’d be right, but you could also do what [Mski] did and make a pocket dart gun!

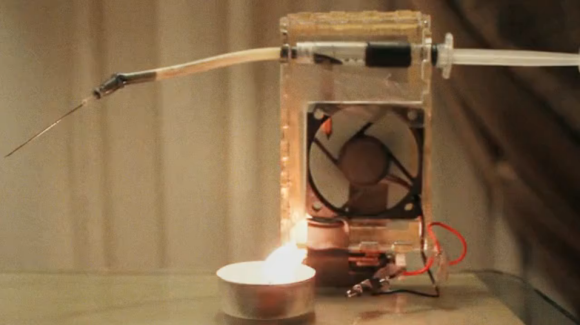
[Mski] used a 10mL syringe and a clear BiC pen body. He glued the pen barrel to the needle adapter on the syringe to make the chamber. He made the darts by cutting cotton swabs in half and inserting glue-covered needles. If you’ve never cut a cotton swab in half, they are hollow inside. What he has there are actually straight pins, which are cheaper than needles and come in larger quantities. The good news is you can make a bandolier of darts without breaking the bank.

Load your gun by shoving spitballs and/or darts up the chamber with a thin wooden stick, like a bamboo skewer. If you use your wife’s knitting needle, we recommend putting it back where you found it.

Do you prefer flaming projectiles and find clothespins easier to come by? Are you a hemophiliac or needle-phobic? Make this mini matchstick gun instead.

Can’t Stand Your Noisy Fan? Here’s A Plan, Man

[Brian] adores his GW Instek GPC-1850D power supply, but it’s annoyingly loud and disruptive to his audio projects. The thing works great, so he decided to regulate the fan’s speed based on usage level to save his sanity.

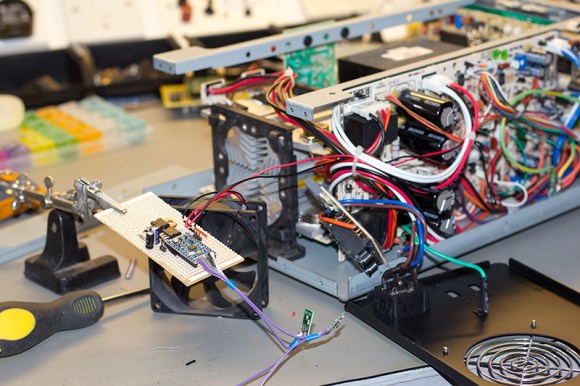
Once [Brian] got under the hood, he found that it actually has four separate heatsinks: one for the bridge rectifiers and one for each power transistor on the three output channels. The heatsinks are electrically and thermally isolated from each other and change temperature based on the channel being used.

[Brian] and his associates had several Microchip MCP9803 temperature sensors kicking around the lab from previous projects, so they put one on each heatsink. The great thing about these is their address selection pins which let all four of them sit together on the I²C bus to Arduinoville. Each sensor is insulated and clamped to its heatsink with a piece of meccano and a dab of thermal paste.

[Brian] used an Arduino Mini and built the circuit on stripboard. The fan runs at 24V, so he’s sharing that with the Arduino through a 7805. He controls the speed of the fan with PWM from the Arduino fed through a MOSFET. The Arduino reads from each sensor and determines which one is hottest. [Brian] wanted the fan to run at all times, so he set a base speed of 20%. When the heatsinks reach 30°C/86°F, the fan speed is increased to 40%. After that, the speed increases at 5°C/9°F intervals until it reaches max speed at 65°C/149°F.

You can grab the code and schematic from [Brian]’s repo. If you want to study your heatsinks, build this heatsink tester first.

Retrotechtacular: Hacking Mother Nature’s North Temperate Regions

…because they’ll tickle your insides! Seriously, don’t eat them if you happen to parachute alone into wilderness and must survive without firearms or equipment like our protagonist here. This 1955 US Navy-produced gem of a training film will show you how to recognize, procure, and prepare many kinds of nutritious plant, insect, and animal life commonly found between 45° and 70° north latitude.

While you hone your large game hunting skills, you can tide yourself over with all kinds of things that will just sit there ready to be plucked for your nourishment: many berries and fruits, nuts, moss, lichens, and the inner bark of several kinds of trees is edible. Sate your taste for savory with grubs, termites, or grasshoppers. When in doubt, eat what the birds and small animals are eating, but stay away from mushrooms. It’s too hard to distinguish the poisonous varieties.

Many edible things are found in and around bodies of water. Game such as deer, ducks, and birds are attracted to water and make their homes near it. Various kinds of traps made from twigs and vegetation will outwit rabbits and squirrels. You can fashion a bow and arrow in order to kill large quadrupeds like deer, elk, and ram. It’s best to aim for the head, neck, or just behind the shoulders as these are the most vulnerable areas.

Once you have killed a large animal, prepare it for cooking by draining its blood and removing its entrails. There are many ways to cook your spoils of survival, and most of them involve cutting the meat into small pieces first. Hopefully, you have some basic tools for starting fires.

Continue reading “Retrotechtacular: Hacking Mother Nature’s North Temperate Regions”