Meltinator 9000 Fuses Glass By Degrees

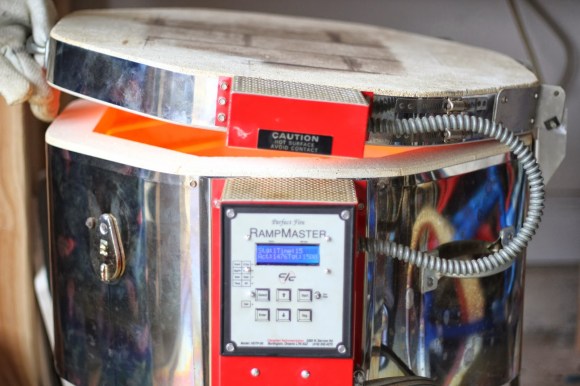
kiln[Richard]’s wife scored an Evenheat glass-fusing kiln, but the 20-year-old temperature controller was broken. He could have simply ordered a replacement controller, but that kind of problem solving doesn’t get you on Hack a Day. His wife wanted more control over the kiln and he convinced her that building their own was the way to go. Thus, the Meltinator 9000 was born.

[Richard]’s design uses an Arduino Uno and an Adafruit display shield, protoshield, and thermocouple reader board. He built a simple relay driver with a resistor, BJT, and a diode and connected it to pin 13 and its built-in indicator. To [Richard]’s delight, all of this fit in the original enclosure.

[Richard]’s software provides 25 fusing schedules with ten steps apiece. Each step has a target temperature,  rate of temperature change, and a hold time which can be increased on the fly. He ran a test program that heated the kiln to 1500°F at a rate of 2550°F/hour. He then cooled it to 500°F at a rate of 1000°F/hour, which took longer than he thought. The good news is that the kiln is well-insulated!  [Richard] has the software available on his GitHub.

Don’t have a glass kiln? Prefer to control beer-related temperatures? You could always hack your stove in the name of homebrewing.

QFN Breakout Is Easy On The Eyes, Wallet

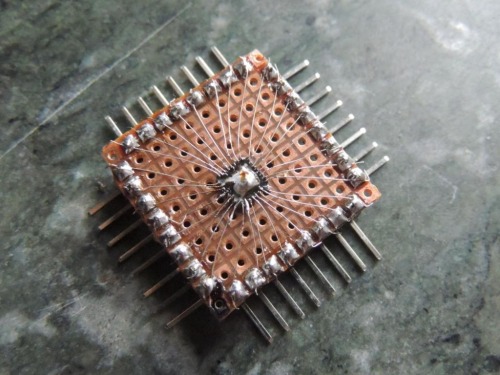
What do you do when you have ATMega328s in QFN package burning a hole in your bug box, but you aren’t set up for SMD and have limited access to parts? You man up and do what [Djpanjan] did: make your own breakout board with solder, right angle header, and many tiny, beautiful wires.
[Djpanjan] says the process is a simple one that requires great concentration. Once he had it broken out, he covered the wires with hot glue to make sure they all stay in place. He programmed it using an Arduino as an ISP and he was able to run the blink sketch without issue. He blinked all the output pins to make sure there were no shorts.

[Djpanjan] says that if he can’t get a breakout for his LQFP-144, he’s going to make his own again. Good luck, [Djpanjan]. We’re all counting on you.

If you’re set up for SMD and etching, there’s always the surface mount breakout route. If not, you can always use magnet wire and protoboard.

Scrappy Lil’ Circular Saw

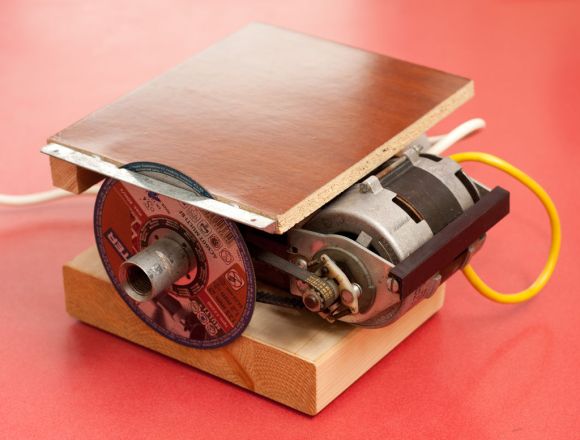
Like a lot of us, [Andrea] has a habit  of disassembling everything he runs into. He recently came across a fairly substantial motor he’d salvaged and envisioned its new life as a small circular saw.
[Andrea] bought new cutting discs, but the rest is salvage and scrap. He had already mounted the motor, pivot, belt, and gear to a wood block, so he added two more wood scraps for a base and a cutting surface. He screwed a metal L beam to one side of the surface block to keep the disc adjacent to the edge. A couple of washers keep the disc rotating freely. [Andrea] used a piece of hydraulic pipe and a cylindrical nut to attach the disc to the pivot. This assembly can be easily tightened by hand, so changing discs is a quick operation.

He kept the electrical as-is and mounted the box to the saw body. This 30W motor runs at ~600-1000RPM which isn’t fast enough to cut wood. Undeterred, [Andrea] plans to use it to cut steel bolts, copper circuit boards, and metal plates. If you need to cut through anything and everything, try this 700W DIY table saw.

Dad-Built Rocket Control Module

Like a lot of parents, [justbennett]’s kids like to play rocket and spaceship command. His kids’ imagination-assigned controls kept shifting from this LEGO to that banana to the dog’s tail, so [justbennett] did what he had to do: make this Dad-built rocket control module for them.
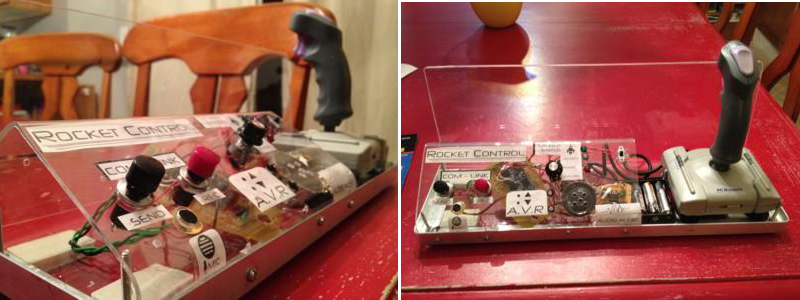
The module supports all of the vital sub-modules required for rocket and spaceship administration. There is a launch status indicator, an acceleration vector resonator (AVR), and a com-link. He used mostly parts on hand, and the Arduino count is zero. He built a NASA-grade Plexiglas enclosure to avoid juice box incidents. The two pieces are connected with aluminum angle bar so that he can make repairs or modifications.

The analogue joystick was a thrift store find. [Justbennett] wired the trigger and thumb buttons up as the AVR which activate a recycled PICAXE 08M project of his. The PICAXE senses the button pushes to flash an LED and play an ascending or descending tone. Long-pressing one button will result in an explosion noise as you might expect.

The launch status indicator is a potentiometer wired to a second PICAXE and three LEDs that light up in sequence. In the future, [justbennett] intends to add haptic feedback with a tiny vibration motor. The com-link packet messaging system is a Radio Shack recording module and two big, tempting buttons. The control module ships with a message from Star Command that explains the controls.

Hack All The Things In The Time You Save With This LED Pomodoro Timer

Do you want to use your time more productively but are tomato-averse? [Robin]’s LED Pomodoro timer could be the perfect hack for you.
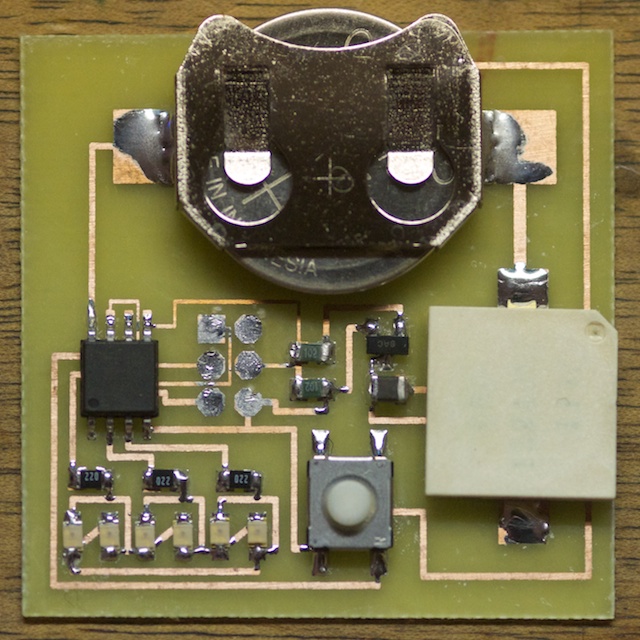
The Pomodoro Technique is a time management solution developed in the late 1980s. The basic idea is to spend a very focused 25 minutes performing some activity such as working or studying and then take a 5-minute break. Many of its proponents use a tomato-shaped kitchen timer to alert them to switch between the two states, but [Robin] wanted to make his own and learn along the way.

First, he wanted to use an ATtiny85 and learn about its features. Specifically, he used its timers, PWM, and low-power sleep mode. [Robin] used Charlieplexing to drive a total of six LEDs. When the timer starts, five yellow LEDs are driven high to indicate each 5-minute slice of work time. A red LED is lit during the 5-minute break.

[Robin] also explored compact PCB design and fabrication. All components are SMD and his board is 4cm square. [Robin] is using this SMD buzzer for discrete feedback. He included a footprint for a six-pin ISP header and programmed it with pogo pins. The timer is completely interrupt-driven: one click of the tactile button starts the work counter, and the buzzer sounds when time is up. A second click starts the break counter.

[Robin] has made everything available in his GitHub repo and encourages you to use it. Time’s a-wastin’!

Behold Lil’ Screwy, A Homebrew 100-Ton Press

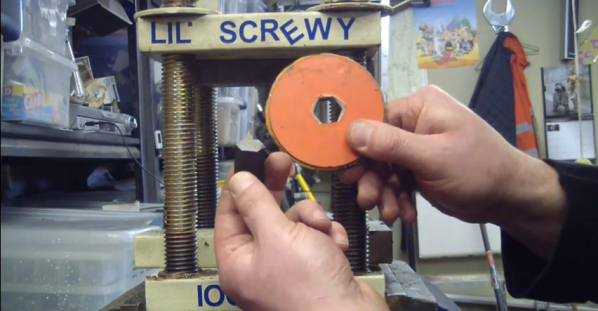
Here we have a magnificent example of the power of the inclined plane. [Chris] has built Lil’ Screwy, a 100-ton home-built press for about $35 plus scrap on hand. He demonstrates its frightening power by punching a 17-mm hole through 8mm-thick steel using an Allen key.

As [Chris] explains in his hilarious video waiting for you after the jump, the force comes from using really big screws. Lil’ Screwy uses four 1-inch L7-rated ready rods with eight threads to the inch. The bolts run between two 1″ steel plates to form the press. In the top plate, he drilled 1″ holes. The bottom holes are drilled out 7/8″ and tapped so the two plates clamp together with awesome crushing power when you twist the giant coupling nuts.

[Chris] milled a pocket in the underside of the top plate for a big neodymium magnet that will keep, for instance, a 17-mm Allen key in place while you punch a piece of steel with it. He has a ring of smaller ones embedded into the bottom plate to hold supports in place for broaching.

As a special bonus, [Chris] shows you how to stick it to the man when it comes to using that last bit of Never-Seez in the can, and also how to make your decals temporarily repositionable.

Continue reading “Behold Lil’ Screwy, A Homebrew 100-Ton Press”

Thumbs-Down Songs On Pandora With Your Mind

[Steven] likes music. Like many of us, he uses Pandora to enjoy the familiar and to discover new music. Now, Pandora means well, but she gets it wrong sometimes. [Steven] has had a Mindwave Mobile EEG headset lying around for a while and decided to put it to good use. With the aid of a Raspberry Pi and a bluetooth module, he built a brainwave-controlled Pandora track advancing system.

The idea is to recognize that you dislike a song based on your brainwaves. The Mindwave gives data for many different brainwaves as well as approximating your attention and meditation levels. Since [Steven] isn’t well-versed in brainwavery, he used Bayesian estimation to generate two multivariate Gaussian models. One represents good music, and the other represents bad music. The resulting algorithm is about 70% accurate, so [Steven]’s Python script waits for four “bad music” estimations in a row before advancing the track.

[Steven] streams Pandora through pianobar and has a modified version of the control-pianobar script in his GitHub repo His script will also alert you if the headset isn’t getting good skin contact, a variable that the Mindwave reports on a scale of 0 to 200.

Stick around for a demo of [Steven] controlling Pandora with his mind. If you don’t have an EEG headset, you can still control Pandora with a Pi, pianobar, and some nice clicky buttons.

Continue reading “Thumbs-Down Songs On Pandora With Your Mind”