Billboard Advertises Engineering School, Manufactures Potable Water

It’s a remarkable thing when ad agencies manage to help people in the course of advertising. The University of Technology and Engineering Peru (UTEC) was looking for ways to increase enrollment. They went to the Peruvian offices of agency DraftFCB and came away with the idea to install a billboard that converts Lima’s water-saturated coastal desert air into potable water.
Perhaps the only downside is that it requires electricity, and not just for those cool neon water drops. There are five generators that capture the humidity and use reverse osmosis to purify the water. Each of these units has a tank that holds 20L. From there, the clean water is aggregated in a main tank and can be collected from a faucet at the base of the billboard. In just three months, the billboard produced over 9,000L (2500 gallons) of potable water for people who would otherwise draw polluted water from wells.

We love to see hacks that help. Use your powers for good, like re-purposing humid air and pollution. Make the jump to see a short video and an artist’s conception of the billboard’s innards.

Continue reading “Billboard Advertises Engineering School, Manufactures Potable Water”

Tiny Improvised Grinder/Saw Packs A Punch

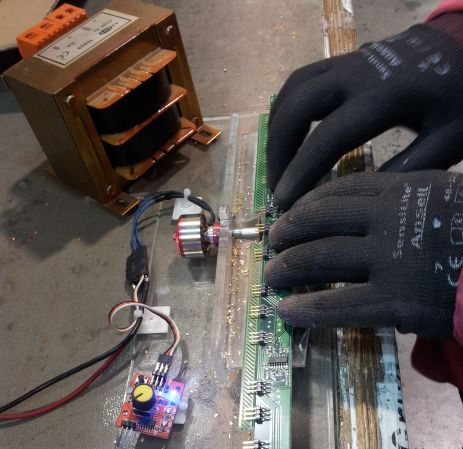
They say necessity is the mother of invention. Sometimes the necessity is simply avoidance of unpleasant tasks such as cutting down 3500 header pins by hand. [Nixieguy] and his coworkers were faced with 50 prototype boards bearing 70 overly long pins apiece. He saved them from cutting them all down by hand by making a tiny improvised circular saw/grinder.
[Nixieguy] started by laser-cutting a combination tool holder and grinding platform. His laser failed before he could fashion a guard to keep the pin bits out of the motor or cut all the pieces he had in mind. The grinder is made from a 10A brushless RC motor, a motor driver, and a servo tester. [Nixieguy] machined an adapter to connect the disc to the shaft.

The transformer is there to hold the thing down during use since it’s so lightweight. He’s wearing two pairs of gloves because the pin cuttings were hot enough to sear skin. [Nixieguy] is planning on a complete redesign including a motor guard and the ability to adjust the depth. Maybe he can turn it into a chainsaw, maybe not.

Retrotechtacular: Shedding Light On Holograms

This week’s Retrotechtacular is a 1972 introduction to holography produced by the fine folks at Encyclopædia Britannica. It details quite admirably what holograms are and how they’re made.

Holograms are quite different from photographs, though both are recorded on film. Holography is based on the additive effects of waves: two crests of equal amplitude create a larger crest, while a crest and a trough of equal amplitude cancel each other out, causing an interference effect. The video demonstrates the concept nicely with water ripples and explains that the same effect happens with sound waves and light waves.

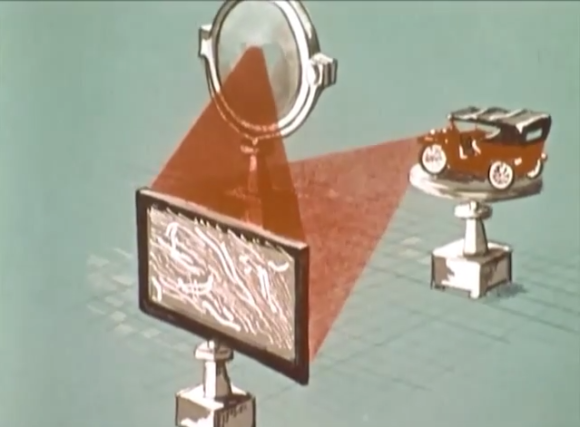
Lasers are the key to the intense and spectrally pure light required for holography. Incandescent light consists of too many wavelengths to be effectively split into two identical light wave sources. To create a hologram, a laser is split with an optical device into two beams. One beam is focused directly on the object being recorded and is called the object beam. The second beam is directed away from the scene through a series of mirrors and shone directly onto a film emulsion.

The film records the interference between the waves of the two beams. It appears to be blank after development, but upon close inspection reveals stripes of light and dark. When the exposed film is placed in the path of only the reference beam, the interference patterns recorded on the film split the beam back into two, recreating the scene. With the aid of a screen for projection, the hologram can be seen showing the original object in 2D. Another big difference between photographs and holograms is that even a small portion of a hologram can reproduce the entire scene, but a piece of a photograph is just that.

Continue reading “Retrotechtacular: Shedding Light On Holograms”

Smart Kegerator Bills Based On Beer Consumption

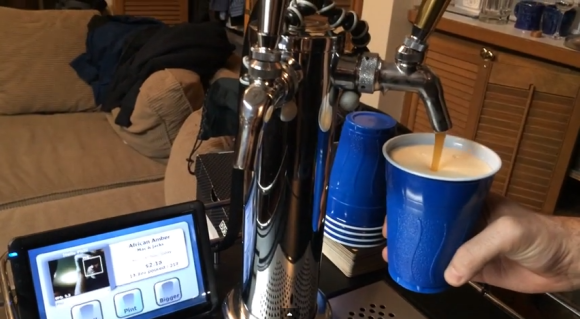
Kegerator ownership is awesome, but it has its downsides. It’s hard to keep track of who drank what without cans or bottles to count. [Phil] was looking for a good solution to this problem when it came to sharing beer with his roommates and friends and has just completed the first iteration of his smart kegerator.
He has devised a system based on a Raspberry Pi.  His software recognizes the face of the person pulling a beer and adds a charge to their tab based on the price of the keg and the volume of the pour. The system also keeps track of current and historic temperature and humidity values inside the kegerator, and everything is displayed on a Mimo 720S touch screen.

[Phil] has a flow meter on each keg to detect and monitor pouring. This triggers the Pi camera module to run the facial recognition. The walk-through found after the jump might be a bit confusing; at the time it was recorded, the unit was only capable of facial detection. [Phil] wrote the UI in QT and C++ and used Python scripts for the flow interrupts. His plans for future iterations include weight sensors underneath the kegs, liquid probe thermometers for more accurate beer temperature readings, a NoIR Pi camera module for low light conditions, and a really snazzy UI that you’ll see on his build page.

If you don’t have a Pi, here’s an Arduino-fied kegerator that reports temperature and controls beer cooling.

Continue reading “Smart Kegerator Bills Based On Beer Consumption”

Fetching Etchings For Stainless Steel

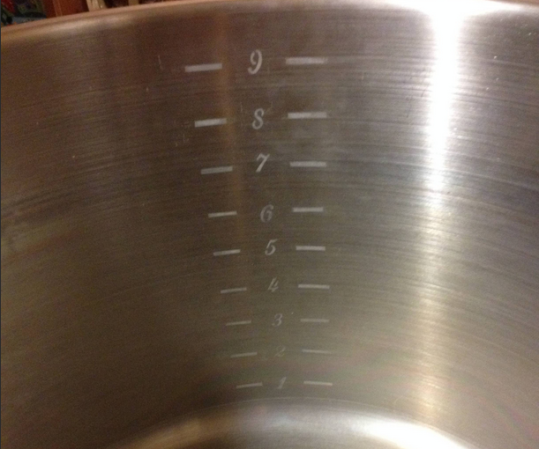
What do you do when you have a 10-gallon brew kettle (or any other stainless steel or aluminium thing) with no volume markings (or Hack a Day logos)? If you’re [Itsgus], you use science to etch some markings with a few household items and a 9V and you call it a day.
[Itsgus] used 1/4c vinegar and 1/4tsp of salt to form an electro-etchant and applied it with a Q-tip connected to the negative terminal of a 9V. He used tape to connect a wire between the positive terminal and the kettle. The vinegar dissolves the salt, creating negatively charged ions. Connected correctly to a 9V, the process removes metal where the current flows. If you were to connect it in reverse,  you would add a small amount of metal.

The process only takes a few seconds. When the etchant starts to sizzle and bubble, Bob’s your uncle. Even though the stainless steel’s natural coat re-oxidizes over the etches, you should probably wash that thing before you brew. If you prefer adding metal to removing it, try electroplating copper on the cheap.

Face Tanner PCB UV Lamp Is So Bright, You Gotta Wear Shades

There may be nothing new under the sun when it comes to etching PCBs with UV light, but [Heliosoph] has brought finer control to a used face tanner he bought that now exposes his boards in ~50 seconds.

The original system allowed for exposure times from 1-99 minutes to be programmed in 1-minute increments. [Heliosoph] though it would be perfect as-is, but the lamp is so powerful that even one minute of exposure was too much. He hoped to find TTL when he opened the thing and was pleasantly surprised to discover a COP410L microcontroller and an MM5484 display driver. Unfortunately, the COP410L’s clock range is too small and he didn’t want to overclock it.

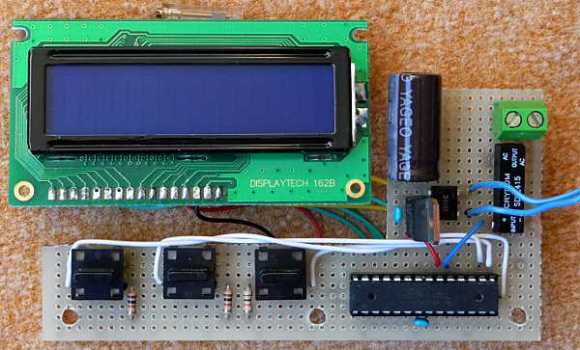
[Heliosoph] built a new board based on the ATMega328P with a salvaged 16×2 LCD, which he was able to easily integrate using the library that ships with the Arduino IDE. He then replaced the BT136 triac lamp switch with a solid state relay, conveniently isolating the electronics from mains power. He re-purposed the unit’s push buttons using the M2tklib, which supports a plethora of common menu functions.

If you need some help with the whole UV PCB etching process, you can’t go wrong with this tutorial from [CNLohr].

Here’s The Dirt On Printing With Pollution

[Anirudh] and his friends were sitting around reminiscing about India. In particular, they recalled riding around in auto-rickshaws in stifling heat, watching their skin turn black from the exhaust. They started thinking about all of the soot and pollution in crowded cities the world over and wondered whether the stuff could be re-purposed for something like printer ink. That’s how they came up with their soot/pollution printer.

They created a soot-catching pump which they demonstrate with a burning candle. The pump mixes the soot particles with rubbing alcohol and an oil substrate and sends the ink to an HP C6602 inkjet cartridge. They used [Nicolas C Lewis]’s print head driver shield for Arduino to interface with the cartridge, turning it into a 96dpi printing head that uses only five pins.

[Anirudh] and his friends plan to design a carbon separator using charged plates to capture the soot particles from pollution sources and filter out dust. Be sure to check out their demonstration video after the jump.

Update: In response to [Hirudinea]’s comment about mining the carbon from cars, [Anirudh] is now looking for collaborators (tinkerers, filmmakers, DIY enthusiasts) to move forward with the idea of re-purposing carbon. Email him at anirudhs@mit.edu.


Continue reading “Here’s The Dirt On Printing With Pollution”