Showing the tablet interface for the scope

Discovering A Wifi Enabled 10MHz Oscilloscope

[youtube=https://www.youtube.com/watch?v=qEqWtKGJhFQ&w=580]


As most of our readers know, [Mike] was visiting Bay Area Maker Faire  last weekend with a big Jolly Wrencher on his back. During his tour he encountered the neat oscilloscope shown in the video above, made by the Belgian company Velleman. Even though it only has a 10MS/s sampling rate and a 10MHz bandwidth, our guess is that it may still be useful for some hobbyists out there as it can communicate with any PC/smartphone/tablet using its Wifi interface.

Inside the black box is a 3.7V 1800mAh Li-ion battery with a USB port to recharge it or update the oscilloscope’s firmware. As seen in the video, the tablet’s touchscreens may enable more natural interaction with the user interface. The protocol used to export the acquired samples is open, which may allow users to create their own analysis program. The oscilloscope uses an 8 bit analog to digital converter and a 4K samples buffer.

iFind Tag

Ask Hackaday: Can Battery-Free Bluetooth Item Locating Tags Exist?

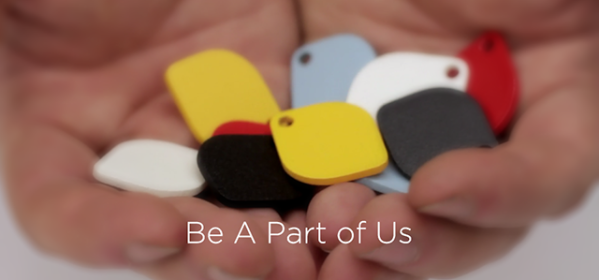
[Vishak] tipped us about the iFind Kickstarter campaign, a 1.25×1.06×0.09″ (32x27x2.4mm) tag meant to be attached to anything you may lose in your daily life. This device communicates with Bluetooth Low Energy (BLE) enabled smartphones, has a 200ft (60m) detection range and a loud alarm. What is interesting to mention is that this device doesn’t need any battery to operate as it

recycles electromagnetic energy and stores it in a unique power bank.

As you can guess, this particular claim intrigued the Hackaday team given that we never featured so small energy harvesting devices. The ‘closest’ thing that comes to our minds is the Allsee project, a simple gesture recognition device that uses existing wireless signals (TV and RFID transmissions) to extract any movement that occur in front of it. However the antenna was quite big and very little power was extracted.

A quick Google search let us know that Bluetooth Low Energy solutions usually consume an idle current of around 10uA @ ~3V. The (very) successful Sticknfind campaign which promoted the same battery-enabled product claimed a one year autonomy with a CR2016 battery and a 100ft range, leading to a ~90mAh/24/30.5/12 = 10.2uA idle current. As we’re not expert on the subject, we would like to ask our readers if they ever came across such energy harvesting performances (3V*10.2uA = 30uW) in a normal home environment. Our very bad maths indicate that if one would like to extract power from a typical Wifi router located 2 meters from you emitting 0.5Watts of power (in a perfect vacuum environment) with a 32*27mm = 864mm = 0.000864m² tag you’d only be able to get 0.5 * (0.000864/(4*pi*2*2)) = 8.6uW.

It is therefore too bad that we can’t see in the presentation video what is inside the iFind, nor more details about the patent pending technologies involved. We hope that our dear readers will enlighten us in the comments section below.

Hacking The D-Link DSP-W215 Smart Plug

DSP-W215

The D-Link DSP-W215 Smart Plug, a wireless home automation device for monitoring and controlling electrical outlets has just been hacked. Even though it isn’t readily available from Amazon or Best Buy yet, the firmware is already up on D-Link’s web site. The very well detailed write-up explains all the steps that led to this exploit creation.

First, the firmware was unpacked to examine the file system contents. It was found that the smart plug doesn’t have a normal web-based interface as users are expected to configure it using D-Link’s Android/iOS app. The apps however, appear to use the Home Network Administration Protocol (HNAP) to talk to the smart plug running a lighthttpd server. A look at the latter’s configuration file revealed the functions that could be called without any authentication. Another revealed that the firmware could accept an unlimited amount of POST request bytes which were copied in a fix length buffer without any performed checks. We’ll let our readers head to the original article to see where the author went from this point.

mirobot

Introducing Mirobot, A DIY WiFi Robot For Children

We’re quite sure that fathers parents people reading Hackaday wonder how to introduce their children acquaintances to the wonderful world of electronics. The Mirobot (Kickstarter link) might just be a good way to do so. As you may see in the picture above the Mirobot is a small WiFirobotics kit that children can build themselves to learn about technology, engineering and programming.

The laser cut chassis is assembled by snapping it together. All the electronics are left exposed to the outside so children may try to figure out which component does what. The robot is configured over your home WiFi via a Scratch-like visual programming tool. Everything (PCB, Arduino code, user interface) is open source.

The platform is based around the Arduino compatible ATMega328, two stepper motors, a Wifi module that can behave as a client or access point and 5 AA batteries. The campaign stretch goals include a collision detection sensor, line following functionality and finally a sound add-on.

Thanks [nickjohnson] for the tip.

OLED display, blue LED and Smartcard

Developed On Hackaday: License Incompatibilities And Project State

mooltipass top pcb

It has been a while since we wrote an article about our ongoing offline password keeper project, aka the Mooltipass. Our last post was asking our dear readers to vote for their favorite card art, so what have we been doing since then?

For the last few weeks we’ve mostly been improving our current PCBs and case design for the production process to go smoothly. The final top PCB shown above has been tweaked to improve his capacitive touch sensing capabilities, you may even see a video of the system in action in the Mooltipass project log on hackaday.io. We’ve also spent some time refining the two most popular card art designs so our manufacturers may print them correctly. We’ll soon integrate our updated USB code (allowing the Mooltipass to be detected as a composite HID keyboard / HID generic) into the main solution which will then allow us to work on the browser plugin.

It’s also interesting to note that we recently decided to stop using the GPL-licensed avrcryptolib. Our current project is CDDL licensed, allowing interested parties to use our code in their own project without forcing them to publish all the remaining code they created. The GPL license enforces the opposite, we therefore picked another AES encryption/decryption implementation. This migration was performed and checked by our dedicated contributor [Miguel] who therefore ran the AES NESSIE / CTR tests and checked their output, in less than a day.

We’re about to ship the first Mooltipass prototypes to our active contributors and advisers. A few weeks later we’ll send an official call for beta testers, just after we shown (here on Hackaday) what the final product looks like. Don’t hesitate to ask any question you may have in the comments section, you can also contact us on the dedicated Mooltipass Google group.

An Open Source Cortex-M0 Halogen Reflow Oven Controller With LCD

reflow oven controller

Homemade reflow ovens are a great inexpensive way to quickly solder multiple prototypes at once. [Andy] may just have built one of the best ones we’ve featured so far on Hackaday. For his project a £25 1300W 12litre halogen oven was chosen because of its low cost and fast heating time, the latter being required to follow typical reflow profile ramp-up stages.

To control the AC power [Andy] first bought a chinese Fotek Solid State Relay (SSR) on ebay, which was quickly replaced by an american one after reading concerning reports on the internet. He then made the same ‘mistake’ by buying the typical MAX6675 thermocouple-to-digital converter from the same website, as he spent much time understanding why the measurements were wrong when the IC was just defective. His final build is based around a 640×360 TFT LCD that he previously reverse engineered, the cortex-M0 STM32F051C8T7, a SPI flash, some power regulators and buttons. The firmware was written in C++ and we’ll let our readers visit [Andy]’s page to see how well  his oven performs.

Sending Open-Source Satellites To Space

An anonymous reader tipped us about two Argentinian satellites (satellite one, satellite two) that were sent in 2013 to space. What is interesting about them? They are both based on commercial off-the-shelf (COTS) components, and the team released the framework & flight computer software for their main platform (named cubesat, GitHub link). Gunter’s space page not only impresses us by showing the quantity of small/amateur satellites sent each month to space, but also lets us know that the hardware source files for CudeBug 1/2 are meant to be released. In the meantime we can only gather that they’re using a Texas Instruments TMS570 running FreeRTOS. Nevertheless, the two different web pages (in spanish and english) offer us a very interesting glimpse of what it takes to send an electronic project to space and how it later behaves.

You may also be interested in checking out ArduSat, a successful kickstarter campaign aimed at sending Arduino experiments in space.